Love this? Pin it for later! 📌
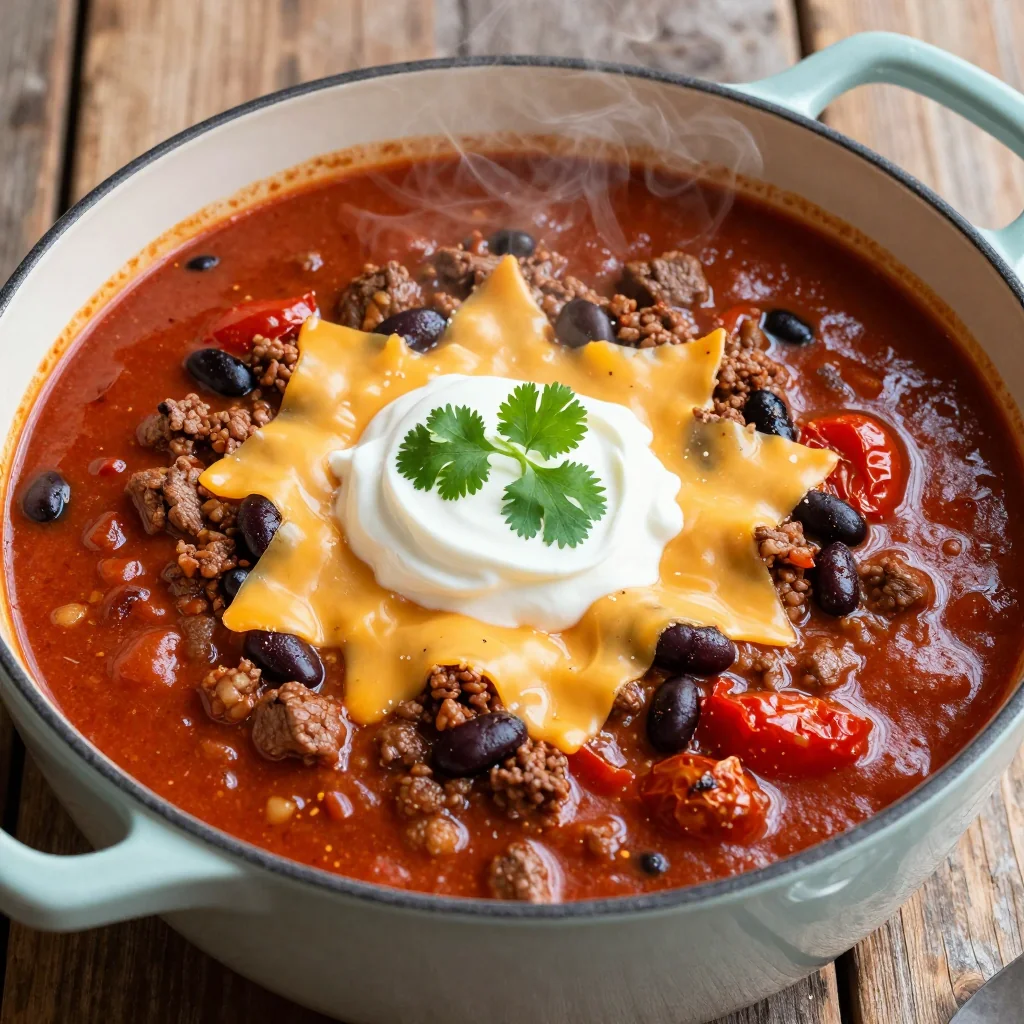
When the first snowflakes start to drift past my kitchen window and the thermometer stubbornly refuses to climb above freezing, there's only one thing on my mind: a steaming bowl of chili that warms you from the inside out. This Spicy Instant Pot Beef Chili has become my family's winter anthem—bold, robust, and packed with enough heat to make you forget about the polar vortex raging outside.
I've been perfecting this recipe for over five years now, tweaking and adjusting until it achieved that perfect balance of deep, complex flavors and tongue-tingling spice. The magic happens in the Instant Pot, where tough chuck roast transforms into melt-in-your-mouth tender morsels in a fraction of the time traditional stovetop methods require. What started as a desperate attempt to feed a crowd during a particularly nasty blizzard has evolved into our most-requested comfort food.
The beauty of this chili lies not just in its incredible flavor, but in its forgiving nature. Whether you're feeding picky eaters who prefer milder fare or spice enthusiasts who want to test their limits, this recipe adapts beautifully. Plus, it makes fantastic leftovers that somehow taste even better the next day when all those spices have had time to mingle and deepen.
Why This Recipe Works
- Pressure cooking magic: The Instant Pot breaks down tough beef chuck in 35 minutes, creating fork-tender chunks that would normally take hours on the stove.
- Layered spice profile: Using three types of chili powder, chipotle peppers, and fresh jalapeños creates a complex heat that builds rather than overwhelms.
- Smoky depth: Fire-roasted tomatoes and smoked paprika add an incredible smoky dimension that makes this chili taste like it simmered all day.
- Customizable heat: Easy to adjust spice levels from mild to five-alarm by controlling the amount of chipotle and jalapeño.
- One-pot wonder: Everything cooks in the Instant Pot, meaning minimal cleanup and maximum flavor development.
- Freezer-friendly: Makes a large batch that freezes beautifully for up to 3 months, perfect for meal prep.
Ingredients You'll Need
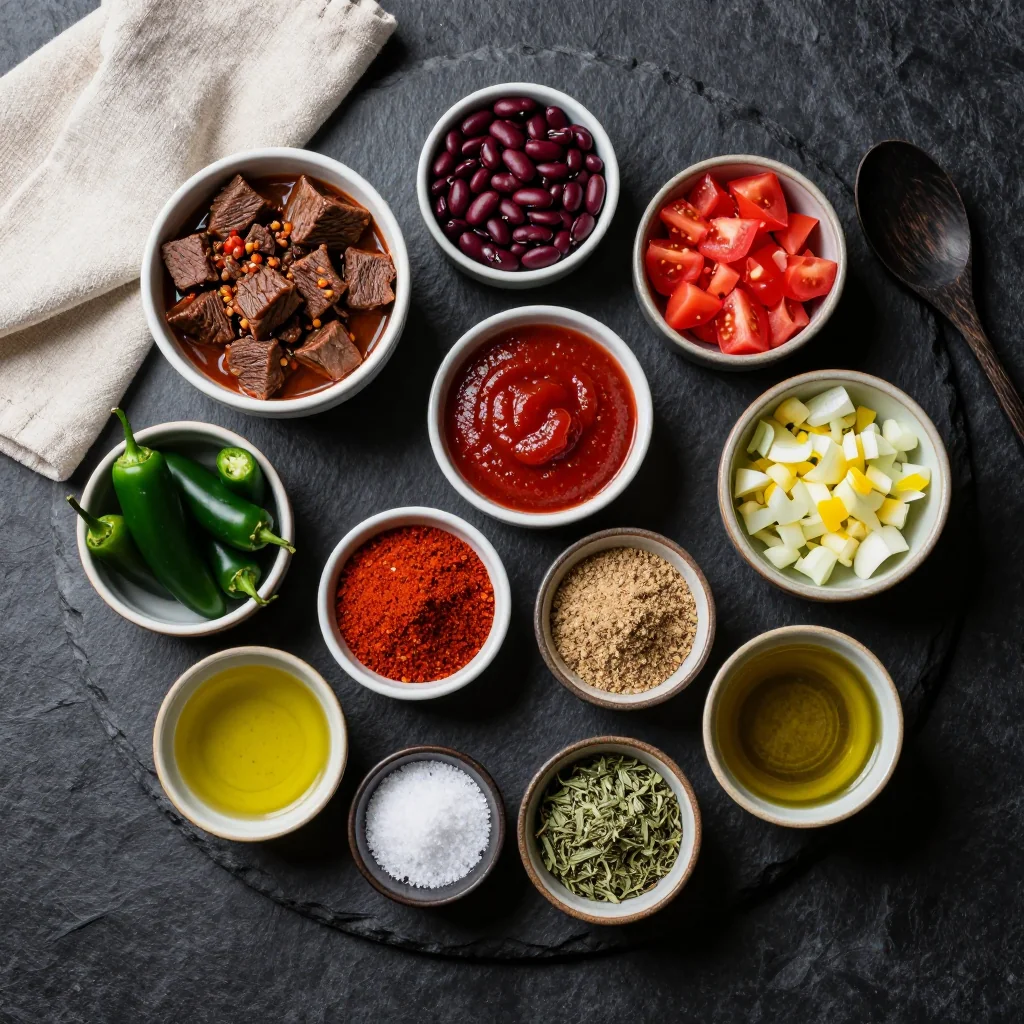
Great chili starts with great ingredients, and I've learned that splurging on a few key items makes all the difference between good and unforgettable. Let's break down what you'll need and why each ingredient matters.
Beef Chuck Roast (2.5 pounds): This well-marbled cut is my go-to for chili because it becomes incredibly tender under pressure while maintaining its beefy flavor. Look for a roast with good marbling throughout—those white streaks of fat will melt into the sauce, creating richness. If you can't find chuck, bottom round or brisket work too, but avoid lean cuts like sirloin that can become dry.
Three Chili Powders: I use a blend of ancho (mild and fruity), chipotle (smoky and hot), and regular chili powder for the base. Ancho chili powder adds a subtle sweetness and gorgeous deep red color, while chipotle powder brings that irresistible smoky heat. If you can only find one type, regular chili powder works, but the blend really elevates the flavor.
Chipotle Peppers in Adobo: These little powerhouses pack incredible flavor. One pepper minced fine gives a nice warmth, while two or three will bring serious heat. The adobo sauce they're packed in is liquid gold—smoky, slightly sweet, and complex. Don't you dare throw it away! I always add a spoonful to the chili and freeze the rest in ice cube trays for future use.
Fire-Roasted Tomatoes: Regular diced tomatoes work in a pinch, but fire-roasted tomatoes add an incredible depth of flavor that makes people ask "what's your secret?" They're charred before canning, giving them a subtle smokiness that complements the chipotle beautifully.
Beer: A dark Mexican beer like Negra Modelo adds maltiness and helps tenderize the meat, but any dark beer works. The alcohol cooks off, leaving behind rich, complex flavors. If you prefer not to use alcohol, substitute with strong coffee or additional beef broth.
How to Make Spicy Instant Pot Beef Chili for a Cold Night
Prepare the beef
Pat the chuck roast dry with paper towels—this is crucial for proper browning. Cut into 1-inch cubes, trimming away any large chunks of fat but leaving the smaller marbling intact. Season generously with 2 teaspoons salt, 1 teaspoon black pepper, and 1 tablespoon of the chili powder blend. Let sit at room temperature for 15 minutes while you prep the vegetables. This brief rest allows the seasoning to penetrate the meat.
Sauté the aromatics
Set your Instant Pot to "Sauté" on high. When the display reads "Hot," add 2 tablespoons of oil. Brown the beef in batches—about 6-8 pieces at a time—2 minutes per side. Don't crowd the pot or the beef will steam instead of brown. Those browned bits (fond) on the bottom are flavor gold. Transfer beef to a plate. Add onions and cook until softened and golden, about 5 minutes, scraping up the fond. Add garlic, jalapeños, and chipotle; cook 1 minute until fragrant.
Bloom the spices
Add the remaining chili powders, cumin, oregano, and smoked paprika to the pot. Stir constantly for 30-45 seconds until the spices are fragrant and have formed a paste with the oil. This crucial step "blooms" the spices, releasing their essential oils and intensifying their flavors. Be careful not to burn them—if they start to stick, add a splash of the beer to deglaze.
Deglaze and build the base
Pour in the beer, scraping the bottom of the pot with a wooden spoon to release all those flavorful browned bits. Let it bubble for 2 minutes, allowing the alcohol to cook off. Add the tomatoes, tomato paste, and beef broth, stirring to combine. Return the beef (and any accumulated juices) to the pot. The liquid should just barely cover the meat—add more broth if needed.
Pressure cook
Cancel the sauté function. Lock the lid in place and set the valve to "Sealing." Select "Pressure Cook" or "Manual" on high pressure for 35 minutes. It will take about 10-15 minutes to come to pressure. Once cooking is complete, let the pressure naturally release for 15 minutes—this is crucial for tender meat. Quick-release any remaining pressure by carefully moving the valve to "Venting."
Add the beans and finish
Carefully remove the lid and stir in the drained beans. Cancel any remaining settings and select "Sauté" on medium. Simmer uncovered for 10-15 minutes until the chili has thickened to your desired consistency. Taste and adjust seasoning—add salt, pepper, or more chipotle as needed. The chili will continue to thicken as it cools. For an even richer texture, mash some of the beans against the side of the pot.
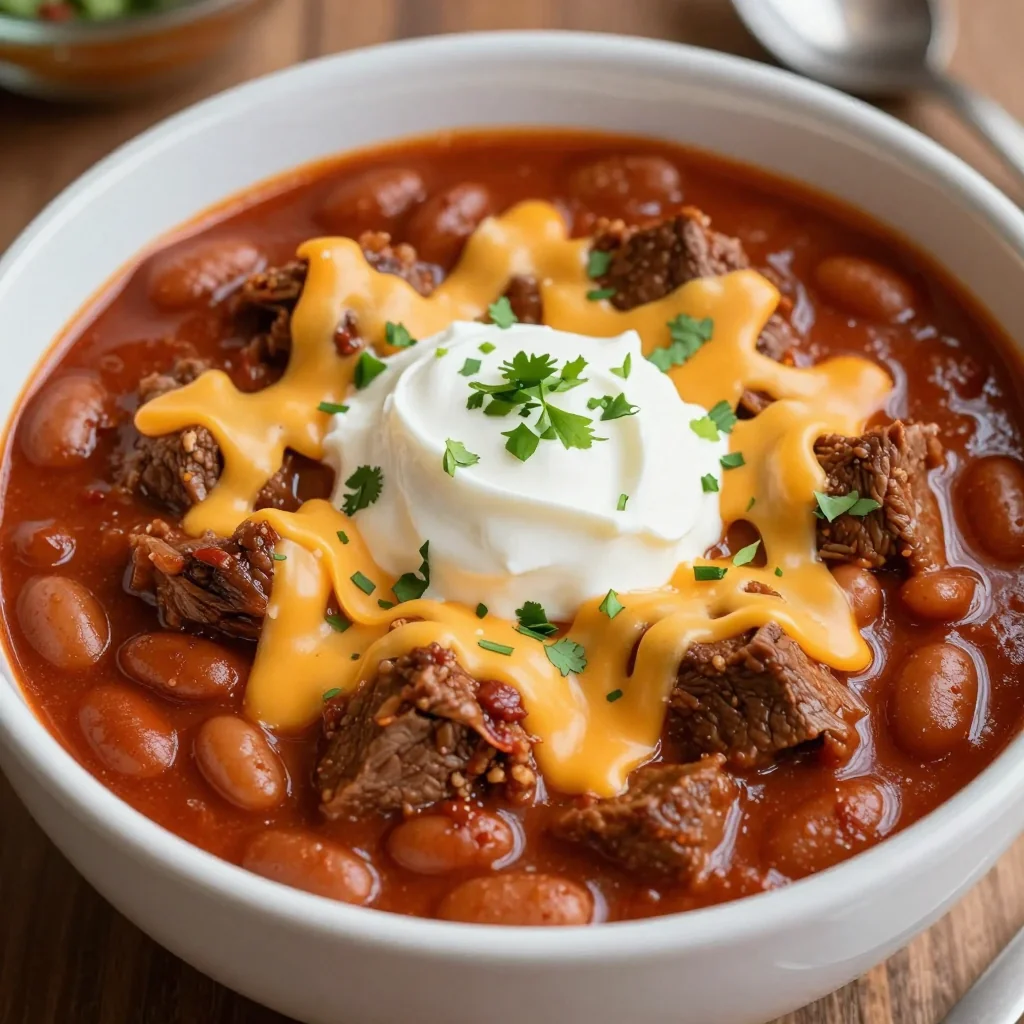
Serve and garnish
Ladle into warm bowls and let everyone customize their toppings. I set out bowls of sour cream (essential for cooling the heat), shredded sharp cheddar, sliced jalapeños, chopped cilantro, diced onions, and plenty of cornbread on the side. A squeeze of fresh lime juice brightens all the flavors and adds a beautiful contrast to the rich, spicy chili.
Expert Tips
Control the heat
Remove the seeds and membranes from jalapeños for milder heat. For extra spice, add a diced habanero or increase chipotle peppers. The sour cream garnish isn't just tasty—it helps tame the flames!
Make-ahead magic
This chili tastes even better the next day! Make it on Sunday and enjoy it throughout the week. The flavors meld and deepen overnight, creating an even more complex taste profile.
Thickening tricks
If your chili is too thin, mash some beans against the pot side or simmer uncovered longer. For too-thick chili, add beef broth in 1/4 cup increments until desired consistency.
Freezer success
Freeze in individual portions for easy weeknight meals. Thaw overnight in the fridge or use the microwave's defrost setting. Add a splash of broth when reheating to restore consistency.
Perfect pairings
Serve with homemade cornbread, over baked potatoes, or use as a topping for nachos. It also makes an incredible filling for burritos or topping for hot dogs at summer barbecues.
Burn notice
Getting a "burn" notice? Ensure you've deglazed properly after browning meat. Add an extra 1/2 cup liquid if needed, and never exceed the max fill line on your Instant Pot.
Variations to Try
White Chicken Chili
Swap beef for chicken thighs, use white beans, and replace chili powders with ground cumin and oregano. Add a can of green chiles and use chicken broth instead of beer.
Vegetarian Version
Replace beef with a mix of mushrooms and lentils. Use vegetable broth and add an extra can of beans. The umami from mushrooms provides satisfying meatiness.
Sweet Heat
Add 2 tablespoons of cocoa powder and 1 tablespoon of brown sugar. The chocolate adds depth while the sugar balances heat. Trust me on this one—it sounds weird but tastes amazing!
Texas-Style
Omit beans entirely (purists insist real chili has no beans) and add an extra pound of beef. Use only chili powders—no tomatoes. The result is a thick, meaty chili that's pure comfort.
Storage Tips
This chili stores beautifully, making it perfect for meal prep or feeding a crowd over several days. Here's how to keep it fresh and delicious:
Refrigerator Storage: Cool completely before transferring to airtight containers. It keeps for up to 5 days in the fridge, though I recommend using it within 3-4 days for best quality. The chili will thicken considerably when cold—this is normal! Simply add a splash of broth or water when reheating.
Freezer Instructions: This chili freezes exceptionally well for up to 3 months. I like to freeze it in individual portions for easy weeknight meals. Use freezer-safe containers or heavy-duty freezer bags—lay them flat to save space. Thaw overnight in the refrigerator or use the defrost setting on your microwave. When reheating, add liquid gradually as the chili may have absorbed more during freezing.
Reheating Methods: For best results, reheat on the stovetop over medium-low heat, stirring occasionally and adding liquid as needed. Microwave works too—heat in 1-minute intervals, stirring between each. If reheating from frozen, defrost first for more even heating. The chili may separate slightly during reheating; just stir well to recombine.
Frequently Asked Questions
Absolutely! Brown the beef and aromatics in a skillet first, then transfer everything to your slow cooker. Cook on low for 8-9 hours or high for 4-5 hours. Add the beans during the last 30 minutes to prevent them from getting mushy. The flavor will be just as incredible, though the texture might be slightly different.
Easy fixes for milder chili: omit the chipotle peppers and use only one jalapeño with seeds removed. Replace the fire-roasted tomatoes with regular ones, and serve with plenty of sour cream and cheese to cool things down. You can also add a tablespoon of honey or brown sugar to balance the heat.
No problem! Replace the beer with an equal amount of strong coffee or additional beef broth. You could also use grape juice or cola for a touch of sweetness that balances the heat. The alcohol cooks off anyway, but these substitutes provide similar depth of flavor.
Yes, but the cooking time changes significantly. Use 2 pounds of 80/20 ground beef and brown it thoroughly in step 2. Reduce the pressure cooking time to 15 minutes. The texture will be different—more like traditional chili—but still delicious. I recommend using ground chuck rather than lean ground beef for better flavor.
Adding beans during pressure cooking can make them mushy and cause them to break down completely. By stirring them in during the final sauté stage, they heat through and absorb some flavors while maintaining their shape and texture. If you prefer very soft beans, you can add them before pressure cooking, but I don't recommend it.
For too-thin chili: Use the sauté function to simmer uncovered, stirring frequently, until reduced. You can also mash some beans against the pot side or add 1-2 tablespoons of tomato paste. For too-thick chili: Gradually add warm beef broth, beer, or even water until you reach desired consistency. Remember that chili thickens as it cools!
Spicy Instant Pot Beef Chili for a Cold Night
Ingredients
Instructions
- Brown the beef: Season cubed chuck roast with salt, pepper, and 1 tablespoon chili powder. Set Instant Pot to sauté and brown beef in batches, 2 minutes per side. Remove and set aside.
- Build the base: In the same pot, sauté onion until softened, about 5 minutes. Add garlic, jalapeños, and chipotle; cook 1 minute. Add all spices and cook 30 seconds until fragrant.
- Deglaze: Pour in beer, scraping up browned bits. Simmer 2 minutes, then add tomatoes, tomato paste, and beef broth. Return beef and juices to the pot.
- Pressure cook: Lock lid and set valve to sealing. Cook on high pressure for 35 minutes. Natural release for 15 minutes, then quick release remaining pressure.
- Finish and serve: Stir in beans and simmer on sauté for 10-15 minutes to thicken. Season to taste and serve hot with your favorite toppings.
Recipe Notes
For milder chili, use only 1 chipotle pepper and remove jalapeño seeds. For extra heat, add a diced habanero or increase chipotle peppers. This chili tastes even better the next day and freezes beautifully for up to 3 months.