Picture this: it’s 2 a.m., the kitchen lights are dim, and the only thing louder than my stomach is the relentless hum of the refrigerator. I was half‑asleep, scrolling through endless snack ideas, when a sudden craving for something sweet, salty, and downright addictive hit me like a thunderclap. I grabbed the nearest Butterfinger bar, a tub of peanut butter, and a bag of graham crackers, and what happened next was pure culinary serendipity. I swear, the first bite was a revelation – a crunchy‑to‑chewy symphony that made my taste buds do a little victory dance.
But here’s the kicker: most no‑bake candy recipes either end up soggy, overly sweet, or just plain bland. I’ve tried a dozen “quick” versions that left me with a sticky mess that clung to the pan and my fingers like a bad breakup. That’s why I’m daring you to taste this and not go back for seconds – because this is hands down the best version you’ll ever make at home. The secret? A precise balance of creamy peanut butter, buttery graham crumbs, and those unmistakably crunchy Butterfinger shards, all wrapped in a glossy chocolate coat that snaps like a fresh snowflake.
What truly sets this batch apart is a tiny twist I discovered during a late‑night experiment: a splash of vanilla extract that doesn’t just flavor the mixture, it amplifies the buttery notes and makes the peanut butter taste like it was kissed by a caramelized sugar fairy. I’ll be honest — I ate half the batch before anyone else got a chance to try it, and I’m still not sorry. The aroma that fills the kitchen as the chocolate melts is the kind of scent that makes you pause your Netflix binge and stare at the pot, wondering if you’ve just invented the next big thing in dessert.
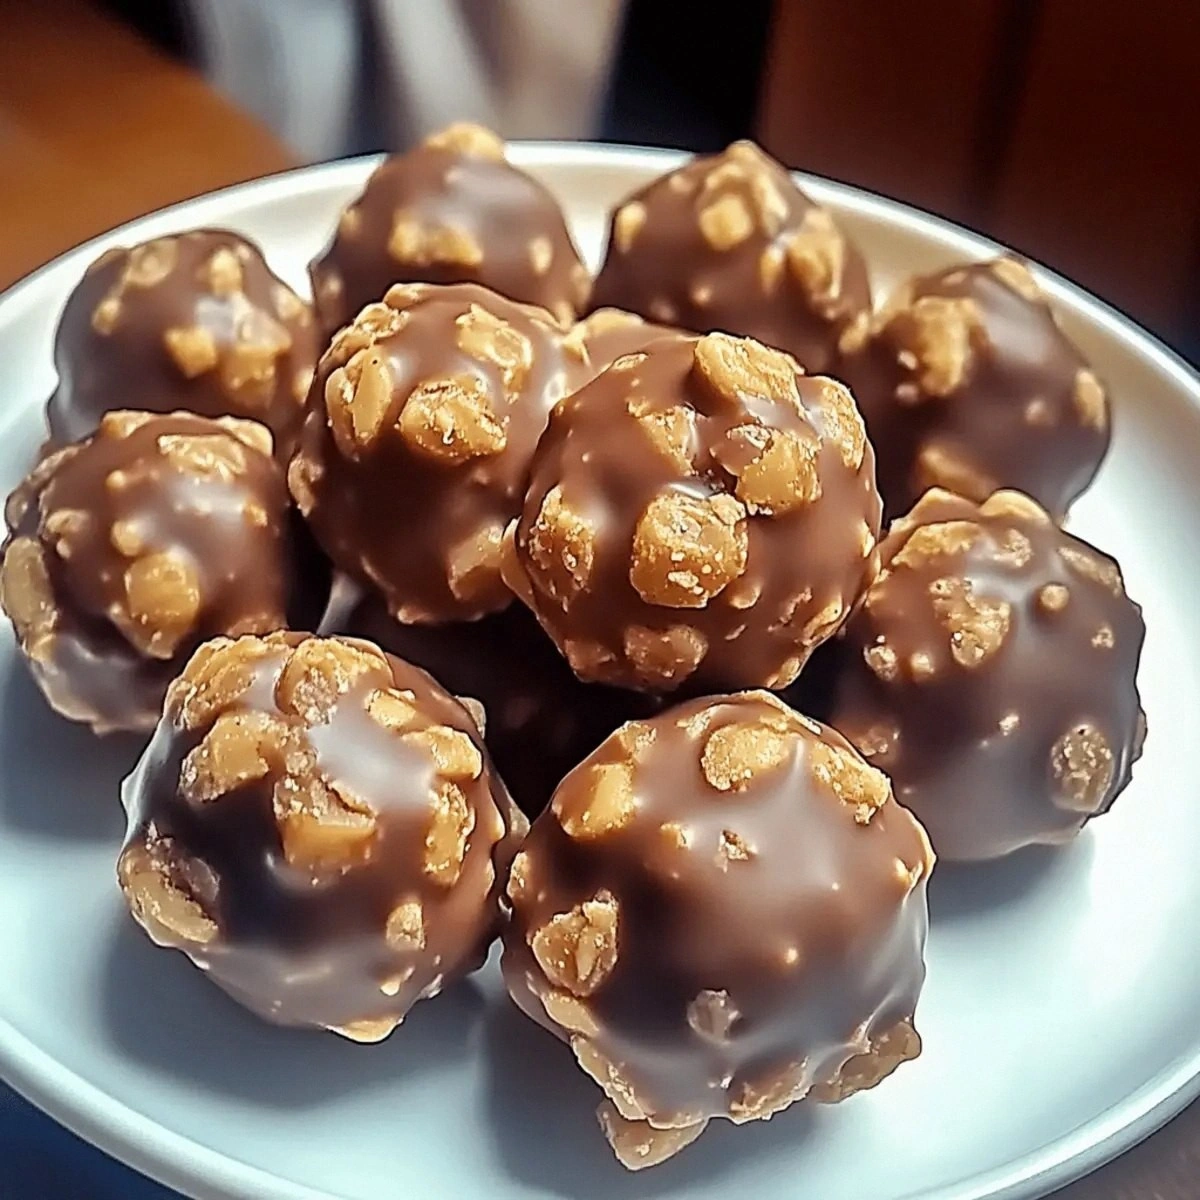
Okay, ready for the game‑changer? This recipe doesn’t need an oven, a fancy mixer, or a culinary degree. All you need is a sturdy bowl, a spatula, and the willingness to get a little messy. I promise you’ll end up with bite‑size spheres that are crisp on the outside, melt‑in‑your‑mouth on the inside, and have a buttery crunch that shatters like thin ice under a warm foot. Let me walk you through every single step — by the end, you’ll wonder how you ever made it any other way.
What Makes This Version Stand Out
- Taste: The combination of salty butter, sweet peanut butter, and chocolate creates a flavor trifecta that feels like a nostalgic candy bar reunion.
- Texture: Each bite delivers a crunchy graham crumb core, a creamy peanut butter center, and a glossy chocolate shell that snaps with satisfying authority.
- Simplicity: No oven, no complex equipment – just mix, roll, chill, and dip. It’s the ultimate lazy‑girl dessert that still feels gourmet.
- Uniqueness: The addition of crushed Butterfinger bars introduces that iconic caramel‑toffee crunch you can’t replicate with any other candy.
- Crowd Reaction: Serve these at a party and watch guests line up, eyes wide, whispering, “I dare you to eat just one.”
- Ingredient Quality: Using real butter and high‑quality peanut butter means the flavor is rich, not artificial.
- Method: The no‑bake approach preserves the buttery integrity of the ingredients, avoiding the dry‑out that baking can cause.
- Make‑Ahead Potential: Store them in the fridge for up to a week; they actually get better as the flavors meld.
Inside the Ingredient List
The Flavor Base
1 cup creamy peanut butter is the heart of this treat. Its nutty richness coats every crumb, ensuring each bite feels luxurious. If you skip it, you’ll lose that smooth, buttery mouthfeel and the balls will become dry. For a twist, try almond butter, but expect a slightly different flavor profile.
1 teaspoon vanilla extract might seem like a tiny addition, but it acts like a flavor amplifier, turning the peanut butter from “good” to “legendary.” A dash of vanilla also softens the sharpness of the butter, creating a balanced sweetness. If you only have pure vanilla bean, scrape a half‑bean for an even more aromatic experience.
The Texture Crew
1/2 cup softened butter provides the melt‑in‑your‑mouth richness that binds the dry ingredients together. It’s the secret behind that velvety interior that doesn’t crumble apart. Use real unsalted butter and let it sit at room temperature; melted butter will make the mixture too runny.
2 cups powdered sugar sweetens the mixture and gives it the perfect crumbly consistency for rolling. Too much sugar makes the balls overly sweet, while too little leaves them crumbly. If you’re watching sugar, you can substitute half with a natural sweetener like erythritol, but the texture will change slightly.
The Unexpected Star
1 cup crushed Butterfinger bars brings that iconic caramel‑toffee crunch that makes these balls unforgettable. The shards melt slightly during the chocolate coating, creating pockets of gooey caramel. If you can’t find Butterfinger, substitute with a mix of toffee bits and caramel candies, but the flavor won’t be as authentic.
1 cup graham cracker crumbs adds a subtle sweetness and a delicate crunch that contrasts the creamy interior. They also act as a binder, helping the mixture hold its shape. For a gluten‑free version, use crushed gluten‑free graham crackers or even toasted oat flakes.
The Final Flourish
1 cup chocolate bark or chocolate chips forms the glossy outer shell that snaps when you bite. Choose high‑quality dark or milk chocolate depending on your preference; the higher the cocoa, the richer the taste. If you’re dairy‑free, opt for a good vegan chocolate – the texture remains just as satisfying.
Everything's prepped? Good. Let's get into the real action…
The Method — Step by Step
First, gather all your ingredients and let the butter soften to a spreadable consistency. This isn’t the time for a microwave‑meltdown; let it sit for about 15 minutes at room temperature. The butter should feel pliable, not oily. Once ready, cut the softened butter into small cubes and set aside – you’ll melt these later with the chocolate.
In a large mixing bowl, combine the creamy peanut butter, powdered sugar, and vanilla extract. Using a sturdy spatula, mash them together until the mixture is smooth and glossy. This is the moment of truth – you’ll know it’s ready when the mixture no longer sticks to the sides of the bowl. Power transition: Now we bring in the texture crew.
Kitchen Hack: If the mixture feels too dry, add a teaspoon of melted butter – it will come together without becoming greasy.Stir in the softened butter cubes, one at a time, allowing each piece to melt into the mixture. You’ll hear a faint sizzle as the butter meets the warm peanut butter, creating a buttery perfume that fills the kitchen. Keep mixing until the butter is fully incorporated and the texture resembles a thick, pliable dough.
Fold in the graham cracker crumbs and crushed Butterfinger bars. This is where the crunch factor is built in. The crumbs should be evenly dispersed, and you’ll notice small caramel flecks from the Butterfinger pieces. If you see clumps, break them up with the back of a spoon – you want a uniform distribution.
Cover the bowl with plastic wrap and refrigerate the mixture for at least 30 minutes. This chilling step firms up the dough, making it easier to roll into perfect spheres. While you wait, pre‑heat a double boiler or a microwave‑safe bowl for the chocolate coating. Future pacing: Picture yourself later, dipping each ball into glossy chocolate, the aroma swirling around you.
Kitchen Hack: For an even coating, line a shallow tray with parchment, place the melted chocolate there, and roll the balls in it using a fork.Once the mixture is firm, scoop out roughly one‑tablespoon portions and roll them between your palms into smooth balls. The size should be about one inch in diameter – not too big, not too small. Watch Out: If the balls start to melt in your hands, return them to the fridge for a few minutes; the butter will set again.
Watch Out: Over‑rolling can cause the balls to become dense; aim for a light, airy press.While you’re rolling, melt the chocolate bark or chips using a double boiler or in 30‑second bursts in the microwave, stirring in between. The chocolate should be smooth and glossy, not grainy. Once melted, dip each chilled ball into the chocolate, allowing excess to drip back into the bowl. The coating should be thick enough to coat the ball fully but thin enough to let the inner crunch shine through.
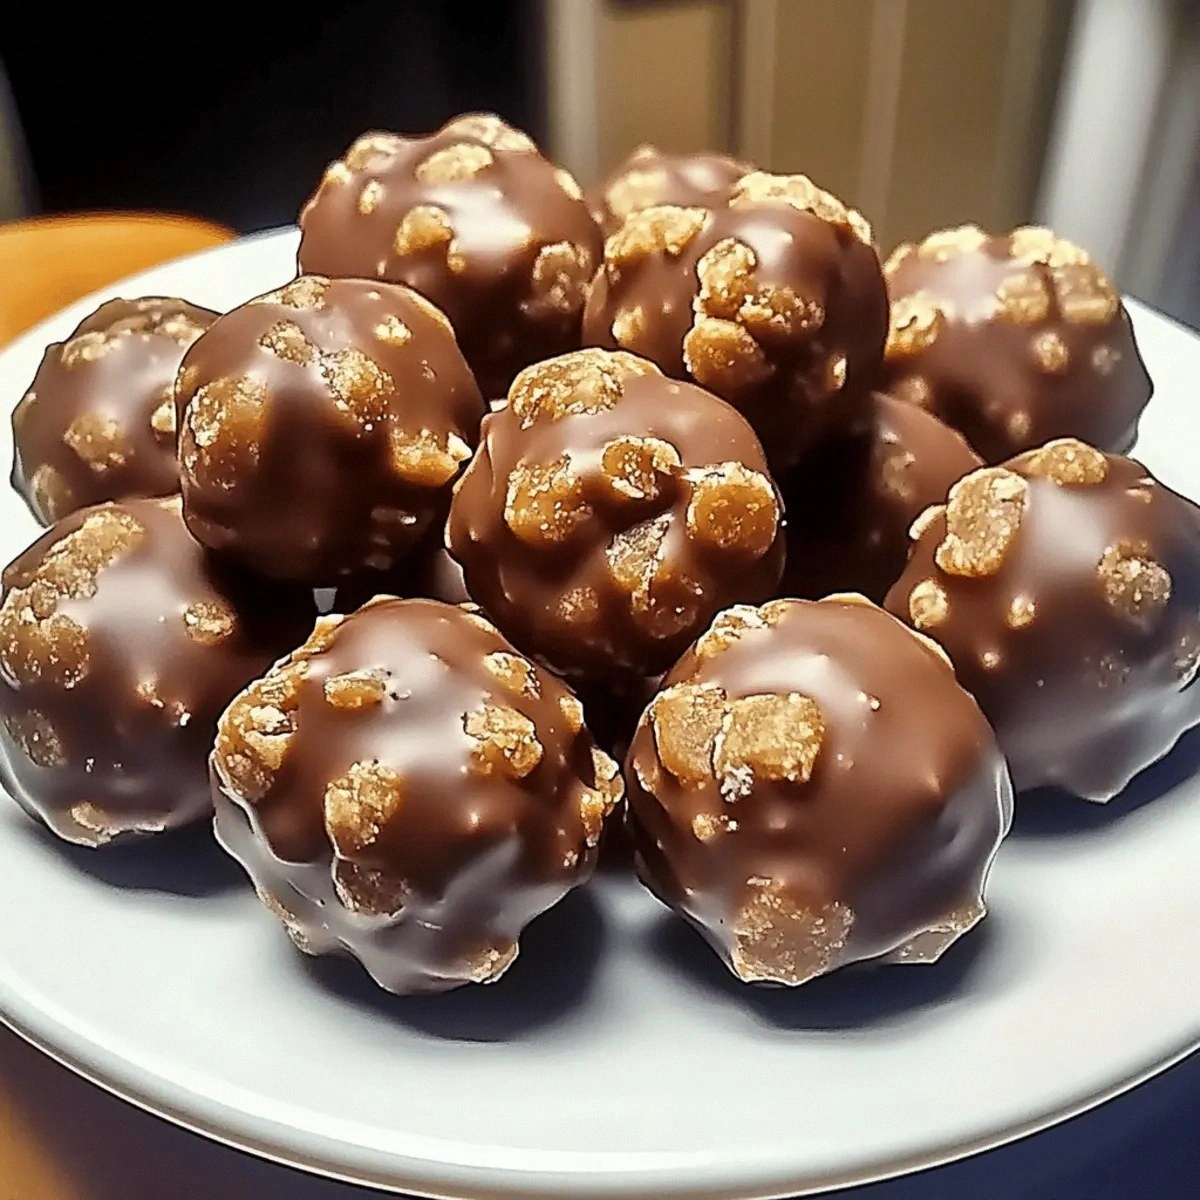
Place the coated balls onto a parchment‑lined tray and let them set at room temperature, or speed up the process by refrigerating for 10‑15 minutes. You’ll know they’re ready when the chocolate hardens and snaps cleanly under a gentle press. And now the fun part: admire the glossy sheen and the tiny caramel specks peeking through the chocolate.
Once set, transfer the balls to an airtight container. They’ll stay fresh for up to a week in the fridge, and the flavors will continue to meld, becoming even more harmonious. Serve them chilled or at room temperature – either way, they’re a crowd‑pleasing masterpiece that will have everyone asking for the recipe.
That's it — you did it. But hold on, I've got a few more tricks that'll take this to another level…
Insider Tricks for Flawless Results
The Temperature Rule Nobody Follows
Never melt chocolate directly over high heat; a gentle double boiler keeps the cocoa butter from seizing. If the chocolate does seize, add a teaspoon of neutral oil and stir until smooth. I once tried melting chocolate in a skillet and ended up with a grainy mess – lesson learned. Keep the temperature under 115°F for dark chocolate, and under 120°F for milk chocolate.
Why Your Nose Knows Best
When the butter is fully incorporated, you’ll notice a buttery aroma that signals the mixture is ready for the next step. Trust that scent; it’s more reliable than a timer. I used to count minutes, but the moment the kitchen smells like toasted peanuts, I know the dough has reached the perfect consistency.
The 5‑Minute Rest That Changes Everything
After rolling the balls, give them a brief 5‑minute rest on the counter before dipping. This short pause lets the interior firm up, preventing the chocolate from sliding off. I once rushed this step and ended up with half‑coated spheres that looked sad on the plate.
Chocolate Tempering Shortcut
If you want that professional snap, stir a tablespoon of melted chocolate into the rest of the bowl after it’s fully melted. This “seed” method brings the chocolate to the right temper without a candy thermometer. The result is a glossy finish that doesn’t melt too quickly in your hand.
Storing Secrets for Maximum Crunch
When you store the balls, place a sheet of parchment between layers. This prevents them from sticking together and keeps each ball’s chocolate shell pristine. I tried stacking them directly, and the top ones ended up with a dull, smudged coating.
Creative Twists and Variations
This recipe is a playground. Here are some of my favorite ways to switch things up:
Salted Caramel Explosion
Swap half of the Butterfinger bars for soft caramel squares and sprinkle flaky sea salt on the chocolate coating before it sets. The salty‑sweet contrast turns each bite into a mini dessert fireworks display.
Nutty Crunch Delight
Add ½ cup chopped toasted almonds or peanuts to the mixture before chilling. The extra nutty crunch pairs beautifully with the peanut butter, creating a layered texture that feels like a nut bar meets candy.
Espresso Infusion
Mix one tablespoon of instant espresso powder into the powdered sugar. The subtle coffee note deepens the chocolate flavor and adds a sophisticated edge that’s perfect for adult gatherings.
White Chocolate Dream
Use white chocolate bark instead of milk or dark chocolate for a sweeter, creamier exterior. Pair it with a sprinkle of dried cranberries for a pop of tartness that cuts through the richness.
Miniature Ice Cream Sandwiches
After the balls have set, sandwich a small scoop of vanilla ice cream between two balls and roll the edges in crushed graham crackers. Freeze for 30 minutes and you have a bite‑size ice cream sandwich that’s a show‑stopper.
Storing and Bringing It Back to Life
Fridge Storage
Place the balls in an airtight container lined with parchment paper. They’ll stay fresh for up to 7 days, and the chocolate will stay firm. If you notice a slight hardening, let them sit at room temperature for 10 minutes before serving.
Freezer Friendly
These beauties freeze wonderfully. Arrange them on a tray, freeze solid for 2 hours, then transfer to a zip‑top bag. They’ll keep for up to 3 months. When you’re ready to enjoy, move them to the fridge for 30 minutes, then let them sit at room temperature for a few minutes.
Best Reheating Method
If the chocolate coating feels a bit dull after storage, give the balls a quick 5‑second zap in the microwave (just enough to soften the surface). Add a tiny splash of water to the bowl before microwaving – the steam revives the chocolate’s sheen without melting the interior.