I was halfway through a late‑night pizza bake, the oven was screaming, and the kitchen smelled like a tropical storm—because I had accidentally dropped a can of pineapple juice onto the dough. The resulting mess looked like a disaster, but the aroma was oddly comforting, like a beach sunset on a rainy day. I stared at the chaos, then remembered the last time I had made a Piña Colada Cheesecake, and a mischievous grin spread across my face. I decided to turn that kitchen calamity into a culinary triumph, and the result? A bite‑sized, creamy, coconut‑laden cheesecake that tastes like a vacation in a jar.
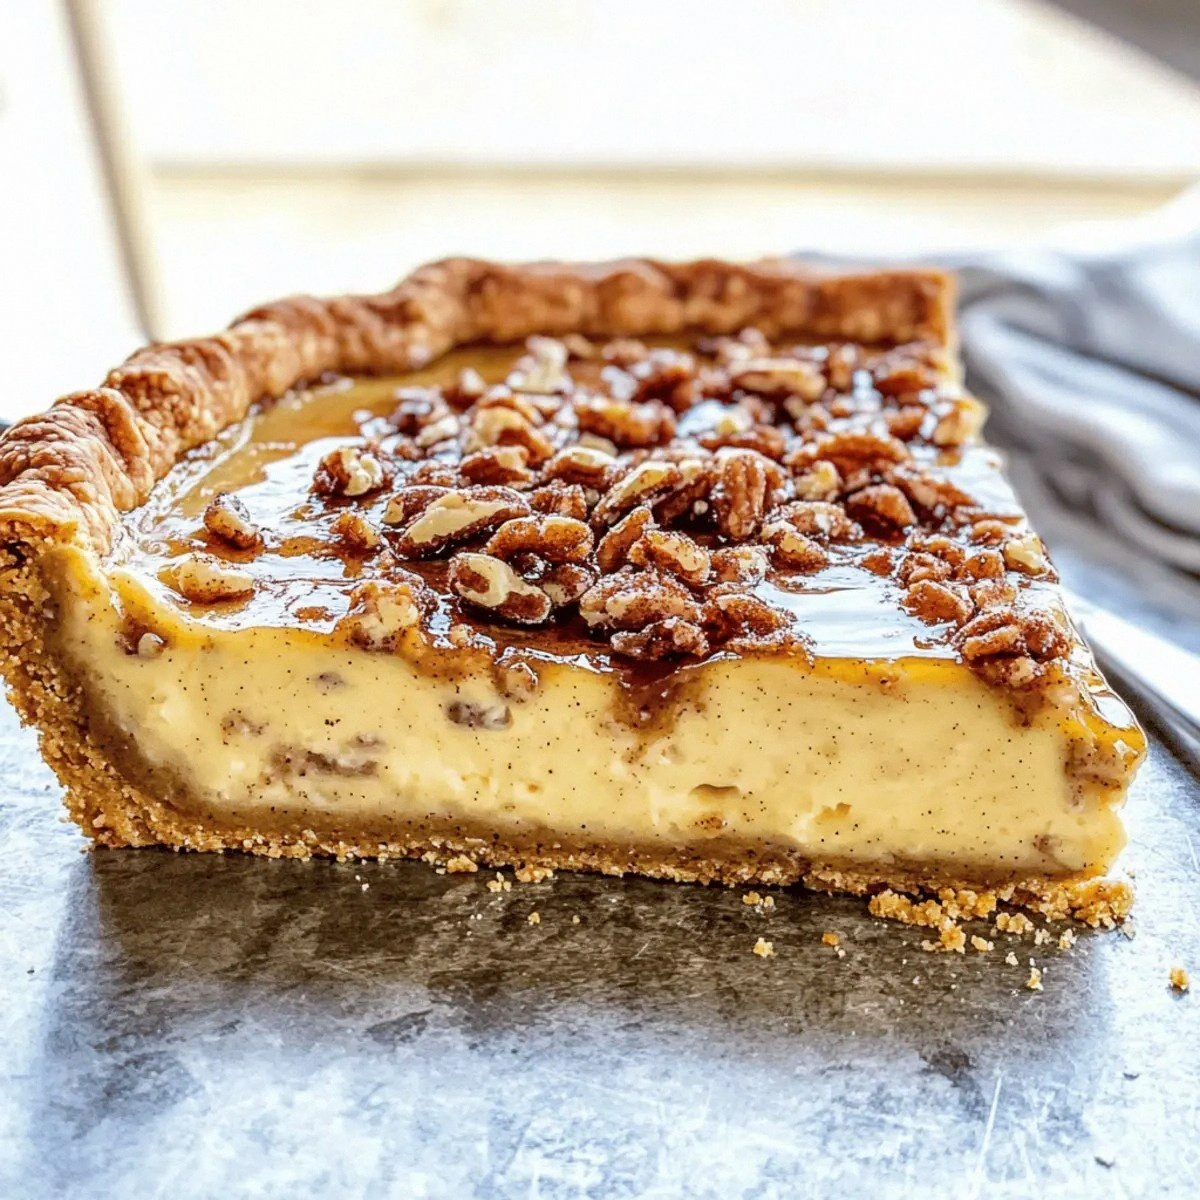
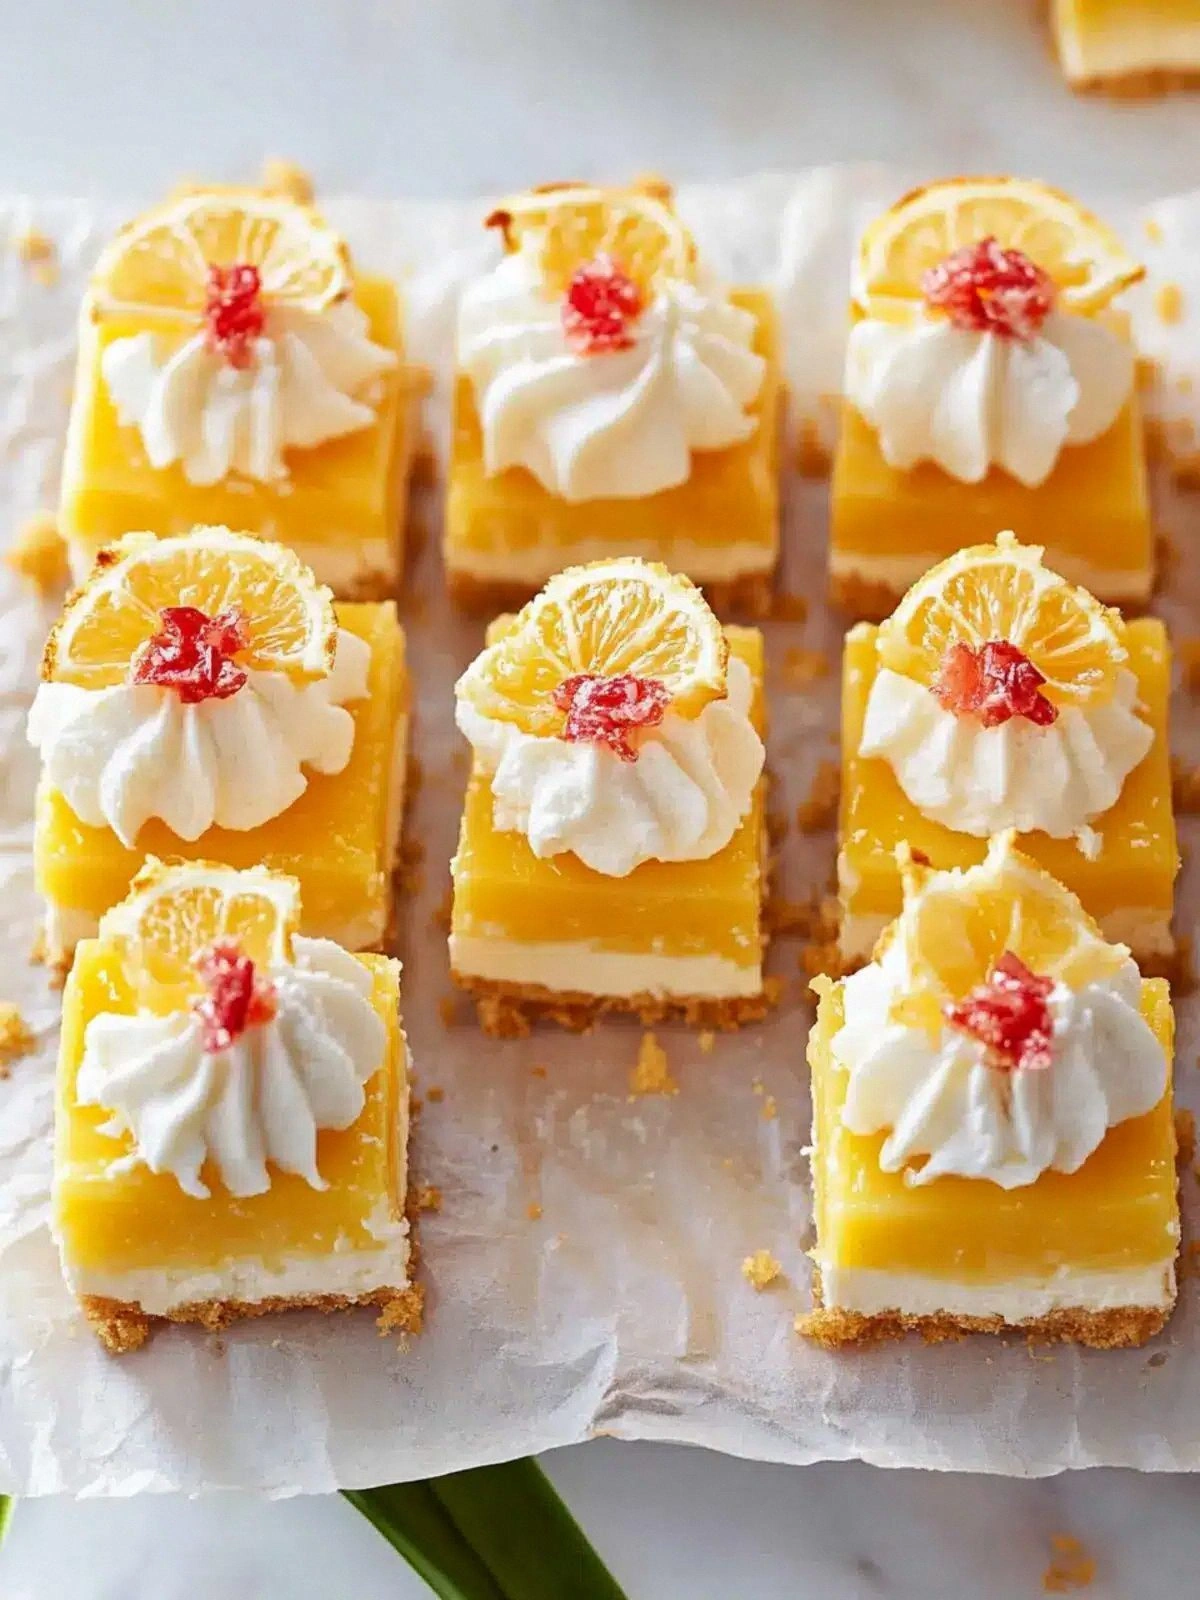
Picture this: a buttery graham cracker crust, crackling at the edges like toasted coconut, beneath a silky filling that swirls with coconut milk and pineapple juice. The moment you bite, the tropical flavors burst—sweet pineapple, creamy coconut, and a hint of vanilla that lingers like a secret whispered on a breezy pier. The texture is a delicate balance: the crust is crisp enough to snap, the filling is smooth enough to melt, and the topping of toasted coconut flakes gives a satisfying crunch that contrasts with the soft interior. I swear you can hear the faint hiss of the filling as it sets, and the faint clink of maraschino cherries as they settle into the glossy surface.
What makes this version stand out is that it’s not just a cheesecake; it’s a multi‑layered experience. The crust isn’t just a base—it’s a flavor foundation that carries the tropical notes forward. The filling uses both whole eggs and yolks, creating a richer mouthfeel without being too heavy. And the finishing touch of vanilla bean paste, rather than standard extract, adds depth and a subtle floral undertone that elevates the entire dessert. I dare you to taste this and not go back for seconds because it’s that good. The result is a dessert that feels both indulgent and light, like a vacation on a plate.
I’ll be honest—when I first tasted the first bite, I almost skipped the rest of the batch. The combination of coconut, pineapple, and a hint of vanilla was like a tropical sunrise in my mouth. The texture was so smooth that it almost felt like a dessert that could melt on your tongue before you even had a chance to savor the flavors. This is hands down the best version you'll ever make at home. And if you’re wondering what makes it so special, it’s the careful balance of ingredients and the little techniques that I’ve perfected over the years. Stay with me here—this is worth it.
What Makes This Version Stand Out
Texture: The crust’s buttery crunch contrasts beautifully with the silky filling, creating a dynamic mouthfeel that keeps every bite exciting.
Flavor Depth: Using vanilla bean paste instead of extract adds a subtle floral note that elevates the tropical sweetness without overpowering.
Ingredient Quality: Fresh pineapple juice and real coconut milk provide authentic flavor, while high‑quality cream cheese gives the filling its creamy richness.
Make‑Ahead Potential: This cheesecake can be assembled ahead of time and chilled, making it perfect for parties or last‑minute dessert plans.
Visual Appeal: The glossy finish, toasted coconut flakes, and bright maraschino cherries give it a professional look that impresses guests.
Versatility: The recipe can be tweaked with different fruits or nut flavors, making it a canvas for creativity.
Alright, let's break down exactly what goes into this masterpiece…
Inside the Ingredient List
The Flavor Base
The graham crackers form the backbone of this cheesecake. They provide a sweet, slightly nutty foundation that balances the tropical sweetness of the filling. If you skip them, you lose that essential crunch and the structure that holds the cheesecake together. For a gluten‑free version, substitute almond flour for the crackers and use a bit more butter to keep the crust moist.
The unsalted butter is the secret to a buttery, melt‑in‑your‑mouth crust. It coats the crackers, helping them caramelize and creating a golden edge that’s both aromatic and visually appealing. If you use salted butter, you’ll need to reduce the added salt to avoid a salty aftertaste. A quick tip: melt the butter over low heat and let it cool slightly before mixing to prevent the crackers from becoming soggy.
The Texture Crew
Cream cheese is the star of the show. It gives the cheesecake its signature richness and smoothness. A good rule of thumb is to let the cream cheese sit at room temperature for at least 30 minutes before mixing—this prevents lumps and ensures a silky filling. If you’re watching your calorie intake, you can swap in a lower‑fat cream cheese, but be prepared for a slightly firmer texture.
Eggs, both whole and yolks, bind the mixture while adding moisture and body. The whole eggs keep the filling light and airy, whereas the yolks add a luxurious depth of flavor. If you’re concerned about raw eggs, you can use pasteurized eggs or a small amount of gelatin to set the filling without eggs. The trick is to whisk the eggs gently to avoid incorporating too much air, which could cause the cheesecake to crack.
The Unexpected Star
Coconut milk and coconut flakes bring the tropical vibe to life. The milk infuses the filling with a subtle coconut flavor, while the flakes add a pleasant chewiness and visual contrast. If you’re lactose intolerant, opt for a dairy‑free coconut milk, but keep in mind that the flavor will be slightly different. To maximize the coconut taste, toast the flakes in a dry skillet until golden before adding them.
Pineapple juice is the natural sweetener that gives this cheesecake its bright, citrusy note. It’s a healthier alternative to refined sugar, and it adds a vibrant color that makes the dessert pop. If you prefer a more intense pineapple flavor, use fresh pineapple puree instead of juice. Just be sure to strain out the pulp for a smooth filling.
The Final Flourish
Maraschino cherries are the finishing touch that gives the cheesecake a festive look and a burst of sweet, tart flavor. They’re not just decorative; they add a pleasant contrast to the creamy filling. If you’re averse to artificial dyes, you can use fresh cherries or freeze‑dried cherries for a more natural look. For an extra pop of color, drizzle a bit of pineapple juice over the cherries before baking.
Everything's prepped? Good. Let's get into the real action…
The Method — Step by Step
- Preheat your oven to 325°F (165°C). Line a 9‑inch springform pan with parchment paper for easy release. In a medium bowl, combine the graham cracker crumbs, melted butter, 1/4 cup caster sugar, and 1/4 teaspoon salt. Press the mixture firmly into the bottom of the pan, creating an even layer that will hold the cheesecake together. Let the crust set while you prepare the filling.
- In a large mixing bowl, beat the cream cheese on medium speed until smooth and creamy, about 2 minutes. Add the 1/2 cup caster sugar and continue to beat until the mixture is light and fluffy. This step is crucial for preventing lumps in the final cheesecake.
- Add the vanilla extract, coconut milk, and 1/2 cup coconut flakes to the cream cheese mixture. Whisk until fully incorporated, making sure the coconut flakes are evenly distributed. The coconut flakes add a subtle crunch that will contrast beautifully with the smooth filling.
- Beat in the two whole eggs, one at a time, ensuring each is fully blended before adding the next. The eggs act as a binder, giving the cheesecake its structure. After the eggs, fold in the three yolks for extra richness.
- Stir in the pineapple juice and 2 tablespoons corn starch. The corn starch helps the filling set without becoming rubbery. Mix until the batter is silky and free of lumps.
- Pour the batter over the pre‑baked crust, smoothing the top with a spatula. Sprinkle the remaining 1/2 cup coconut flakes on top for a crunchy finish. Gently tap the pan on the counter to release any air bubbles. This will prevent cracks during baking.
- Place the pan in the preheated oven and bake for 30 minutes, or until the edges are set but the center still has a slight wobble. The cheesecake should have a light golden hue on top. If you see the edges browning too quickly, cover the pan loosely with aluminum foil.
- Remove the cheesecake from the oven and let it cool in the pan for 15 minutes. Afterward, run a knife around the edges to loosen it, then release and transfer to a wire rack. Let it cool completely at room temperature before refrigerating.
- Once cooled, top the cheesecake with maraschino cherries, pressing them lightly into the surface. Chill in the refrigerator for at least 4 hours, preferably overnight, to allow the flavors to meld and the texture to firm up.
That's it — you did it. But hold on, I've got a few more tricks that'll take this to another level. The next section will give you insider tips that even seasoned bakers might overlook.
Insider Tricks for Flawless Results
The Temperature Rule Nobody Follows
Baking at the right temperature is everything. If your oven runs hot, the cheesecake will set too quickly on the outside while the inside remains runny. Use an oven thermometer to verify the actual temperature, and if needed, lower the heat by 25°F. This subtle adjustment can make the difference between a perfectly set center and a cracked, uneven dessert.
Why Your Nose Knows Best
As the cheesecake bakes, you’ll notice a sweet, caramelized aroma. This scent is a sign that the sugars are caramelizing just right. If you start to smell a burnt or metallic smell, the oven might be too hot. Trust your nose; it’s a reliable indicator that the cheesecake is on track.
The 5‑Minute Rest That Changes Everything
After removing the cheesecake from the oven, let it rest in the pan for exactly 15 minutes before turning it out. This short rest allows the residual heat to finish cooking the center without overcooking the edges. It also helps the cheesecake set, reducing the risk of cracks.
Using a Water Bath for Smoothness
If you’re prone to cracks, try baking the cheesecake in a water bath. Wrap the springform pan in foil and place it in a larger baking dish filled with hot water. The water bath provides gentle, even heat, preventing sudden temperature changes that cause cracks.
Cooling at Room Temperature First
Letting the cheesecake cool at room temperature before refrigerating helps prevent condensation and keeps the surface smooth. Rapid temperature changes can cause the outer layer to set too quickly, leading to an uneven texture.
Adding a Splash of Water Before Reheating
If you need to reheat slices, add a tiny splash of water to the microwave before warming. This steams the cheesecake back to perfection, keeping it moist instead of dry. The water also helps maintain the creamy texture.
Creative Twists and Variations
Caramelized Banana Crunch
Swap the coconut flakes for chopped caramelized bananas. The bananas add a sweet, buttery flavor that pairs well with the pineapple. This variation is perfect for summer picnics and brings a new dimension to the classic recipe.
Chocolate Coconut Explosion
Add 2 tablespoons of cocoa powder to the batter and replace the pineapple juice with chocolate‑flavored milk. The result is a rich, chocolatey cheesecake with a coconut undertone. Serve with a drizzle of chocolate sauce for an extra indulgent touch.
Almond Joy Surprise
Incorporate almond flour into the crust and add shredded coconut to the filling. Top with toasted almonds and a splash of almond extract. This version pays homage to the popular candy bar while staying true to the tropical vibe.
Spiced Pineapple Delight
Add a pinch of ground cinnamon and nutmeg to the batter for a warm, spicy note. The spices complement the pineapple and coconut, creating a comforting dessert that’s great for cooler evenings.
Berry Coconut Bliss
Replace the pineapple juice with mixed berry puree for a tart, fruity twist. Add fresh berries on top for a colorful garnish. This version is refreshing and slightly tangy, making it ideal for brunches.
Mini Cheesecake Cups
Divide the batter into a muffin tin lined with paper liners to create individual bite‑size cheesecakes. Bake for 20 minutes and chill for 2 hours. These mini versions are perfect for parties and make for easy, no‑mess dessert service.
Storing and Bringing It Back to Life
Fridge Storage
Store the cheesecake in the refrigerator for up to 5 days in an airtight container. The flavors deepen, and the texture becomes even creamier. When ready to serve, let it sit at room temperature for 10 minutes to soften slightly.
Freezer Friendly
Wrap the cheesecake tightly in plastic wrap, then in aluminum foil, and freeze for up to 2 months. When you’re ready to enjoy, thaw overnight in the refrigerator. The texture may be slightly denser, but the flavor remains intact.
Best Reheating Method
To reheat a slice, place it on a microwave‑safe plate and microwave on high for 20–30 seconds. Add a tiny splash of water to keep it moist. Alternatively, place the slice in a preheated oven at 300°F for 5 minutes to gently warm it without drying out.