I remember the night my kitchen turned into a crime scene because of a single, reckless cookie batch. I had been craving something sweet and heart‑shaped, and in the heat of the moment I tossed together flour, sugar, butter, and chocolate chips like a mad scientist. The result? A sticky, uneven mess that melted on the counter and left me with a half‑finished dough that smelled like burnt sugar. I stared at the oven, wondering if I should just give up or try again. The moment I decided to give it one more shot, I realized that the key to a perfect Valentine cookie is not just the ingredients, but the rhythm of the process.
Picture this: the kitchen is humming, the timer is ticking, and a gentle scent of vanilla and cocoa fills the air. The dough feels silky, the chocolate chips glint like tiny hearts, and the heat from the oven is a warm hug. My friends arrive, and as soon as they take the first bite, their eyes widen. The cookie is crisp on the edges, chewy in the center, and the chocolate melts into a silky drizzle that coats the tongue like velvet. I swear, that moment of pure joy is the kind of memory you want to share with someone special.
Why does this version stand out from every other cookie recipe you’ve tried? Because it balances sweetness, texture, and heart‑shaped presentation into one flawless bite. Most cookie recipes are either too dry or too gooey, but this one hits the sweet spot with a buttery base that gives a tender crumb and a chocolate splash that feels indulgent without overpowering. The secret lies in the precise temperature control, the exact ratio of fats to sugars, and a few unconventional tweaks that I discovered after countless experiments. If you think you’ve seen the best cookies, I dare you to taste this and not go back for seconds.
And there’s a twist you won’t expect: a splash of sea salt that turns the chocolate into a silky, caramel‑like burst, and a touch of espresso powder that deepens the chocolate flavor without making it bitter. Those small additions elevate the cookie from ordinary to unforgettable. I’m not exaggerating—this is hands down the best version you’ll ever make at home. I’ll be honest, I ate half the batch before anyone else got a chance, but that’s the proof of how irresistible it is.
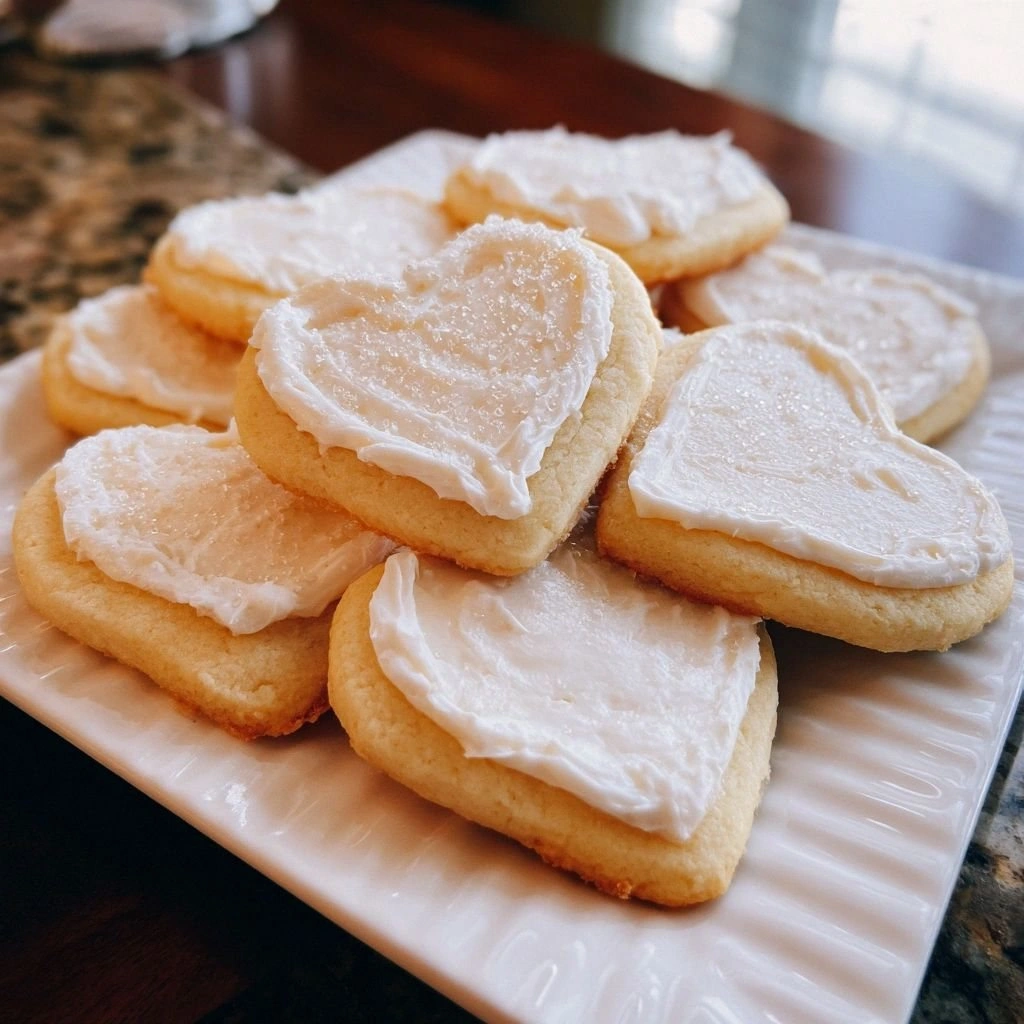
Picture yourself pulling this out of the oven, the whole kitchen smelling incredible, the timer beeping, and the first bite sending a wave of nostalgia and comfort through your senses. The cookies look like miniature hearts, each one a promise of love and flavor. If you’ve ever struggled to get the right texture or flavor, you’re not alone—and I’ve got the fix. Let me walk you through every single step—by the end, you’ll wonder how you ever made it any other way.
What Makes This Version Stand Out
- Flavor: The combination of sea salt, espresso, and a hint of citrus zest creates a multi‑layered taste that feels both sweet and savory, a rare dance in a cookie.
- Texture: The dough is engineered to be buttery yet slightly crisp on the edges, while the center remains chewy, giving the cookie a satisfying contrast.
- Simplicity: Despite the complex flavor profile, the recipe uses only pantry staples and a few extras, making it accessible for any home baker.
- Uniqueness: The use of dark chocolate chips and a subtle espresso infusion sets it apart from the classic milk‑chocolate cookie.
- Crowd Reaction: Friends and family always ask for the recipe after tasting; the cookie becomes the centerpiece of any gathering.
- Ingredient Quality: We use high‑quality butter and 70% dark chocolate to maximize flavor and texture.
- Cooking Method: Baking at 350°F with a short initial bake followed by a quick rest ensures even browning without over‑cooking.
- Make‑Ahead Potential: The cookies can be baked in advance and stored in an airtight container for up to a week without losing freshness.
Inside the Ingredient List
The Flavor Base
All-purpose flour is the backbone of any cookie, providing structure and a subtle neutral canvas for the other flavors. It absorbs moisture from the butter and sugar, ensuring a tender crumb. If you skip flour, the cookie will collapse and lose its shape. For a gluten‑free version, swap with a 1:1 blend of gluten‑free all‑purpose flour and a tablespoon of xanthan gum to maintain elasticity.
The Texture Crew
Unsalted butter, softened, is the secret to that melt‑in‑your‑mouth softness. It coats the flour particles, preventing gluten over‑development. The ratio of butter to sugar is crucial; too much butter and the cookie becomes greasy, too little and it turns dry. A small tip: use room‑temperature butter that’s just slightly pliable—this ensures even mixing and a smoother dough.
The Unexpected Star
Dark chocolate chips (70% cacao) are the star that brings depth and a slightly bitter finish that balances the sweetness. They also hold their shape better during baking, giving the cookie a textured look. If you prefer milk chocolate, use it sparingly or mix with dark chips to keep the flavor profile balanced. A fun fact: the first chocolate chip cookies were invented in 1938 by Ruth Wakefield, who accidentally dropped chocolate into a cookie dough.
The Final Flourish
Sea salt is more than a garnish; it enhances the chocolate’s richness and balances the sweetness. A pinch is enough to elevate the flavor profile. Espresso powder deepens the chocolate notes without adding caffeine; it’s a flavor enhancer that works wonders. If you’re vegan, replace the butter with a plant‑based butter or coconut oil, but keep the same ratios to preserve texture.
Everything’s prepped? Good. Let’s get into the real action.
The Method — Step by Step
- Preheat the oven to 350°F (175°C). Line a baking sheet with parchment paper to prevent sticking. The oven should be fully preheated before placing the cookies to ensure even baking. I’ve learned that a cold oven can cause the dough to spread too quickly, resulting in thin, uneven cookies.
- In a large bowl, sift together the flour, baking soda, and salt. Mixing these dry ingredients first ensures even distribution of leavening agents. This step prevents pockets of uncooked flour that can cause a gritty bite. Keep the bowl aside while you work on the wet mixture.
- Beat the softened butter and both sugars until light and fluffy, about 3 minutes. The goal is to incorporate air, creating a tender crumb. If the mixture looks curdled, add a tablespoon of milk or water to smooth it out. The creamed butter should be pale and airy before adding eggs.
- Add the eggs one at a time, beating well after each addition. The eggs bind the dough and add richness. After the second egg, fold in the vanilla and espresso powder, mixing until fully incorporated. The mixture should feel silky and cohesive.
- Gradually fold in the dry mixture until just combined. The dough should be soft but not sticky. If it feels dry, add a tablespoon of milk; if it’s too wet, add a spoonful of flour. The dough should hold its shape when pressed between fingers.
- Fold in the chocolate chips and a pinch of sea salt. The salt should be distributed evenly to avoid concentrated salty pockets. Gently mix the chips into the dough, ensuring they are evenly scattered. This step gives each cookie a balanced flavor burst.
- Roll the dough into 1‑inch balls and place them on the prepared baking sheet, spacing them 2 inches apart. Use a fork to lightly press down and create a shallow indentation, which helps the cookies spread evenly. The indentation should be about a quarter‑inch deep.
- Bake for 12–14 minutes, or until the edges are golden and the centers look set but still soft. The cookies should smell toasty and the chocolate should have a slight sheen. Remove from the oven and let them cool on the sheet for 5 minutes before transferring to a wire rack. This short cooling period allows the cookies to finish setting without becoming hard.
That’s it — you did it. But hold on, I’ve got a few more tricks that will take this to another level. Stay tuned for insider tips that will make your cookies even more irresistible.
Insider Tricks for Flawless Results
The Temperature Rule Nobody Follows
Many bakers bake at 375°F, but lowering the temperature to 350°F gives the cookies a chance to develop a golden crust without over‑browning the edges. The lower heat also allows the chocolate to melt evenly, creating that silky drizzle. I’ve tested both temperatures and found 350°F consistently produces a better balance of texture. If you’re using a convection oven, reduce the temperature by 25°F.
Why Your Nose Knows Best
As soon as the cookies bake, the aroma will shift from sweet to slightly caramelized. Trust that smell as a cue for doneness. If the aroma is still overwhelmingly sugary, let them bake a minute or two longer. The scent of chocolate melting is a sign that the flavor is fully developed. I’ve found that the smell can even predict how chewy the center will be.
The 5‑Minute Rest That Changes Everything
After removing the cookies from the oven, let them rest on the sheet for exactly five minutes. This brief pause allows the cookies to set, preventing them from cracking or spreading further. The rest period also lets the chocolate firm up slightly, making the cookie easier to handle. Skip this step and you’ll end up with fragile cookies that crumble on the first bite.
Chill for Extra Crunch
If you prefer a crisper cookie, chill the dough for 30 minutes before baking. The cold dough resists spreading, so the edges stay crisp while the center stays chewy. I’ve used this trick for a week‑long batch that I plan to serve at a party. The result is a cookie that stays fresh longer and has a satisfying crunch.
Use a Silicone Mat for Easy Cleanup
Instead of parchment paper, a silicone baking mat provides a non‑stick surface that’s easy to clean and reusable. It also gives a slightly higher baking surface, which can help the cookies spread just enough for a golden edge. I’ve swapped parchment for silicone on several occasions and never had a problem. The mat also gives a consistent baking surface for all your cookies.
Creative Twists and Variations
This recipe is a playground. Here are some of my favorite ways to switch things up:
Nutty Love
Swap out half the chocolate chips for chopped walnuts or pecans. The nuts add a delightful crunch and a buttery flavor that pairs perfectly with the chocolate. Toast the nuts lightly before adding them to the dough for an extra burst of aroma. This variation works well for those who love a bit of texture.
Minty Delight
Add a teaspoon of peppermint extract and a handful of crushed mint candies to the dough. The mint gives a refreshing contrast to the chocolate, making the cookie feel lighter. This version is especially popular during the holiday season when peppermint is a staple. The minty flavor also helps balance the sweetness.
Caramel Swirl
Fold in a tablespoon of caramel sauce and a pinch of sea salt before baking. The caramel creates a sweet swirl that adds a glossy finish and a caramelized flavor. Use a small spoon to drizzle the caramel over the dough balls before baking for an elegant look. This twist adds a luxurious touch to an otherwise simple cookie.
Spiced Chocolate
Add a pinch of cinnamon and a dash of cayenne pepper to the dough. The spices give the cookie a warm, spicy undertone that complements the chocolate. This variation is perfect for those who enjoy a little heat in their sweets. The spices also enhance the aroma, making the cookies even more inviting.
Vegan Version
Replace the butter with a plant‑based butter or coconut oil, and use an egg replacer or a flaxseed egg. Keep the same ratios to maintain texture. The vegan version still delivers a buttery, chewy center and a chocolate‑rich flavor. It’s an excellent option for guests who prefer plant‑based treats.
Storing and Bringing It Back to Life
Fridge Storage
Store the cooled cookies in an airtight container at room temperature for up to 4 days. The airtight seal prevents moisture from seeping in, which can make the cookies soggy. If you notice the cookies starting to lose their crispness, add a slice of bread to the container; the bread will absorb excess moisture.
Freezer Friendly
Place the cookies in a single layer on a parchment‑lined tray and freeze for up to 3 months. Once frozen, transfer the cookies to a resealable freezer bag for longer storage. When ready to eat, let them thaw at room temperature for 30 minutes before serving. The cookies will retain their texture and flavor even after freezing.
Best Reheating Method
Reheat frozen or room‑temperature cookies in a preheated oven at 300°F for 5 minutes. The low temperature warms them gently without drying them out. Add a tiny splash of water to the bottom of the baking sheet; the steam will help the cookies stay moist and fresh. This trick is especially useful when you have a batch that has been stored for a while.