The first time I cracked open a bag of Chex cereal, I didn’t think it could ever be more than a crunchy snack. I was in the middle of a late‑night movie marathon, the TV flickering, the fridge lights dimming, and a sudden craving for something sweet and salty hit me like a tidal wave. I grabbed the cereal, a handful of butter, and a jar of brown sugar, and I was about to embark on a culinary experiment that would change my snack game forever. That night, the kitchen smelled like caramelized sugar and melted butter, and the sound of the pan sizzling was music to my ears. I didn’t know it yet, but I was about to create the ultimate Toffee Chex Mix, a snack that would become the centerpiece of every gathering I hosted.
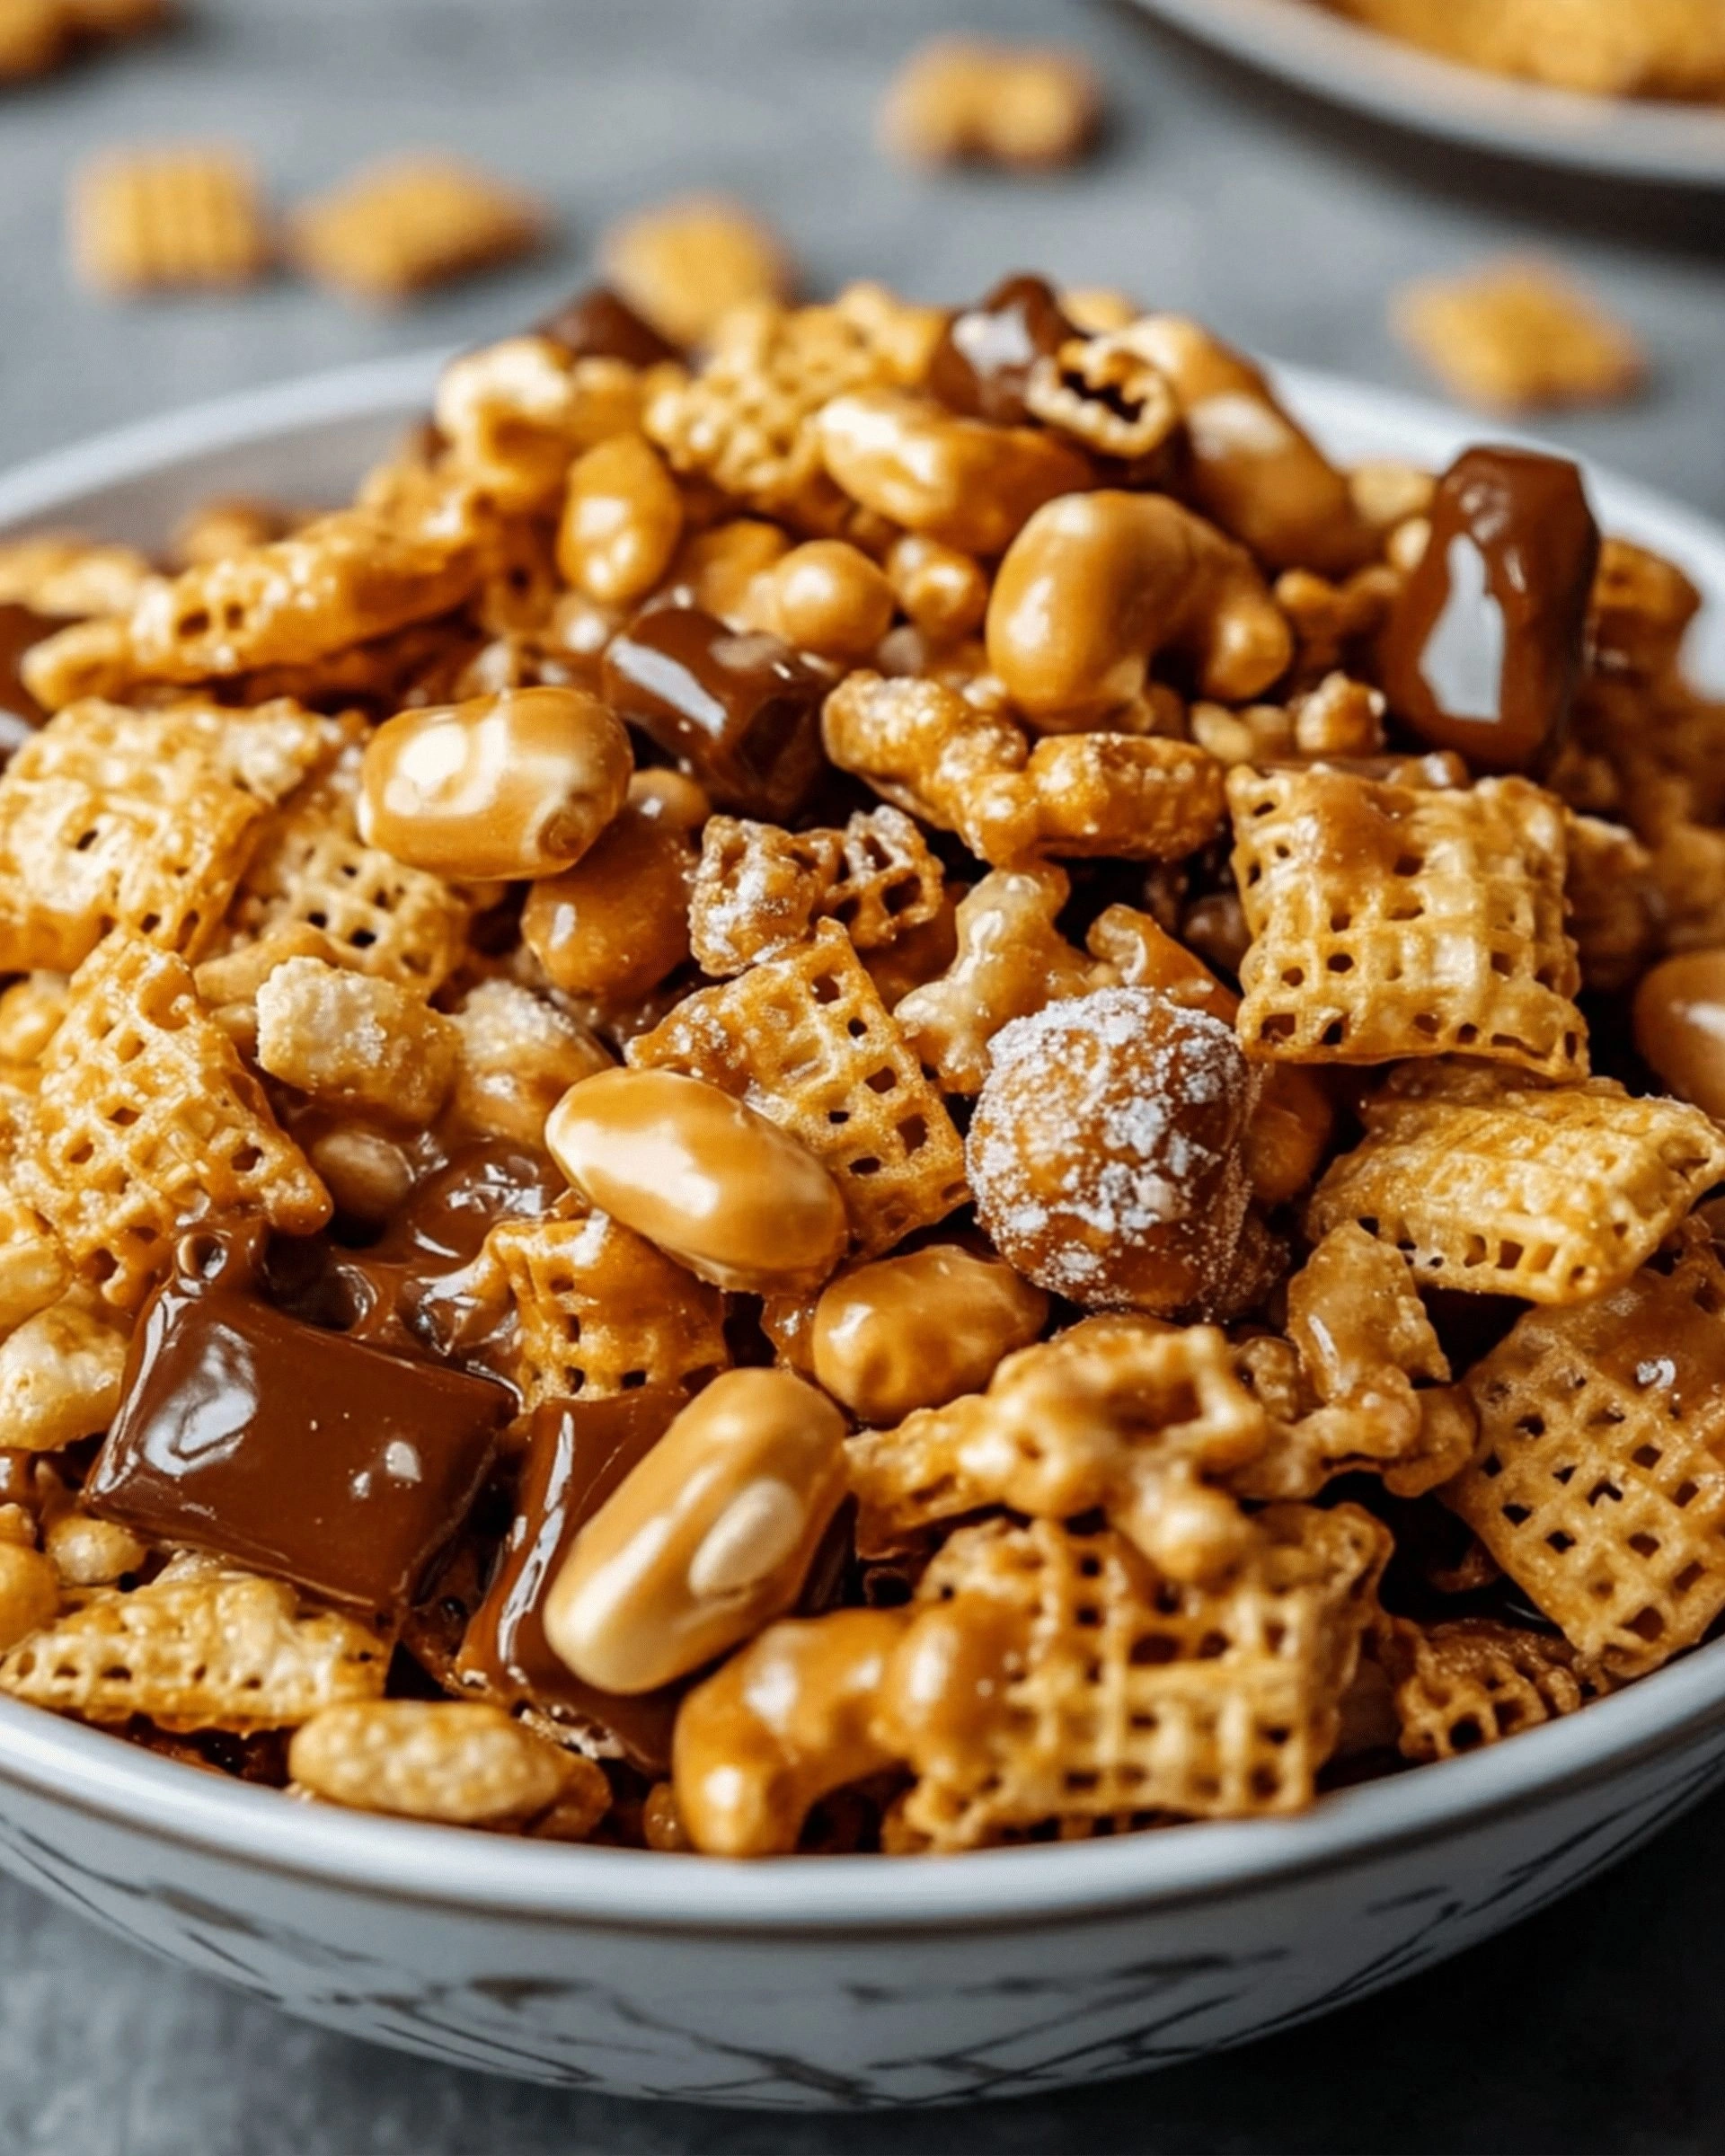
Imagine biting into a handful of crunch that bursts with a caramelized, buttery glaze, only to be followed by a subtle hint of vanilla and the satisfying snap of toasted cereal. The first bite is an explosion of sweet and savory, the second a gentle reminder of the toffee bits that cling to the cereal like tiny golden moons. The texture is a perfect dance between crispy and chewy, with the chocolate chips melting into a glossy coating that clings to every bite. The aroma is a warm, buttery sweetness that fills the room, making it impossible to resist reaching for another handful. The sound of the mix being poured into a bowl is like a crunchy applause that signals the end of a culinary performance.
I’m not just telling you this because I love the snack; I’m telling you because this version is a revelation. Most recipes rely on a generic mix of cereal and a simple syrup glaze, but this one elevates the flavor profile by incorporating a carefully balanced ratio of corn, rice, and wheat Chex, a splash of vanilla, and a generous amount of toffee bits that give it a buttery crunch. The result is a snack that feels like a decadent dessert but with the convenience of a quick, one‑pan preparation. It’s the kind of snack that will make your friends question whether they’re eating a treat or a dessert. I dare you to taste this and not go back for seconds.
There’s a secret ingredient that sets this mix apart: a small amount of sea salt that balances the sweetness and enhances the chocolate’s depth. When I first added the sea salt, the flavor exploded, and the mix felt more sophisticated than a typical candy bar. The buttery glaze coats the cereal like velvet, giving each bite a luxurious feel. The texture is crisp yet slightly chewy, thanks to the toffee bits that add a satisfying snap. Picture yourself pulling this out of the oven, the whole kitchen smelling incredible, and everyone’s eyes widening in anticipation. Let me walk you through every single step — by the end, you’ll wonder how you ever made it any other way.
What Makes This Version Stand Out
- Taste: The blend of caramelized sugar, butter, and vanilla creates a rich, buttery flavor that’s not overly sweet, allowing the chocolate and toffee to shine through. The subtle sea salt amplifies the depth of each bite, giving it a gourmet feel that’s rare in snack mixes. This balanced flavor profile makes it a crowd‑pleaser at parties and family gatherings alike.
- Texture: The combination of corn, rice, and wheat Chex provides a varied crunch, while the toffee bits add a chewy, buttery element that keeps the mix interesting. The chocolate chips melt into a glossy glaze that clings to each piece, creating a satisfying mouthfeel that feels like a dessert in a bowl. The result is a snack that never feels flat or monotonous.
- Simplicity: With only a handful of ingredients and a single pan, this recipe is a breeze for even novice cooks. All you need is a pot, a spatula, and a bowl, making it a perfect go‑to snack for busy evenings or spontaneous gatherings. The ease of preparation doesn’t compromise flavor or quality.
- Uniqueness: Unlike other Chex mixes that rely on a single cereal type, this version uses a trio of cereals to create a layered crunch. The addition of toffee bits and a splash of vanilla sets it apart from traditional chocolate‑cheese or caramel‑chex mixes. It’s a fresh take that feels both nostalgic and innovative.
- Crowd Reaction: Guests often comment on how the mix tastes like a premium candy bar, yet it’s so affordable and easy to make that it’s a win for any host. The mix’s balanced sweetness and salty undertones make it a hit with kids and adults alike. The visual appeal of the glossy chocolate glaze adds an extra layer of allure.
- Ingredient Quality: Using high‑quality butter, real brown sugar, and premium chocolate chips ensures that every bite is rich and flavorful. The use of sea salt over table salt gives the mix a subtle mineral note that elevates the overall taste. The quality of the ingredients directly translates into the final product’s excellence.
- Cooking Method: The single‑pan technique allows for even caramelization without the need for a stovetop and oven combo. The glaze forms naturally as the sugar and butter melt, creating a coating that adheres perfectly to the cereal. The method is both efficient and foolproof.
- Make‑ahead Potential: The mix can be prepared in advance, stored in an airtight container, and reheated to restore its crunch. The glossy glaze remains intact, and the toffee bits stay buttery. This makes it a convenient snack for busy schedules or large gatherings.
Alright, let’s break down exactly what goes into this masterpiece…
Inside the Ingredient List
The Flavor Base
The foundation of this mix starts with the sweet and buttery glaze that coats each cereal piece. The butter melts into a golden liquid that carries the brown sugar and corn syrup, creating a caramelized coating that’s both glossy and flavorful. When the glaze thickens, it locks in the flavor, ensuring that each bite delivers a burst of sweetness. Skipping the butter would leave the glaze thin and the mix bland, so it’s crucial to let it melt fully before adding the sugars.
The brown sugar provides a deep, molasses‑like sweetness that balances the butter’s richness. Its natural molasses content adds complexity and depth to the glaze, giving the mix a subtle, warm undertone. If you substitute white sugar, you’ll lose that depth, and the mix will taste overly sweet and flat. A good rule of thumb is to use equal parts brown sugar and white sugar for a balanced profile.
Corn syrup is the secret to achieving that perfect glossy coating. It prevents crystallization, ensuring that the glaze remains smooth and silky. Corn syrup also adds a slight sweetness that complements the brown sugar without overpowering it. If you can’t find corn syrup, you can use honey or maple syrup, but the texture will differ slightly.
The Texture Crew
Corn Chex adds a light, airy crunch that’s perfect for a snack that needs to stay crisp. The cereal’s small, square pieces melt into a golden crunch when coated with the glaze, creating a satisfying snap. The rice Chex brings a delicate, crispy bite that’s slightly lighter in flavor, adding texture variety. Together, they form a symphony of crunches that never feels repetitive.
Wheat Chex provides a slightly denser bite and a hint of nuttiness that complements the other cereals. Its shape allows the glaze to cling to more surface area, enhancing the overall flavor experience. Skipping the wheat Chex would result in a less varied texture and a slightly less satisfying crunch. If you’re gluten‑free, you can replace it with gluten‑free rice cereal or omit it entirely.
Toffee bits are the star that gives the mix its signature buttery crunch. These small, caramelized pieces are coated in chocolate, creating a rich, buttery bite that melts in your mouth. The toffee’s caramelized edges provide a slight chewiness that contrasts with the cereal’s crunch. Without the toffee, the mix would feel like a standard chocolate‑chex mix, lacking the unique buttery element that makes it special.
The Unexpected Star
Vanilla extract is the subtle, aromatic twist that elevates the entire flavor profile. A teaspoon of vanilla brings a floral note that balances the sweetness, giving the mix a more complex and sophisticated taste. The vanilla also enhances the chocolate’s richness, making each bite feel more indulgent. If you’re vegan, a splash of vanilla plant‑based extract works just as well.
Sea salt is the finishing touch that brings everything together. A pinch of sea salt amplifies the chocolate’s depth and balances the sweetness, creating a harmonious flavor that’s neither too sweet nor too salty. The mineral notes from sea salt add a subtle complexity that’s often missing in snack mixes. Skipping the salt would result in a flat, overly sweet taste that could overwhelm the chocolate and toffee.
The Final Flourish
Chocolate chips or toffee bits are what give the mix its glossy, decadent finish. The chips melt into a glossy coating that clings to every piece, creating a luxurious mouthfeel. The chocolate’s bitterness balances the sugar’s sweetness, providing a well‑rounded flavor. If you prefer a darker chocolate, choose a higher cacao percentage for a richer taste.
Optional nuts, such as pecans or walnuts, add a nutty crunch that complements the cereal’s texture. The nuts also add a protein boost and a subtle earthy flavor. If you’re avoiding nuts, you can simply omit them; the mix will still be delicious. The nuts’ crunchy texture adds an extra layer of complexity to each bite.
Everything’s prepped? Good. Let’s get into the real action…
The Method — Step by Step
- Heat a large, heavy‑bottomed skillet over medium heat and add the butter. As the butter melts, let it bubble gently; this will help it blend with the sugar. Watch the butter turn a light golden color, which signals that it’s ready to accept the sugars. If the butter starts to brown too quickly, lower the heat slightly. This step is crucial for achieving a smooth, glossy glaze.
- Add the brown sugar to the melted butter and stir until it’s fully dissolved. The mixture should become thick and glossy. Keep stirring to prevent the sugar from settling at the bottom of the pan. The aroma of caramelized sugar should fill the kitchen, hinting at the deliciousness to come. Let the mixture simmer for 2-3 minutes until it starts to thicken.
- Pour in the corn syrup and vanilla extract, stirring until the mixture is smooth. The corn syrup will keep the glaze from crystallizing and add a subtle sweetness. The vanilla will add a fragrant, floral note that balances the richness. Stir continuously to ensure a uniform glaze that coats every cereal piece. The mixture should look like a glossy, amber liquid.
- Reduce the heat to low and add the corn, rice, and wheat Chex cereals. Toss gently to coat the cereal with the glaze. The cereal will start to puff up as the glaze thickens. Keep stirring for about 5 minutes, ensuring that every piece is evenly coated. The cereal should look glossy and slightly caramelized.
- Add the sea salt and stir for a minute. The salt will help balance the sweetness and enhance the chocolate’s depth. Be careful not to over‑salt; a pinch is enough. The mixture should still feel glossy and slightly thick. This step is the moment of truth where the flavor profile is finalized.
- Fold in the chocolate chips or toffee bits, making sure they’re evenly distributed. The chocolate will melt into a glossy coating that clings to each cereal piece. The toffee bits will add a buttery crunch that contrasts with the cereal’s crispness. Stir gently to avoid breaking the toffee. The mixture should look like a glossy, chocolate‑coated cereal.
- If you’re adding nuts, fold them in now. The nuts add a nutty crunch that complements the cereal’s texture. They should be evenly coated with the glaze to prevent them from sinking to the bottom. Stir gently to keep the nuts intact. The final mixture should have a balanced distribution of cereal, chocolate, toffee, and nuts.
- Transfer the mixture to a parchment‑lined baking sheet or a large, shallow dish. Spread it out in an even layer to allow the glaze to set properly. The edges should start to pull away from the parchment as the glaze thickens. Let it cool at room temperature for 20-30 minutes. The glaze will harden into a crisp, glossy coating.
- Once the mix has cooled and the glaze has set, break it into bite‑sized pieces. Store the mix in an airtight container at room temperature for up to a week. The crispy texture will stay intact as long as the container remains sealed. For longer storage, keep it in the freezer for up to a month. When you’re ready to enjoy it again, let it thaw at room temperature for 15 minutes to restore its crunch.
That's it — you did it. But hold on, I've got a few more tricks that'll take this to another level...
Insider Tricks for Flawless Results
The Temperature Rule Nobody Follows
Many people think any medium heat will work, but the key is to keep the heat low after adding the sugars. A high temperature can cause the glaze to seize and crystallize, leaving a gritty texture. By maintaining a gentle simmer, you allow the sugars to dissolve evenly and create a silky coating. I once tried a quick high‑heat method and ended up with a sticky mess that didn’t set properly. The lesson? Patience and low heat are the secret to a flawless glaze.
Why Your Nose Knows Best
The aroma of caramelized sugar is a reliable indicator of the glaze’s readiness. When the mixture turns a golden amber and emits a sweet, buttery scent, it’s ready for the cereals. If you’re unsure, let the mixture sit for a minute; the aroma will intensify, signaling that the sugars have fully melted. Trust your nose; it’s the best judge of sweetness and doneness.
The 5‑Minute Rest That Changes Everything
After spreading the mix on parchment, let it rest for exactly five minutes before breaking it into pieces. During this brief pause, the glaze will set into a crisp shell. If you break it immediately, the coating will be sticky and uneven. The five‑minute rest ensures a perfect crunch and an even distribution of chocolate and toffee. I’ve found that this simple pause makes the difference between a good snack and a great snack.
The Right Pan Matters
Using a heavy‑bottomed skillet ensures even heat distribution, preventing hot spots that can burn the glaze. A non‑stick pan can be used, but a stainless steel or cast iron pan gives the best results. If you’re using a non‑stick pan, watch for the glaze to stick and stir more frequently. The right pan reduces the risk of burning and ensures a smooth, glossy coating.
The Sweet‑Salt Balance
A pinch of sea salt is the difference between a bland and a balanced snack. Too little salt and the sweetness will dominate; too much and the chocolate will taste bitter. I’ve experimented with different salts, and sea salt gives the most nuanced flavor profile. If you’re on a low‑sodium diet, you can reduce the amount, but remember the flavor balance will shift.
Creative Twists and Variations
This recipe is a playground. Here are some of my favorite ways to switch things up:
Spicy Sriracha Surprise
Add a teaspoon of sriracha to the glaze for a spicy kick that pairs surprisingly well with the sweet chocolate. The heat cuts through the richness, creating a flavor profile that’s both sweet and savory. This variation is perfect for parties where you want to impress your guests with a bold twist.
Almond Joy Edition
Swap out the chocolate chips for shredded coconut and add sliced almonds for a tropical vibe. The coconut adds a chewy texture, while the almonds give a nutty crunch. This version feels like a dessert bar, making it a great treat for summer gatherings.
Pumpkin Spice Palate
Incorporate a pinch of pumpkin pie spice into the glaze for a warm, autumnal flavor. The spice adds depth and a subtle earthy note that complements the chocolate. This twist is ideal for Thanksgiving or Halloween parties.
Dark Chocolate Delight
Use a high‑cacao dark chocolate instead of milk chocolate for a richer, more intense flavor. The bitterness balances the sweetness and gives the mix a sophisticated profile. This version is great for chocolate lovers who prefer a more complex taste.
Nut-Free Bliss
Omit the nuts entirely for a nut‑free version that still delivers on crunch and flavor. The cereal and toffee bits provide enough texture, while the chocolate and glaze keep it indulgent. This variation is ideal for guests with nut allergies.
Storing and Bringing It Back to Life
Fridge Storage
Store the mix in an airtight container at room temperature for up to a week. The airtight seal prevents moisture from softening the glaze, keeping the crunch intact. Avoid storing in a humid kitchen; if the air feels damp, use a desiccant packet to keep the mix crisp. Label the container with the date so you can track freshness.
Freezer Friendly
For longer storage, place the mix in a freezer‑safe bag or container. Freeze for up to a month; the glaze will remain crisp when thawed. To thaw, let the mix sit at room temperature for 15 minutes; this allows the glaze to soften just enough for a satisfying crunch. Freezing also helps prevent the chocolate from seizing and keeps the mix fresh.
Best Reheating Method
If the mix has lost its crunch, a quick reheating in a 350°F oven for 5 minutes will restore it. Place the mix on a parchment‑lined baking sheet and watch it crisp up. Add a tiny splash of water before reheating if the glaze feels too dry; the steam will bring back the glossy sheen. After reheating, let it cool for a minute before serving to avoid burning your mouth.