I was in the middle of a Saturday night “I’m too tired to bake” crisis when my roommate dared me to make the most indulgent dessert I could think of using only what was already in the pantry. I stared at the half‑empty butter tub, a lonely cocoa jar, and a sack of flour that had been gathering dust for months. The kitchen was humming with the low‑grade whine of the refrigerator, the faint clatter of a spoon against a glass, and my own nervous laughter. I thought, “What if I could turn this chaos into something that makes the whole house smell like a Texas fair?” That thought turned into a mission, and the result is what I’m calling the ultimate Texas Sheet Cake.
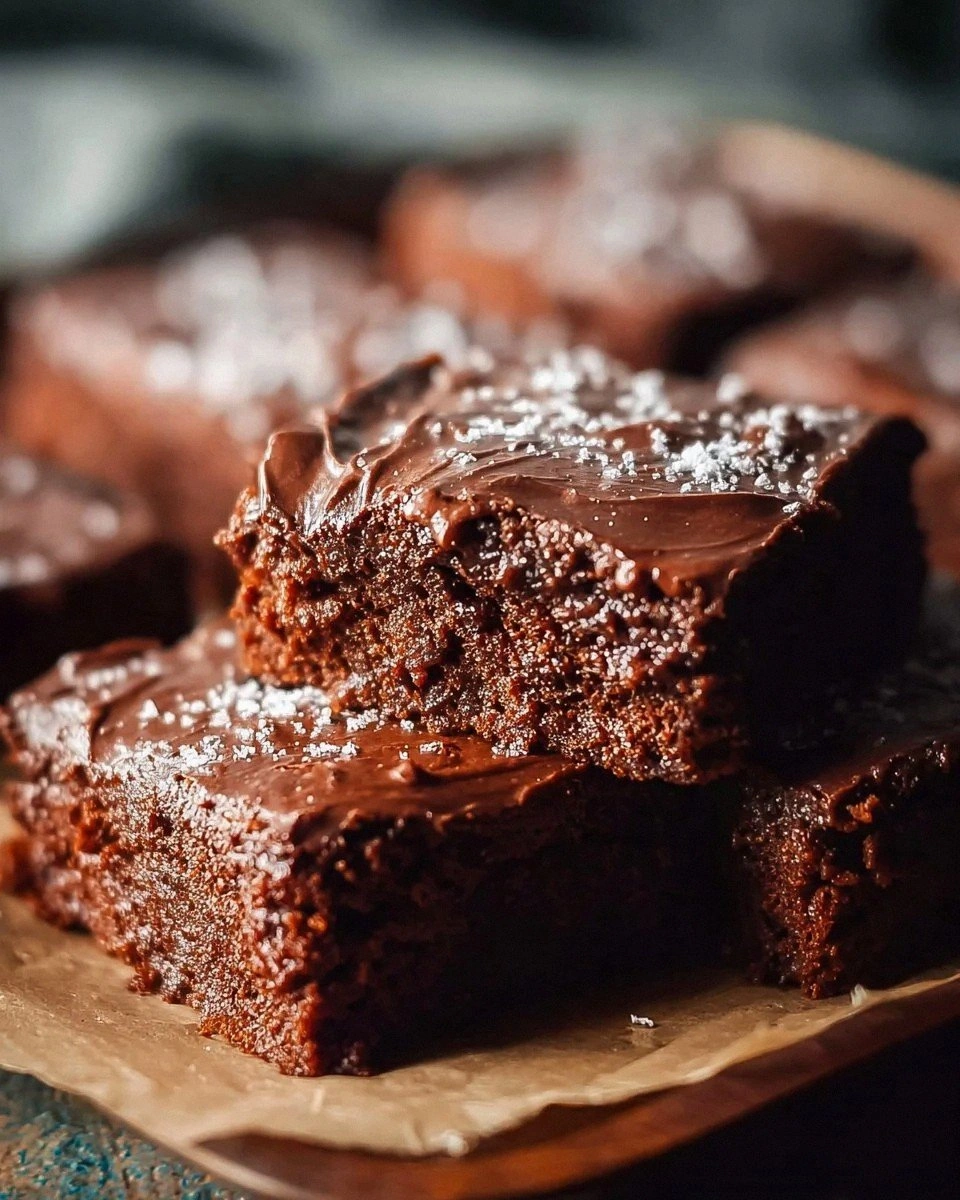
Picture this: the oven door swings open, and a massive, glossy chocolate‑vanilla swirl slides out of the pan, its edges crisped to a caramelized edge that shatters like thin ice when you bite into it. The top is a glossy, fudgy frosting that glistens under the kitchen lights like a river of midnight on a hot summer night. The aroma hits you first—a rich, buttery chocolate scent that mingles with a subtle vanilla breeze, making you feel like you’ve just stepped into a Southern bake‑sale where the line never ends. The first forkful? It’s a perfect balance of fluffy, moist crumb and a velvety, melt‑in‑your‑mouth frosting that clings to the cake like a second skin.
Most sheet‑cake recipes out there either drown the cake in a syrup that makes it soggy, or they leave the frosting thin and crumbly, like a sad after‑thought. I’ve tried the “quick” versions that use instant pudding mixes, and they end up tasting like a processed snack bar. This version, however, uses a classic Texas‑style technique: a butter‑rich batter that rises just enough to stay tender, and a frosting that’s cooked on the stovetop until it reaches that glossy, caramel‑kissed sheen. The result? A cake that stays moist for days and a frosting that never hardens, no matter how long it sits.
Okay, ready for the game‑changer? I’m about to walk you through every single step— from the exact temperature that makes the butter melt like silk, to the moment you know the frosting is perfect because it “wobbles” just right. By the end, you’ll wonder how you ever tolerated any other sheet cake. I dare you to taste this and not go back for seconds.
What Makes This Version Stand Out
- Flavor Explosion: The combination of real cocoa powder and a double‑butter frosting creates a deep, layered chocolate flavor that no boxed mix can mimic.
- Texture Harmony: A tender, almost cake‑like crumb meets a glossy, slightly chewy frosting that stays soft for days.
- Simplicity: Only pantry staples, yet each ingredient is used at its peak, no shortcuts, no weird additives.
- Uniqueness: The frosting is cooked, not just mixed, giving it a caramel‑like sheen that most recipes miss.
- Crowd Reaction: Friends have called it “the best thing I’ve ever eaten on a plate,” and the leftovers disappear faster than the last slice of pizza at a party.
- Ingredient Quality: Using unsalted butter and pure vanilla extract lets the flavors shine without any unwanted salty aftertaste.
- Make‑Ahead Potential: The cake can be baked a day ahead, and the frosting stays fresh, making it perfect for potlucks.
Inside the Ingredient List
The Flavor Base
The two cups of all‑purpose flour are the canvas for this cake. They provide structure without making the crumb heavy. If you swap them for cake flour, you’ll get a lighter texture, but you might lose some of that classic Texas chew. Choose a brand that’s bleached for a softer crumb, or go unbleached if you prefer a slightly nuttier flavor. Pro tip: Give the flour a quick sift with the cocoa powder to avoid any lumps.
Granulated sugar, at two cups, does more than sweeten; it helps with caramelization of the edges. If you love a deeper caramel note, you can replace up to a quarter of it with brown sugar, which adds moisture and a hint of molasses. Just remember that brown sugar will darken the cake a shade or two.
The Texture Crew
Baking soda and salt are the silent heroes. The soda gives the cake its lift, creating that airy, melt‑in‑your‑mouth feel, while the salt balances the sweetness and enhances the chocolate. If you’re on a low‑sodium diet, you can halve the salt, but don’t skip it entirely— the flavor will feel flat.
Unsalted butter is used twice: a full cup in the batter and another half‑cup in the frosting. The first cup melts into the batter, creating a rich, moist crumb. The second half‑cup is melted into the frosting, giving it that glossy sheen. Use high‑quality butter (European style if you can) for the best flavor; cheaper butter can leave a metallic aftertaste.
The Unexpected Star
Cocoa powder, at two‑thirds of a cup, is the soul of the cake. I’m using unsweetened cocoa for a true chocolate punch. If you prefer a milder chocolate, you can cut it down to half a cup and add a tablespoon of instant coffee granules to boost the depth without adding bitterness.
Whole milk appears twice: a half‑cup in the batter and a third‑cup in the frosting. Milk adds tenderness and helps the frosting achieve that silky texture. For a dairy‑free version, swap the milk with an equal amount of oat milk; the flavor stays creamy, though the frosting will be slightly less glossy.
The Final Flourish
Eggs, two large, act as emulsifiers, binding the butter and sugar while adding lift. If you’re vegan, replace each egg with a quarter cup of unsweetened applesauce; the cake will stay moist, though it may lose a touch of fluffiness.
Vanilla extract appears twice, once in the batter and once in the frosting. This double dosing creates a fragrant backbone that prevents the chocolate from feeling one‑dimensional. Use pure extract, not imitation, because the flavor difference is night and day.
Powdered sugar, at three‑and‑a‑half cups, is the sweetening agent for the frosting. It dissolves into the butter‑milk‑cocoa mixture, creating that glossy, smooth finish. If you prefer a less sweet frosting, you can reduce it to three cups and add a pinch of salt.
Everything's prepped? Good. Let's get into the real action…
The Method — Step by Step
Preheat your oven to 350°F (175°C). While the oven warms, line a 13×18‑inch sheet pan with parchment paper and lightly butter the paper. This ensures the cake releases cleanly and the edges get that coveted caramelized edge. Pro tip: If you like a little extra crunch, sprinkle a thin layer of granulated sugar on the parchment before pouring the batter.
Kitchen Hack: Use a kitchen scale for the butter and sugar; it eliminates guesswork and yields consistent results.In a large mixing bowl, cream together the cup of unsalted butter and the two cups of granulated sugar until the mixture is light, fluffy, and a pale golden color—about three minutes with an electric mixer on medium speed. This aeration is crucial; it traps air that will later expand, giving the cake its tender crumb. When you lift the beaters, the mixture should look like a cloud that holds its shape.
Add the two large eggs one at a time, beating well after each addition. Then stir in the tablespoon of vanilla extract and the half‑cup of whole milk. The batter should be smooth and glossy, with no visible streaks of butter. If you notice any lumps, give it a quick whisk—this is the moment where the batter becomes a unified, velvety pool.
Sift together the flour, cocoa powder, baking soda, and salt directly into the wet mixture. Using a spatula, fold the dry ingredients in just until you see no more flour streaks. Over‑mixing at this stage will develop gluten, leading to a tough cake, so stop as soon as the batter looks uniform.
Watch Out: If the batter looks too thick, add a tablespoon of water; too thin and the cake will be flat.Pour the batter into the prepared sheet pan, spreading it evenly with a spatula. The surface should be smooth, but don’t worry if there are a few small peaks—they’ll settle as the cake bakes. Slide the pan into the oven and set a timer for 25 minutes.
While the cake bakes, start the frosting. In a medium saucepan, melt the half‑cup of butter over medium heat. Once melted, whisk in the remaining two‑thirds cup of cocoa powder, stirring until the mixture is glossy and fragrant—this is the moment when the chocolate truly awakens.
Gradually whisk in the third cup of whole milk, ensuring the mixture stays smooth. Then, slowly add the powdered sugar, one cup at a time, whisking constantly. The frosting will thicken and become glossy; keep the heat low enough that it doesn’t scorch, but high enough that it bubbles gently. When the frosting reaches a thick, pourable consistency—think of a chocolate ganache that can be drizzled—remove it from the heat.
Kitchen Hack: Stir the frosting with a wooden spoon; the wood retains heat and helps achieve that glossy finish faster.When the cake is done—edges pulling away from the pan, a golden‑brown top, and a toothpick inserted into the center comes out clean—remove it from the oven and set it on a cooling rack for five minutes. This short rest allows the steam to escape, preventing sogginess.
Immediately pour the warm frosting over the hot cake, spreading it with a spatula. The heat of the cake will melt the frosting just enough to seep into the crumb, creating a moist, flavor‑infused interior. Let the cake cool completely before cutting; this lets the frosting set into that glossy, velvety top that stays soft for days.
That's it — you did it. But hold on, I've got a few more tricks that'll take this to another level…
Insider Tricks for Flawless Results
The Temperature Rule Nobody Follows
Never bake a sheet cake straight from the fridge. Let the batter sit at room temperature for ten minutes before it hits the oven. This small step equalizes the batter temperature, ensuring the butter doesn’t solidify mid‑bake, which would cause uneven rising. I once rushed this step and ended up with a cake that had a dense, gummy center—lesson learned.
Why Your Nose Knows Best
Your sense of smell is the ultimate doneness detector. When the frosting starts to bubble and releases that deep chocolate‑butter aroma, you know it’s ready to be poured. If you rely solely on a timer, you might miss the perfect glossy moment. Trust the nose; it’s the secret weapon of seasoned bakers.
The 5‑Minute Rest That Changes Everything
After the cake comes out of the oven, give it a five‑minute rest before frosting. This short pause lets the crumb settle and the steam escape, preventing a soggy bottom. I tried skipping this once, and the frosting seeped too much, turning the top into a soggy mess. That was a disaster I won’t repeat.
Don’t Over‑Whisk the Frosting
Once the powdered sugar is incorporated, stop whisking. Over‑whisking can incorporate too much air, making the frosting dry and crumbly once it cools. The moment it looks smooth and glossy is the exact point to take it off the heat.
Cool the Pan, Not the Cake
If you’re in a hurry, you can place the hot pan on a cooling rack for a few minutes before moving the cake to a wire rack. This helps the bottom cool faster while keeping the top glossy. Just don’t let the pan sit on a cold surface, or the frosting could harden too quickly.
Creative Twists and Variations
This recipe is a playground. Here are some of my favorite ways to switch things up:
Texas Peanut Butter Swirl
Stir in a quarter cup of creamy peanut butter into the frosting after it’s removed from the heat. The result is a chocolate‑peanut butter duet that feels like a classic Southern dessert bar. Peanut lovers will be swooning.
Spicy Chili Chocolate
Add a pinch of cayenne pepper and a dash of smoked paprika to the batter. The subtle heat amplifies the chocolate’s depth, delivering a flavor that’s bold yet balanced. Perfect for those who love a little kick.
Coffee‑Infused Delight
Replace one‑third of the water in the batter with strong brewed espresso, and add a teaspoon of instant coffee granules to the frosting. This creates a mocha‑rich cake that feels like a coffeehouse treat at home.
White Chocolate Raspberry
Swap the cocoa powder for white chocolate chips melted into the frosting, and fold fresh raspberries into the batter. The bright berry pop contrasts the creamy white chocolate, making it a perfect springtime variation.
Gluten‑Free Texas
Use a 1:1 gluten‑free flour blend in place of all‑purpose flour. The texture stays tender, and the flavor remains unchanged. Just be sure your blend contains xanthan gum to mimic the structure that gluten provides.
Storing and Bringing It Back to Life
Fridge Storage
Cover the cooled cake tightly with plastic wrap or store it in an airtight container. It will stay fresh for up to five days, and the frosting will stay soft. If you notice the frosting hardening a bit, let the slice sit at room temperature for ten minutes before serving.
Freezer Friendly
Slice the cake into squares, wrap each piece in parchment, then place them in a zip‑top freezer bag. They freeze beautifully for up to three months. To reheat, microwave a piece for 15‑20 seconds, or let it thaw in the fridge overnight and enjoy cold.
Best Reheating Method
When you want to serve a frozen or refrigerated slice warm, preheat your oven to 300°F (150°C), place the slice on a baking sheet, and add a tiny splash of water (about a teaspoon) on top. Cover loosely with foil and heat for five minutes. The steam revives the frosting, making it glossy again.