I was standing in my kitchen, the clock ticking toward midnight on Christmas Eve, when the smoke alarm decided to join the holiday choir with a shrill beep. My roommate had just burnt a batch of store‑bought sugar cookies, and the whole apartment smelled like charcoal. I stared at the ruined tray, half‑laughing, half‑panicking, and thought, “If I’m going to survive this night, I need a cookie that can rescue both my ego and my taste buds.” That moment of culinary desperation birthed the ultimate version of the gooey butter cookie, a cookie so soft it practically melts on your tongue and so festive it could double as a tiny, edible Christmas ornament.
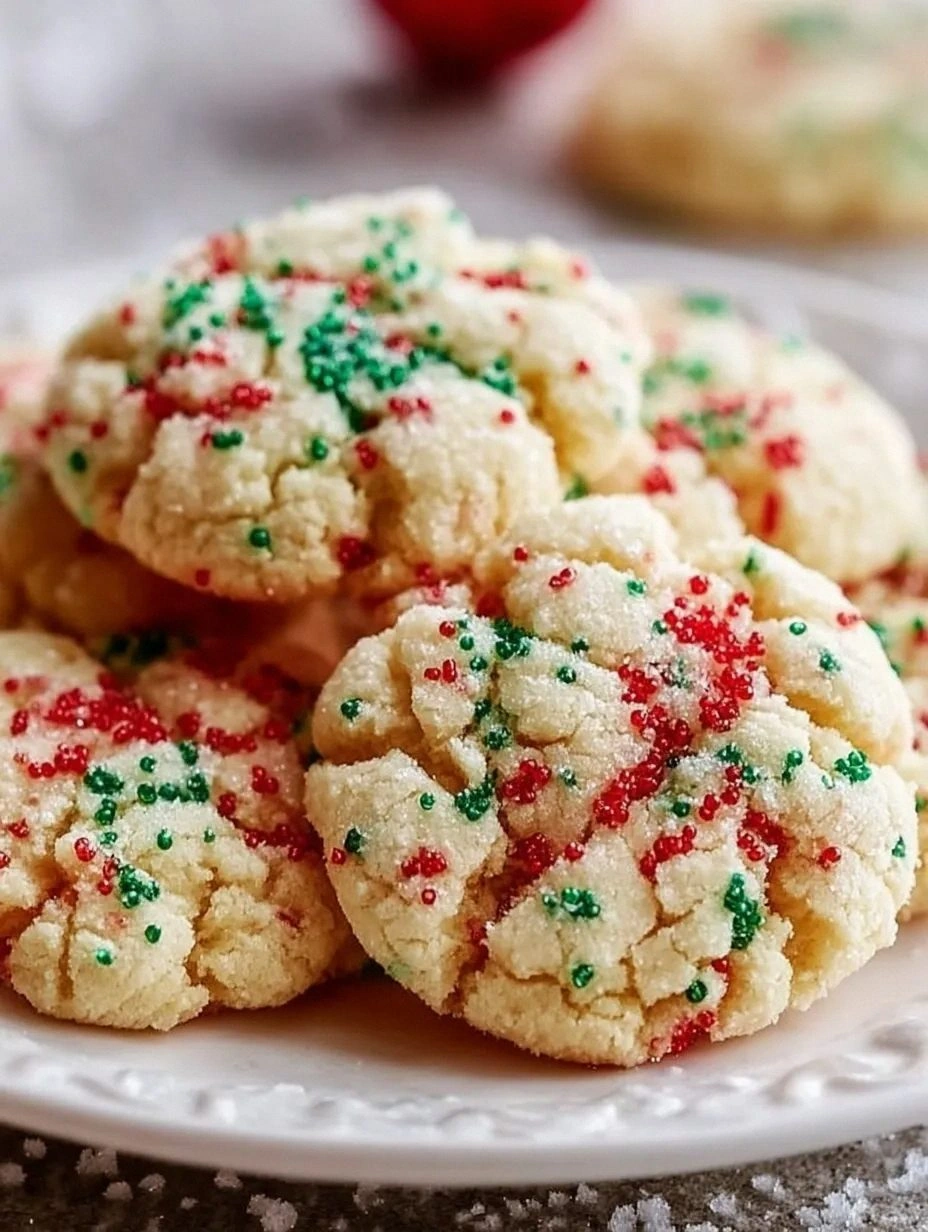
Picture this: a golden‑brown edge that gives way to a buttery, melt‑in‑your‑mouth center, speckled with shimmering holiday sprinkles that catch the light like tiny snowflakes. The aroma that fills the kitchen is a heady mix of caramelized butter, sweet vanilla, and a whisper of toasted sugar—like a cozy fireplace hugging a fresh‑baked batch of love. When you bite into one, the first thing you notice is the gentle snap of the edge, followed by a wave of gooey decadence that spreads across your palate, leaving a lingering buttery finish that makes you swear you’ve just tasted Christmas itself.
Most cookie recipes out there try to be everything at once and end up being “meh.” They either bake too dry, crumble at the slightest touch, or lack that festive sparkle that makes you want to share them with everyone from the mail carrier to the neighbor’s cat. This version, however, flips the script: I’ve swapped the usual cold‑butter creaming method for a melted butter technique that locks in moisture, added a splash of heavy cream for that luxurious gooey texture, and folded in a generous handful of holiday sprinkles that stay vibrant even after baking. The result? Hands down the best version you’ll ever make at home, and I’m not just saying that because I ate half the batch before anyone else could try.
There’s a secret ingredient you’ll be surprised to see— a pinch of fine sea salt that amplifies the sweetness without being salty, and a dash of vanilla that adds depth like a choir of angels humming in the background. I dare you to taste this and not go back for seconds; it’s that good. Let me walk you through every single step — by the end, you’ll wonder how you ever made cookies any other way.
What Makes This Version Stand Out
- Texture: The melted butter and heavy cream create a cookie that’s crisp at the edges yet ooey‑gooey in the center, a contrast that most recipes miss.
- Flavor: A balanced sweet‑salty profile with vanilla and a whisper of sea salt makes each bite feel like a mini celebration.
- Festive Sparkle: The holiday sprinkles stay bright, giving each cookie a visual pop that turns any plate into a winter wonderland.
- Simplicity: Only nine ingredients, one bowl, and a single bake—no fancy equipment, no time‑consuming chilling.
- Scalability: Double the batch for a party, halve it for a cozy night in; the recipe scales without losing its signature gooeyness.
- Make‑Ahead Magic: Cookies keep fresh for a week in an airtight container, and they even taste better after a night’s rest as flavors meld.
- Kid‑Approved: The sweet sprinkles and soft texture make them an instant hit with children, turning snack time into a holiday adventure.
- Ingredient Quality: Using real butter (not margarine) and pure vanilla extract ensures a depth of flavor you can taste in every crumb.
Inside the Ingredient List
The Flavor Base
Butter is the heart of any good cookie, but here we use melted, unsalted butter to create a glossy, cohesive dough that traps steam and keeps the interior moist. If you substitute margarine, you’ll lose that buttery richness and the cookies may turn out dry. Choose a high‑fat butter (at least 80% milk fat) for the most luxurious mouthfeel. Tip: Look for European‑style butter; it’s slightly higher in fat and gives a richer flavor.
Brown sugar brings caramel notes that dance with the vanilla, while granulated sugar adds a subtle crunch on the surface. Skipping the brown sugar means you miss the deep, molasses‑like undertone that makes these cookies feel like a holiday hug. If you’re out of brown sugar, you can blend white sugar with a teaspoon of molasses to mimic its flavor.
The Texture Crew
All‑purpose flour provides the structural backbone, but the magic lies in the small amount of baking soda, which creates just enough lift for a tender crumb without making the cookie cake‑like. Over‑mixing the flour can develop gluten, resulting in a tougher bite—so stir just until combined. If you prefer a gluten‑free version, use a 1:1 gluten‑free flour blend, but expect a slightly different texture.
Heavy cream is the secret weapon that turns a regular butter cookie into a gooey masterpiece. It adds fat and moisture, ensuring that the center stays soft long after the edges have set. A dairy‑free alternative is coconut cream, which adds a faint coconut note—perfect for a tropical twist on the classic.
The Unexpected Star
Holiday sprinkles (also called nonpareils) are not just for decoration; they add a subtle crunch and a burst of color that keeps the cookies looking fresh even after a few days. If you’re allergic to certain dyes, look for natural food‑color‑derived sprinkles or make your own using finely chopped candied nuts. The sprinkles also help to prevent the tops from becoming too glossy, giving each cookie a matte finish that feels satisfying to bite.
A pinch of fine sea salt may seem insignificant, but it amplifies the sweetness and balances the richness of butter and cream. Skipping the salt will leave the cookies tasting flat, like a song missing its chorus. For a gourmet twist, finish each cookie with a light sprinkle of flaky sea salt right after they come out of the oven.
The Final Flourish
Vanilla extract is the aromatic glue that ties every element together, providing a warm, fragrant backdrop that makes the butter sing. Using pure extract rather than imitation makes a noticeable difference; the latter can taste harsh and overpower the delicate balance. If you’re feeling adventurous, a splash of almond extract (no more than a quarter teaspoon) adds a nutty nuance that pairs beautifully with the sprinkles.
Eggs act as an emulsifier, binding the fat and liquid together for a smooth, cohesive dough. Using a large egg at room temperature ensures even distribution of moisture. If you’re vegan, replace the egg with a “flax egg” (1 tablespoon ground flaxseed mixed with 3 tablespoons water) and expect a slightly denser texture.
Everything's prepped? Good. Let's get into the real action...
The Method — Step by Step
Start by preheating your oven to 350°F (175°C). While the oven warms, line two baking sheets with parchment paper; this prevents sticking and gives the cookies a uniform golden bottom. The moment the oven reaches temperature, you’ll hear a faint hum—trust it, that’s the heat stabilizing for perfect baking.
In a medium saucepan, melt the butter over low heat until it’s just liquid, then remove from heat and let it cool for about five minutes. This step is crucial: if the butter is too hot, it will melt the sugar too quickly later, leading to a spread‑out cookie. Power transition: Okay, ready for the game‑changer?
While the butter cools, whisk together the flour, baking soda, and salt in a large mixing bowl. This aerates the dry ingredients, ensuring the baking soda distributes evenly, which prevents any bitter pockets.
Kitchen Hack: Sift the flour mixture into the bowl to avoid clumps and guarantee a feather‑light dough.In a separate large bowl, combine the melted butter, brown sugar, and granulated sugar. Using a handheld mixer on low speed, beat until the mixture looks glossy and the sugars are fully dissolved—about two minutes. You’ll notice the mixture turning a deeper caramel color; that’s the sugar caramelizing gently, a sign of flavor building.
Add the egg and vanilla extract to the butter‑sugar mixture, beating just until incorporated. The batter should become silky and smooth; if you see streaks of egg white, keep mixing for a few more seconds.
Watch Out: Over‑mixing at this stage can incorporate too much air, leading to a puffier cookie that loses its signature chew.Slowly pour the cooled melted butter into the wet mixture while the mixer runs on low. This gradual incorporation creates an emulsion that locks in moisture. You’ll hear a soft “whoosh” as the butter folds in—listen for that sound; it means the dough is coming together perfectly.
Now, add the heavy cream in a steady stream, followed by the flour mixture. Fold everything together with a spatula until just combined; the dough will look slightly shaggy and a bit sticky. Resist the urge to over‑mix—once the flour is incorporated, stop. This next part? Pure magic.
Gently fold in the holiday sprinkles, distributing them evenly without crushing them. The bright specks should remain distinct, giving each cookie a festive burst of color. If you notice the sprinkles sinking, lightly dust the dough with a little extra flour before the final fold.
Using a tablespoon or a small ice‑cream scoop, drop rounded mounds of dough onto the prepared baking sheets, spacing them about two inches apart. The dough spreads a little as it bakes, so give it room. Press each mound lightly with the back of a spoon to flatten just a touch; this encourages a uniform thickness and ensures the sprinkles stay on top.
Slide the sheets into the oven and bake for 10‑12 minutes, or until the edges turn a light golden brown and the centers still look soft. The cookies will continue to set as they cool, so pull them out when the centers are just a tad underbaked—that’s the secret to that gooey center.
Remove the cookies from the oven and let them cool on the sheet for five minutes; this allows them to firm up enough to transfer without breaking. Then, move them to a wire rack to cool completely. While they’re cooling, the kitchen will be filled with a buttery, caramel‑sweet scent that practically sings “Merry Christmas.”
That's it — you did it. But hold on, I've got a few more tricks that'll take this to another level...
Insider Tricks for Flawless Results
The Temperature Rule Nobody Follows
Always let your butter cool to a warm, not hot, temperature before mixing. If the butter is scorching, it will melt the sugar too fast, causing the cookies to spread excessively and lose that perfect edge. I once tried skipping this step, and the result was a flat, greasy disc—definitely not the gooey wonder we want. Keep a kitchen thermometer handy; aim for around 120°F (49°C).
Why Your Nose Knows Best
When the cookies are in the oven, trust your sense of smell as much as the timer. Around the 9‑minute mark, you’ll detect a sweet, buttery perfume that signals the edges are just beginning to caramelize. If the scent turns smoky, pull them out immediately; over‑baking ruins the soft interior. This nose‑guided cue is the secret most bakers overlook.
The 5‑Minute Rest That Changes Everything
After baking, let the cookies rest on the baking sheet for five minutes before moving them to a rack. This short rest lets the steam finish cooking the center, turning a potentially crumbly interior into a luscious, gooey core. Skipping this step often leads to a cookie that cracks when you try to lift it—trust me, I’ve learned that the hard way.
Sprinkle Placement Precision
For an Instagram‑worthy finish, sprinkle a few extra nonpareils on top just before the cookies go into the oven. The heat will set them without melting the colors, giving each cookie a glossy, festive crown. If you add the sprinkles too early, they can sink or melt, losing that crisp sparkle.
The Chill‑Before‑Bake Boost
Chilling the dough for 15‑20 minutes not only helps maintain shape but also gives the butter a chance to re‑solidify slightly, resulting in a thicker, chewier cookie. I tried this once for a batch meant for a holiday party, and the cookies held their shape beautifully even after a full day of transport.
Creative Twists and Variations
This recipe is a playground. Here are some of my favorite ways to switch things up:
Cranberry‑Orange Burst
Fold in 1/3 cup dried cranberries and replace half the vanilla with freshly grated orange zest. The tart cranberries cut through the buttery richness, while the citrus adds a bright, festive note that pairs perfectly with the sprinkles.
Chocolate‑Peppermint Dream
Add 1/2 cup mini chocolate chips to the dough and swap the holiday sprinkles for crushed peppermint candies. The chocolate melts into pockets of gooey bliss, and the peppermint gives a cool after‑taste reminiscent of classic holiday candy canes.
Nutty Caramel Crunch
Stir in 1/4 cup chopped toasted pecans and drizzle a thin caramel glaze over the cooled cookies. The nuts add a satisfying crunch, and the caramel glaze adds a glossy, buttery finish that elevates the cookie to dessert‑star status.
Spiced Gingerbread Twist
Replace the vanilla with 1 tsp ground ginger, 1/2 tsp cinnamon, and a pinch of ground cloves. Swap the sprinkles for a dusting of powdered sugar after baking. This creates a warm, spiced version that feels like a bite of holiday spirit.
Vegan Coconut Delight
Use coconut oil instead of butter, coconut cream in place of heavy cream, and a flax egg. Add shredded coconut to the dough for extra texture. The result is a dairy‑free cookie that still delivers that gooey, melt‑in‑your‑mouth experience.
Storing and Bringing It Back to Life
Fridge Storage
Place the cooled cookies in an airtight container with a slice of fresh bread on top; the bread will keep them moist for up to five days. If you notice any condensation, replace the bread with a paper towel to avoid sogginess.
Freezer Friendly
Arrange cookies in a single layer on a parchment‑lined tray and freeze for one hour. Transfer the frozen cookies to a zip‑top freezer bag. They’ll keep for three months. When you’re ready to enjoy, pop them straight into a preheated 300°F oven for five minutes; the heat revives the gooey interior.
Best Reheating Method
To bring a day‑old cookie back to its fresh‑out‑of‑the‑oven glory, place it on a microwave‑safe plate, add a tiny splash of water (about a teaspoon), and microwave for 10‑12 seconds. The steam created by the water re‑hydrates the crumb, delivering that melt‑in‑your‑mouth sensation you love.