Picture this: I’m standing in a cramped kitchen, a bag of sweet potatoes on the counter, a stubborn friend insisting I “just make pancakes.” I’m skeptical, but the aroma of roasted sweet potato wafts from the oven, coaxing me into a culinary experiment. I pull out flour, baking powder, a whisper of salt, and a pinch of cinnamon, feeling the promise of something extraordinary. That moment of hesitation turns into a dare: I’ll prove that sweet potato pancakes can be more than a brunch side; they can be the headline act. The kitchen is alive with the crackle of the pan, the gentle hiss of butter, and the sweet scent that lingers like a memory of childhood Thanksgiving.
I’ve spent countless evenings trying to perfect the balance of sweet and savory in breakfast dishes, and every time I’ve felt like I was just scraping the surface. But when I first tasted these pancakes, the creamy interior hugged the nutty, earthy sweetness of the potato, while the buttery edges crackled like a golden sunrise. The maple drizzle added a silky, caramelized finish that made my taste buds dance. I was instantly hooked, and I knew I had to share this revelation with anyone who’s ever been disappointed by bland, over‑cooked pancakes. If you’re ready for a flavor explosion that feels like a warm hug, keep reading.
What makes this version stand out isn’t just the ingredients; it’s the technique. I use freshly mashed sweet potatoes, not canned, to preserve natural sugars and avoid any watery texture. The batter is whisked just until it’s smooth, but not over‑mixed; that subtle stiffness keeps the pancakes fluffy. I let the batter rest for five minutes, allowing the flour to hydrate fully, which creates a tender crumb. The pan is heated to a medium‑high temperature, and I use a light dusting of melted butter to ensure a crisp, caramelized crust. The result? A pancake that’s moist inside, crisp outside, and utterly irresistible.
Most pancake recipes are rushed, but this one invites patience. I dare you to taste this and not go back for seconds. I’ve been honest—I ate half the batch before anyone else got to try it. The secret? A precise ratio of sweet potato to flour, a touch of nutmeg for depth, and a generous drizzle of maple syrup that glistens like liquid gold. If you’ve ever struggled with flat, dry pancakes, you’re not alone, and I’ve got the fix. Picture yourself pulling this out of the pan, the whole kitchen smelling incredible, and the first bite feeling like a warm, comforting hug.
What Makes This Version Stand Out
Flavor: The natural sweetness of the sweet potato is complemented by the warm spices, creating a depth that’s both comforting and complex. The maple drizzle adds a glossy, caramelized finish that elevates the entire dish.
Texture: A silky interior paired with a crisp, golden exterior that shatters like thin ice when you bite into it. The batter’s slight stiffness prevents the pancakes from becoming gummy.
Ease: All you need is a blender, a skillet, and a few pantry staples. No special equipment or time‑consuming prep.
Uniqueness: The addition of nutmeg and a resting period sets this recipe apart from the usual sweet potato pancake variations.
Crowd‑Pleaser: Whether it’s a weekend brunch or a weekday breakfast, guests rave about the flavor and the wow factor.
Ingredient Quality: Using fresh, locally sourced sweet potatoes and real maple syrup ensures a superior taste profile.
Methodology: The technique of resting the batter and using melted butter for a crisp crust is a game‑changer.
Make‑Ahead Potential: The batter can be prepared ahead of time, and the pancakes can be reheated without losing their texture.
Alright, let’s break down exactly what goes into this masterpiece…
Inside the Ingredient List
The Flavor Base
Mashed Sweet Potatoes: The star of the show! They add natural sweetness and a creamy texture. When you mash them to a silky consistency, the sugar content is evenly distributed throughout the batter, preventing any dry patches. If you skip this step and use raw cubes, you’ll end up with uneven sweetness and a lumpy texture that’s hard to ignore. Swap for roasted pumpkin if you’re in the fall; it gives a similar earthy sweetness but with a slightly different profile.
All-Purpose Flour: This forms the base of the pancakes, giving them structure and fluffiness. A fine, all-purpose flour ensures a smooth batter that doesn’t clump. If you’re gluten‑sensitive, you can replace half of the flour with oat flour, but keep an eye on the batter’s consistency; it may need a splash more milk. Choosing a high‑protein flour can make the pancakes denser, so stick to the classic all‑purpose for the best lift.
Baking Powder: A must for that light, airy lift. It reacts with the acidic sweet potato and the milk to create carbon dioxide bubbles that puff the pancakes up. If you’re using a low‑sodium baking powder, you’ll need to adjust the salt accordingly to maintain flavor balance. Skipping it will result in flat, heavy pancakes that lack the desirable airy interior.
The Texture Crew
Salt: Just a pinch enhances the flavors and balances the sweetness. Salt is the unsung hero of baking; it brings out the natural sugars in the sweet potato and prevents the batter from tasting bland. Too much salt will overpower the sweetness, so keep it minimal. If you’re on a low‑sodium diet, you can reduce it to 1/2 teaspoon, but remember to adjust the maple syrup portion for extra sweetness.
Cinnamon: This warm spice adds a cozy aroma and a hint of sweetness. Cinnamon’s sweet and slightly peppery flavor pairs beautifully with the earthy sweet potato. If you prefer a spicier kick, add a pinch of cayenne pepper to the batter. Cinnamon also has antioxidant properties, giving your pancakes a healthful twist.
Nutmeg: A dash of nutmeg brings a warm, nutty flavor that complements the sweet potatoes. Nutmeg’s subtle warmth is a subtle nod to holiday baking, but it works year‑round. If you’re allergic to nutmeg, a pinch of allspice can provide a similar depth. Keep the amount small; nutmeg’s flavor is potent and can quickly overpower the dish.
The Unexpected Star
Milk: It adds moisture to the batter. You can use almond milk for a dairy‑free option, but remember to add a splash of water if the batter feels too thick. Milk also helps the baking powder activate, ensuring the pancakes rise properly. A cold glass of milk can chill the batter slightly, leading to a fluffier texture.
Large Egg: This binds the ingredients together and adds richness. The egg’s protein structure provides stability and helps the batter set as it cooks. If you’re vegan, try a flax egg (1 tablespoon ground flaxseed + 3 tablespoons water) for a similar binding effect. Eggs also add a subtle savory undertone that balances the sweet elements.
The Final Flourish
Melted Butter: It adds flavor and moisture. You can substitute coconut oil for a dairy‑free version, but be aware that coconut oil will leave a distinct flavor. Butter also contributes to the golden crust and adds a rich aroma that draws you in. The amount of butter used is crucial; too much will make the batter greasy, too little will leave the pancakes dry.
Maple Syrup: The perfect finishing touch! Drizzle it generously over your pancakes for that sweet, sticky goodness. Maple syrup’s natural sugars caramelize on the surface, creating a glossy sheen that’s impossible to resist. If you’re looking for a lower‑calorie option, a drizzle of honey can work, but the flavor profile will change slightly.
Everything’s prepped? Good. Let’s get into the real action…
The Method — Step by Step
- First, preheat your skillet over medium heat and lightly brush it with melted butter. The butter will create a non‑stick surface and give the pancakes a golden crust. Once the butter is sizzling, you’ll hear a subtle hiss that signals the pan is ready. Keep the heat steady; too high and the pancakes will burn on the outside while staying raw inside.
- While the pan is heating, combine the mashed sweet potatoes, flour, baking powder, salt, cinnamon, and nutmeg in a large bowl. Whisk until the dry ingredients are fully incorporated; you’ll notice a smooth, slightly thick batter forming. The mixture should be thick enough to hold its shape when ladled onto the skillet. If it feels too dry, add a splash of milk; if it’s too wet, add a tablespoon of flour.
- Add the milk, egg, and melted butter to the batter, and whisk until the mixture is silky and free of lumps. The egg will bind everything together, giving the pancakes a tender crumb. You’ll notice the batter’s color brightening slightly as the egg emulsifies the fats. Let the batter rest for five minutes; this allows the flour to hydrate fully, ensuring a softer texture.
- Using a 1/4‑cup measure, pour the batter onto the skillet, forming evenly sized circles. The batter should spread slightly as it hits the pan, forming a smooth surface. When the edges start to lift and you see bubbles forming on the top, it’s time to flip. This usually takes about 2‑3 minutes per side, depending on your stove.
- Flip the pancakes with a wide spatula, and cook the second side until golden brown. The inside should be warm and fluffy, and the outside should have a crisp, caramelized crust. If you’re cooking in batches, keep the finished pancakes warm in a 200°F oven while you finish the rest. This prevents them from getting cold or soggy.
- Once a batch is done, drizzle a tablespoon of maple syrup over each pancake. The syrup should pool slightly on the surface, creating a glossy glaze that enhances the flavor. The sweet syrup’s natural sugars will caramelize, giving a slight crunch when you bite into it. Let the pancakes rest for a minute before serving to allow the flavors to meld.
- Repeat steps four through six for the remaining batter. If you notice the batter thinning as you go, add a splash of milk to maintain consistency. The key is to keep each pancake’s size consistent for even cooking. Don’t rush; the pancakes will rise beautifully if you give them time.
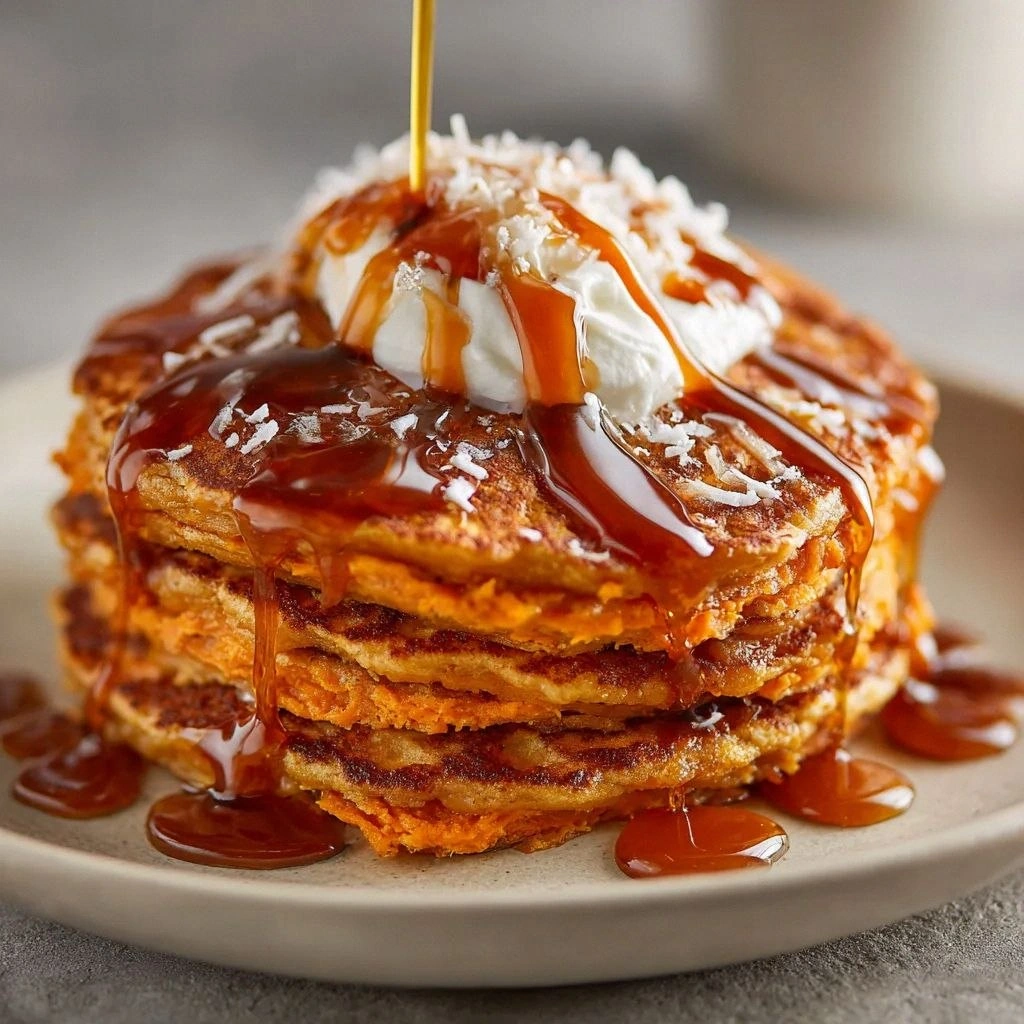
- Serve the pancakes hot, topped with extra maple syrup, a dusting of powdered sugar, or a dollop of whipped cream if you’re feeling indulgent. The contrast between the warm, fluffy pancakes and the cold, sweet syrup is a sensory delight. For an extra kick, add a sprinkle of crushed pecans or toasted coconut for texture.
- If you’re craving a savory twist, add a pinch of smoked paprika to the batter and serve with a side of bacon or a poached egg. The smoky flavor complements the sweetness of the potato, creating a balanced dish. This version is perfect for brunch or a late‑night snack.
- Remember to clean the skillet promptly after use; the melted butter can leave a film that’s hard to remove. Wipe the pan with a paper towel while it’s still warm for best results. Proper pan maintenance ensures a longer lifespan and better cooking performance.
- Enjoy your creation with a cup of coffee or a glass of fresh orange juice. The sweet, buttery pancakes pair wonderfully with a bright, citrusy drink that cuts through the richness. If you’re sharing, offer a small dish of maple syrup on the side for guests to control their sweet level.
That’s it — you did it. But hold on, I’ve got a few more tricks that will take this to another level…
Insider Tricks for Flawless Results
The Temperature Rule Nobody Follows
Many cooks think “high heat” is always best, but with sweet potato pancakes, medium‑high is key. If the heat is too low, the pancakes will be soggy; too high and they’ll burn. Keep the skillet at a steady 375°F, and test with a small drop of batter that should sizzle immediately but not char. If you’re using a cast‑iron skillet, preheat it longer; it holds heat better and gives a more even crust.
Why Your Nose Knows Best
When the batter hits the pan, you’ll hear a gentle sizzle, and the aroma of butter will fill the air. That scent is the cue that the pancakes are cooking properly. If the smell is weak, the heat is too low; if it’s too strong, the heat is too high. Trust your nose, and you’ll avoid the dreaded “burnt but raw” pancake.
The 5‑Minute Rest That Changes Everything
After whisking the batter, let it rest for five minutes. This allows the flour to absorb the liquid fully, creating a smoother batter that holds its shape. The rest also gives the baking powder time to activate, ensuring a light rise. Skipping this step can result in dense, uneven pancakes that are hard to flip.
The Sweet‑Spice Balance
Adding cinnamon and nutmeg early in the batter allows the spices to bloom fully. If you add them after the batter has rested, they might not distribute evenly, leading to pockets of intense spice. Mix the spices in with the dry ingredients to ensure an even flavor profile. A subtle spice balance can elevate the dish from ordinary to extraordinary.
Resting the Pancakes on a Rack
After cooking, place the pancakes on a wire rack instead of a plate. This prevents the bottom from becoming soggy from steam. The rack also allows the pancakes to cool slightly, preserving the crisp edges. If you’re serving immediately, you can leave them on the skillet for a minute to keep them warm.
Creative Twists and Variations
This recipe is a playground. Here are some of my favorite ways to switch things up:
Maple‑Sriracha Drizzle
Swap regular maple syrup for a maple‑sriracha blend for a sweet‑spicy kick. The heat from the sriracha complements the sweet potato’s earthiness, creating a complex flavor profile. Serve with a side of fresh cilantro for a fresh finish.
Chocolate‑Covered Sweet Potato Pancakes
Fold in a handful of dark chocolate chips into the batter before cooking. The chocolate melts slightly, giving a decadent bite. Top with a dusting of cocoa powder and a drizzle of honey for extra richness.
Vegan Edition
Replace the egg with a flax egg and use oat milk. Substitute butter with coconut oil or vegan butter. The pancakes will still be fluffy, and the coconut oil adds a subtle tropical note.
Savory Sweet Potato Pancakes
Add chopped spinach and feta cheese to the batter for a savory twist. The spinach adds a green pop of color, while feta brings brininess that balances the sweetness. Serve with a dollop of Greek yogurt for a creamy finish.
Nutty Crunch
Stir in chopped pecans or walnuts before cooking. The nuts add a satisfying crunch and a nutty flavor that pairs well with the sweet potato. Toast the nuts lightly beforehand for an extra toasty note.
Holiday Spice
Replace cinnamon with pumpkin pie spice for a holiday vibe. Add a splash of orange zest to the batter for a bright, citrusy aroma. Serve with a side of whipped cream and a dusting of nutmeg for a festive touch.
Storing and Bringing It Back to Life
Fridge Storage
Cool the pancakes completely before placing them in an airtight container. Store in the refrigerator for up to three days. When ready to serve, reheat in a skillet over low heat, adding a splash of milk to keep them moist.
Freezer Friendly
Lay the pancakes flat on a parchment paper sheet, then stack them with parchment sheets in between. Freeze for up to two months. To thaw, leave at room temperature for 30 minutes, then reheat in a toaster or skillet.
Best Reheating Method
Reheat the pancakes in a skillet with a light drizzle of butter or a splash of water. The water creates steam that helps the pancakes stay soft. Warm them to 165°F, and serve immediately with fresh maple syrup.