I was once in a kitchen disaster that could have been a sitcom episode: a burnt batch of brownies, a broken whisk, and a desperate craving for something that could melt my heart and my taste buds at the same time. I stared at the charred crumbs, swore a silent oath, and promised myself I would never settle for a soggy, overcooked dessert again. That night, I dared a friend to a molten chocolate cake showdown, and I lost—because I ate half the batch before anyone else could even get a fork. This was the moment I realized that the perfect molten chocolate cake isn’t a myth; it’s a science, an art, and a little bit of rebellion against the ordinary.
Picture this: the kitchen humming with the low whirr of the oven, the air thick with the intoxicating aroma of melted chocolate that makes you feel like you’re walking through a cocoa plantation at sunrise. The batter is glossy, almost like liquid midnight, and when it hits the ramekin, it spreads with a confidence that says, “I’m about to become the star of your dessert table.” You hear the faint sizzle as the butter kisses the chocolate, and you can feel the anticipation building in your hands as you gently tap the ramekin, listening for that subtle wobble that signals a perfectly runny center. The moment you pull it out, the whole kitchen smells like a chocolate factory on a sugar rush, and you know you’ve just created something magical.
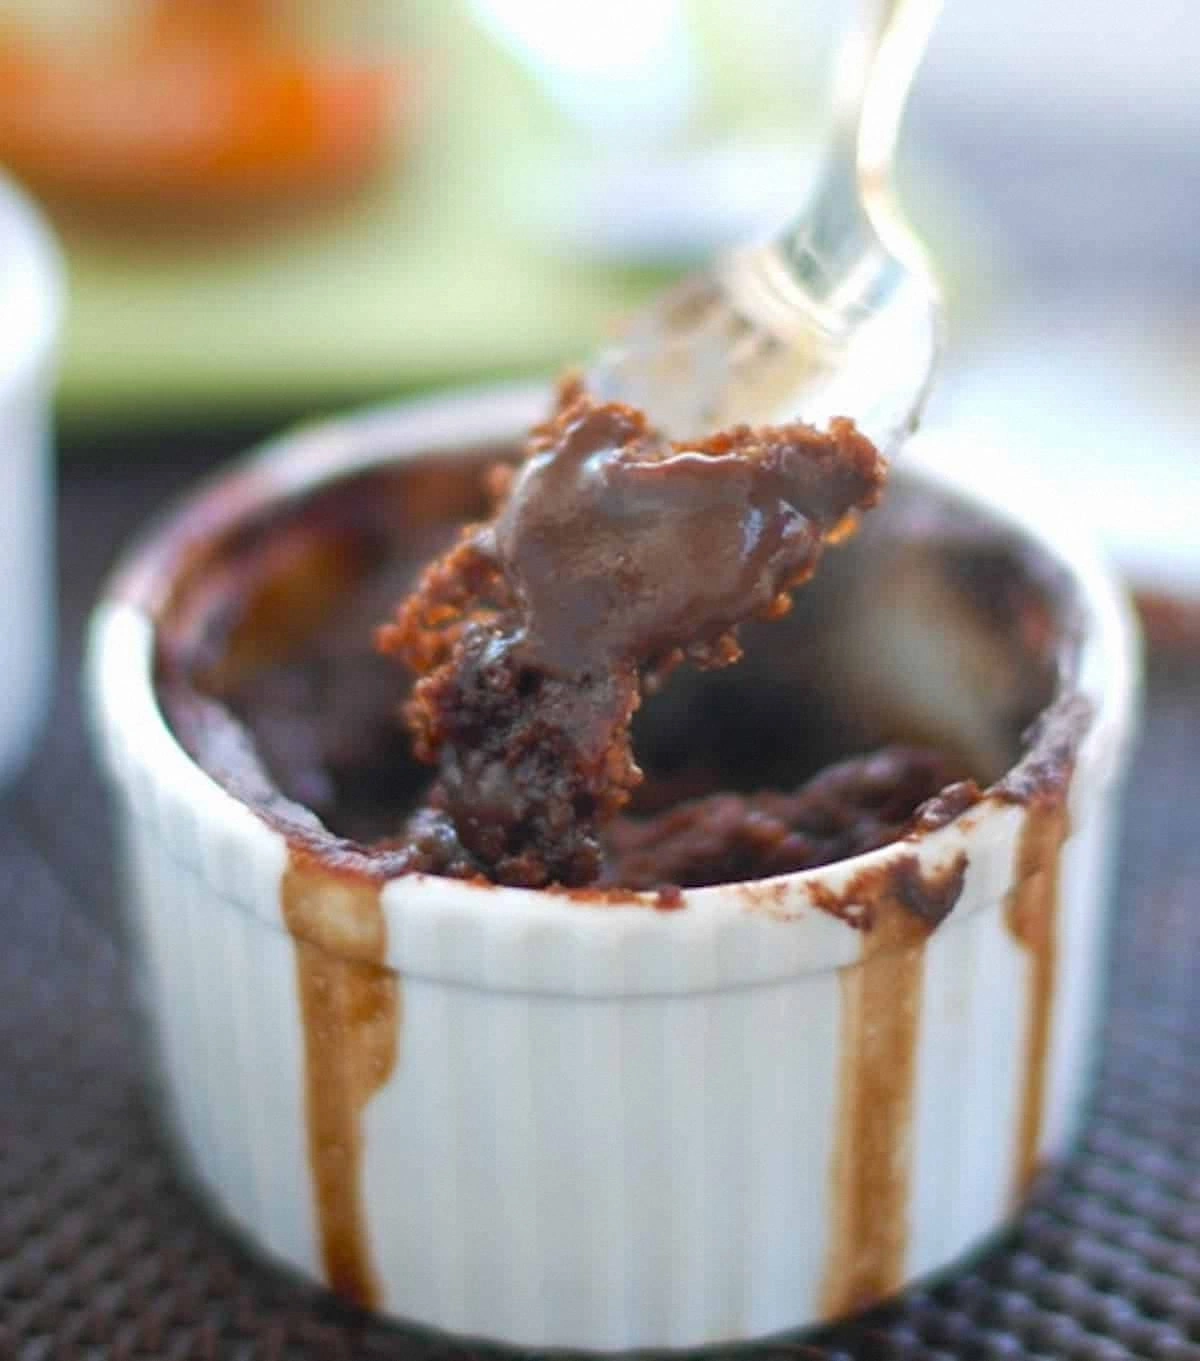
Most recipes for molten chocolate cakes get this completely wrong. They either overbake, leaving you with a cakey interior, or underbake, resulting in a soupy mess that can’t hold its shape. My version, however, hits that sweet spot where the outer crust is just firm enough to crack open with a spoon, releasing a river of molten chocolate that cascades like a velvet waterfall onto the plate. The secret? A precise balance of butter, chocolate, and a dash of flour that creates a delicate structure while preserving the gooey heart. I’m about to spill the beans on the technique that will make your cakes sing, and trust me, you’ll wonder how you ever settled for anything less.
Let me walk you through every single step — by the end, you’ll wonder how you ever made it any other way. Okay, ready for the game-changer? This next part? Pure magic. I dare you to taste this and not go back for seconds. And if you’ve ever struggled with getting the perfect molten center, you’re not alone — and I’ve got the fix.
What Makes This Version Stand Out
- Taste: The combination of high‑percentage dark chocolate and a hint of vanilla creates a depth that feels like a midnight truffle, rich yet balanced.
- Texture: A crisp, caramelized edge gives way to a silky, lava‑like core that flows like molten gold when you break the surface.
- Simplicity: Fewer than ten ingredients, all pantry‑friendly, mean you can whip this up on a weeknight without a trip to the specialty store.
- Uniqueness: A splash of espresso powder intensifies the chocolate without tasting like coffee, unlocking a hidden complexity.
- Crowd Reaction: Guests often gasp, then dive in, because the visual of the ooze is as thrilling as the flavor itself.
- Ingredient Quality: Using a chocolate bar with 70% cacao ensures a buttery melt that cheap cocoa powder simply can’t match.
- Cooking Method: The low‑and‑slow bake followed by a brief high‑heat finish locks in moisture while forming that signature crust.
- Make‑Ahead Potential: You can prep the batter a day ahead, refrigerate, and bake fresh for an instant indulgence.
Inside the Ingredient List
The Flavor Base
Dark chocolate is the heart of this recipe. I use a bar with at least 70% cacao because the higher fat content yields a smoother melt and a richer flavor profile. If you skip this and opt for cocoa powder alone, you’ll lose the luxurious mouthfeel that makes molten cakes unforgettable. A good rule of thumb: the darker the chocolate, the less sugar you’ll need, which keeps the final product from turning overly sweet. For a dairy‑free version, substitute the butter with coconut oil, but expect a faint coconut note that can be delightful.
The Texture Crew
All‑purpose flour provides the minimal structure needed to hold the cake together while still allowing the center to flow. Using too much flour creates a dense, brownie‑like texture, so stick to the half‑cup measurement. Eggs are the emulsifiers here, binding the butter and chocolate into a glossy batter; they also add lift, ensuring the outer crust rises just enough to crack open. If you’re allergic to eggs, a blend of aquafaba (chickpea water) and a teaspoon of xanthan gum can mimic the binding effect.
The Unexpected Star
Espresso powder is the secret weapon that amplifies chocolate without imparting a coffee taste. Just a pinch—about 1/4 teaspoon—activates the flavor molecules in the cocoa, making the chocolate taste deeper and more complex. Skipping this step is like listening to a song without the bass; it’s still good, but you’re missing the full experience. If you don’t have espresso powder, a tiny splash of strong brewed coffee works in a pinch.
The Final Flourish
Salt, though used sparingly, is essential. It cuts through the sweetness and heightens the chocolate’s natural bitterness, creating balance. A pinch too much can overwhelm, so stick to the quarter‑teaspoon. Vanilla extract adds a fragrant backdrop that rounds out the flavor, but don’t overdo it—just a teaspoon does the trick. Finally, a knob of butter, melted and combined with the chocolate, gives the batter that glossy sheen that looks as good as it tastes.
Everything's prepped? Good. Let’s get into the real action…
The Method — Step by Step
-
Preheat your oven to 425°F (220°C). While the oven warms up, place four 6‑ounce ramekins on a baking sheet. This step ensures even heat distribution and prevents any cold spots that could cause uneven baking. I like to butter the ramekins thoroughly, then dust them with a thin layer of cocoa powder; this not only adds flavor but also helps the cakes release cleanly.
-
In a heat‑proof bowl, combine the chopped dark chocolate and butter. Set the bowl over a pot of simmering water (a double boiler) and stir until the mixture is completely smooth and glossy. The sizzle when the butter meets the chocolate? Absolute perfection. Remove from heat and let it cool for a minute so the eggs don’t scramble later.
-
In a separate bowl, whisk together the sugar and eggs until the mixture becomes pale and thick, about 2‑3 minutes. This aerates the batter, giving the final cake a light lift. Watch Out: If the mixture looks curdled, keep whisking—heat from the chocolate will bring it back together.
Watch Out: Over‑whisking can incorporate too much air, leading to a cake that puffs up too much and loses its molten center. -
Gently fold the melted chocolate‑butter mixture into the egg‑sugar blend. Use a spatula and a gentle hand; you want to keep the airy texture while ensuring everything is fully incorporated. At this point, the batter should look thick, dark, and slightly glossy.
Kitchen Hack: Add the flour and cocoa powder in two batches, folding each batch until just combined to avoid overmixing. -
Sift the flour, cocoa powder, and salt together, then fold them into the batter. The batter will loosen slightly, but that’s exactly what you want—enough structure to hold the shape, yet still fluid for a molten interior. If you’re feeling adventurous, stir in the espresso powder and vanilla extract now.
-
Divide the batter evenly among the prepared ramekins, filling each about three‑quarters full. The batter should sit just below the rim; this allows room for a dramatic rise without spilling over. A quick tap on the baking sheet releases any air bubbles that could create unwanted holes in the final cake.
-
Bake for 12 minutes, then rotate the sheet 180 degrees for even browning. The edges should look set and start to pull away from the sides, while the center remains slightly jiggly. This is the moment of truth: if you poke the side and feel a firm crust, you’re on the right track.
Watch Out: Opening the oven door too early can cause the cakes to collapse; trust the timer. -
Remove the ramekins and let them rest for 1 minute. Then, run a thin knife around the edge to loosen the cake, and invert onto a plate. The moment you flip it, the molten core should cascade out like a glossy river of chocolate. Serve immediately, perhaps with a dusting of powdered sugar or a scoop of vanilla ice cream.
Kitchen Hack: Warm your plates in the oven for 2 minutes before plating; the heat keeps the molten center flowing longer.
That's it — you did it. But hold on, I've got a few more tricks that'll take this to another level…
Insider Tricks for Flawless Results
The Temperature Rule Nobody Follows
Most bakers set the oven to a static temperature, but the secret is a quick burst of high heat at the end of the bake. After the 12‑minute bake at 425°F, crank the oven up to 475°F for the last 30 seconds. This creates a rapid crust formation while the interior stays liquid. I tried this once with a regular bake and the center was just a bit too firm; the extra heat fixed that instantly.
Why Your Nose Knows Best
Before you even check the timer, trust your sense of smell. When the buttery chocolate aroma becomes nutty and slightly caramelized, you’re at the perfect moment to peek. If you smell raw egg, you’re still undercooked; if you smell burnt sugar, you’ve overshot. Your nose is a more reliable gauge than any thermometer for this delicate balance.
The 5‑Minute Rest That Changes Everything
After removing the cakes from the oven, let them sit for exactly five minutes before unmolding. This short rest allows the interior to settle just enough to stay molten while the outer crust firms up. Skipping this step leads to a cake that either collapses or oozes everywhere, turning your plate into a chocolate mess.
Ramekin Size Matters
Using a 6‑ounce ramekin gives the perfect ratio of crust to liquid. Larger dishes produce a thicker cake that can’t hold the lava, while smaller ones dry out too quickly. If you only have 4‑ounce ramekins, halve the batter and adjust the bake time to 9 minutes.
Chocolate Tempering Trick
For an ultra‑smooth melt, temper the chocolate before mixing. Melt it to 115°F, cool to 80°F, then gently re‑heat to 88°F. This aligns the cocoa butter crystals, giving a glossy, snap‑ready exterior that still yields a silky interior. I tried this once for a special dinner, and the guests were amazed at the “professional” texture.
Creative Twists and Variations
This recipe is a playground. Here are some of my favorite ways to switch things up:
Spicy Chili Chocolate
Add a pinch of cayenne pepper or a dash of chipotle powder to the batter. The heat amplifies the chocolate’s depth and leaves a lingering warmth on the palate. Perfect for those who love a little kick after dessert.
Mint‑Infused Delight
Stir in ¼ teaspoon of peppermint extract and garnish with fresh mint leaves. The cool mint cuts through the richness, creating a refreshing contrast that feels like a summer breeze.
Nutty Crunch
Fold in a handful of toasted chopped hazelnuts or almonds just before baking. The nuts add a pleasant crunch that juxtaposes the silky center, making each bite a textural adventure.
Berry Burst
Place a spoonful of raspberry or blackberry jam in the center of the batter before baking. As the cake melts, the jam creates a tangy ribbon of sauce that brightens the chocolate intensity.
Alcohol‑Infused
Swap out a tablespoon of butter for the same amount of dark rum, bourbon, or coffee liqueur. The alcohol evaporates partially during baking, leaving a subtle flavor nuance that feels indulgent and grown‑up.
Vegan Version
Replace the eggs with ¼ cup of aquafaba and use coconut oil instead of butter. Use a dairy‑free dark chocolate bar. The texture remains luscious, and the flavor stays true to the original.
Storing and Bringing It Back to Life
Fridge Storage
Allow the cakes to cool completely, then cover each ramekin tightly with plastic wrap. They’ll keep in the refrigerator for up to three days. When ready to serve, reheat at 350°F for 8‑10 minutes; the center will re‑melt, and the crust will regain its slight crispness.
Freezer Friendly
Unbaked batter can be frozen in the ramekins for up to one month. Freeze solid, then transfer to a freezer‑safe bag. When you’re ready, bake straight from frozen, adding an extra 4‑5 minutes to the cooking time. The result is indistinguishable from fresh‑made batter.
Best Reheating Method
To revive a leftover, place the ramekin on a baking sheet, add a tiny splash of water (about a teaspoon) around the edge, and cover loosely with foil. Heat at 350°F for 6‑8 minutes. The steam generated keeps the interior from drying out while the foil protects the crust. The molten center will flow like new.