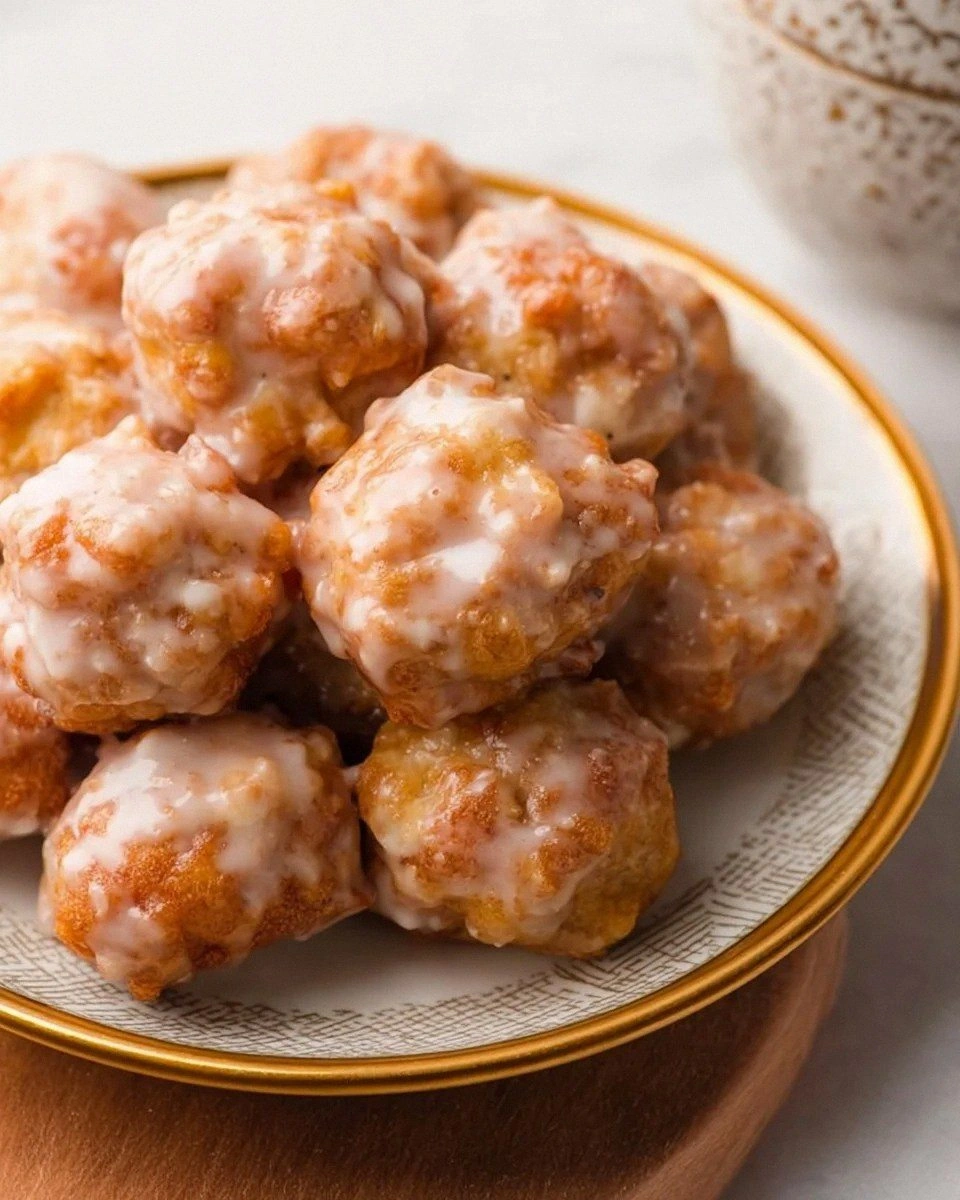
Picture this: it’s a rainy Saturday afternoon, the kind that makes you want to curl up with a blanket, a good book, and something sweet that smells like a hug from your grandma. I was stuck in a kitchen disaster zone—flour everywhere, a half‑cooked pancake that looked more like a rubber disc than breakfast, and a sudden craving for something that could turn that gloom into a celebration. I grabbed two apples, tossed them into the batter, and what happened next was nothing short of alchemy. The first bite was a revelation—crisp, caramel‑kissed edges that gave way to a soft, pillowy interior, all wrapped in a buttery, cinnamon‑spiced hug. That moment made me realize I had just stumbled upon the ultimate version of apple fritter bites, and I’m here to make sure you experience that exact magic.
Now, let’s talk senses. The moment the batter hits the hot oil, you hear a sizzle that’s practically a drumroll announcing the star of the show. The aroma of butter and cinnamon fills the kitchen, weaving through the air like a warm blanket, while the faint sweetness of apples teases your nose. When you finally pull those golden‑brown gems from the pan, they’re still steaming, their surfaces glistening with a light oil sheen that promises a perfect crunch. The first bite? A crackle that shatters like thin ice, followed by a melt‑in‑your‑mouth softness that carries a sweet‑spiced apple core, finishing with a dusting of powdered sugar that melts like snow on a warm day.
Most apple fritter recipes get this completely wrong—either they’re soggy, overly sweet, or they miss that crucial contrast between crisp and tender. I’ve tried everything from store‑bought mixes to overly complicated pastry doughs, and each time something fell flat. The secret to this version? A simple batter that balances leavening, a precise oil temperature, and a surprise ingredient that adds a buttery richness without weighing the bites down. Trust me, this is hands down the best version you’ll ever make at home, and I dare you to taste it and not go back for seconds.
What really sets this recipe apart is a tiny splash of buttermilk that reacts with the baking powder to create airy pockets, and a dash of vanilla that lifts the apple flavor into a whole new dimension. I’ll be honest—I ate half the batch before anyone else got to try it, and that’s because each bite is pure, unapologetic joy. So, buckle up, because I’m about to walk you through every single step—by the end, you’ll wonder how you ever made it any other way. Okay, ready for the game‑changer?
What Makes This Version Stand Out
- Flavor Explosion: The combination of cinnamon, nutmeg, and a hint of vanilla turns each bite into a warm, spiced celebration that sings on the palate.
- Texture Contrast: A crisp, golden crust gives way to a fluffy, apple‑laden interior, delivering that satisfying crunch‑then‑soft feel.
- Simplicity: With pantry staples and a straightforward method, you won’t need any fancy equipment—just a good skillet or deep fryer.
- Unique Ingredient: Buttermilk adds a subtle tang that cuts through the sweetness and creates airy pockets for a lighter bite.
- Crowd Reaction: These bites disappear at parties faster than you can say “one more,” making them perfect for gatherings or solo indulgence.
- Ingredient Quality: Using fresh, crisp apples and real butter elevates the flavor profile beyond the generic store‑bought mixes.
- Cooking Method: Deep‑frying at the right temperature locks in moisture while forming that irresistible crust.
- Make‑Ahead Potential: You can prep the batter ahead of time, refrigerate, and fry fresh when guests arrive for maximum freshness.
Alright, let's break down exactly what goes into this masterpiece...
Inside the Ingredient List
The Flavor Base
First up, the spice trio—cinnamon, nutmeg, and vanilla. Cinnamon brings that classic autumn warmth, while nutmeg adds a subtle earthy depth that prevents the flavor from becoming one‑dimensional. Vanilla, though often overlooked, acts like a secret liaison, rounding out the spices and enhancing the apple’s natural sweetness. If you skip the vanilla, you’ll notice a slight flatness, as if the party lost its DJ. For a dairy‑free twist, swap the vanilla extract for a splash of almond extract, but keep the quantity the same to maintain balance.
The Texture Crew
The flour and leavening agents—baking powder and baking soda—work together to create those airy pockets that make each bite feel light as a cloud. Using all‑purpose flour ensures a tender crumb, while the baking powder provides lift and the soda reacts with the buttermilk’s acidity for extra rise. If you opt for whole‑wheat flour, expect a denser bite and a nuttier flavor; just add a tablespoon of extra buttermilk to keep the batter from becoming too heavy.
The Unexpected Star
Buttermilk is the unsung hero here. Its slight tang not only balances the sweetness but also reacts with the baking soda to create carbon dioxide bubbles, giving the fritters a delicate interior. Many recipes use regular milk, which yields a heavier texture. If you’re out of buttermilk, whisk one tablespoon of lemon juice or white vinegar into a cup of milk and let it sit for five minutes—that’s a perfect stand‑in.
The Final Flourish
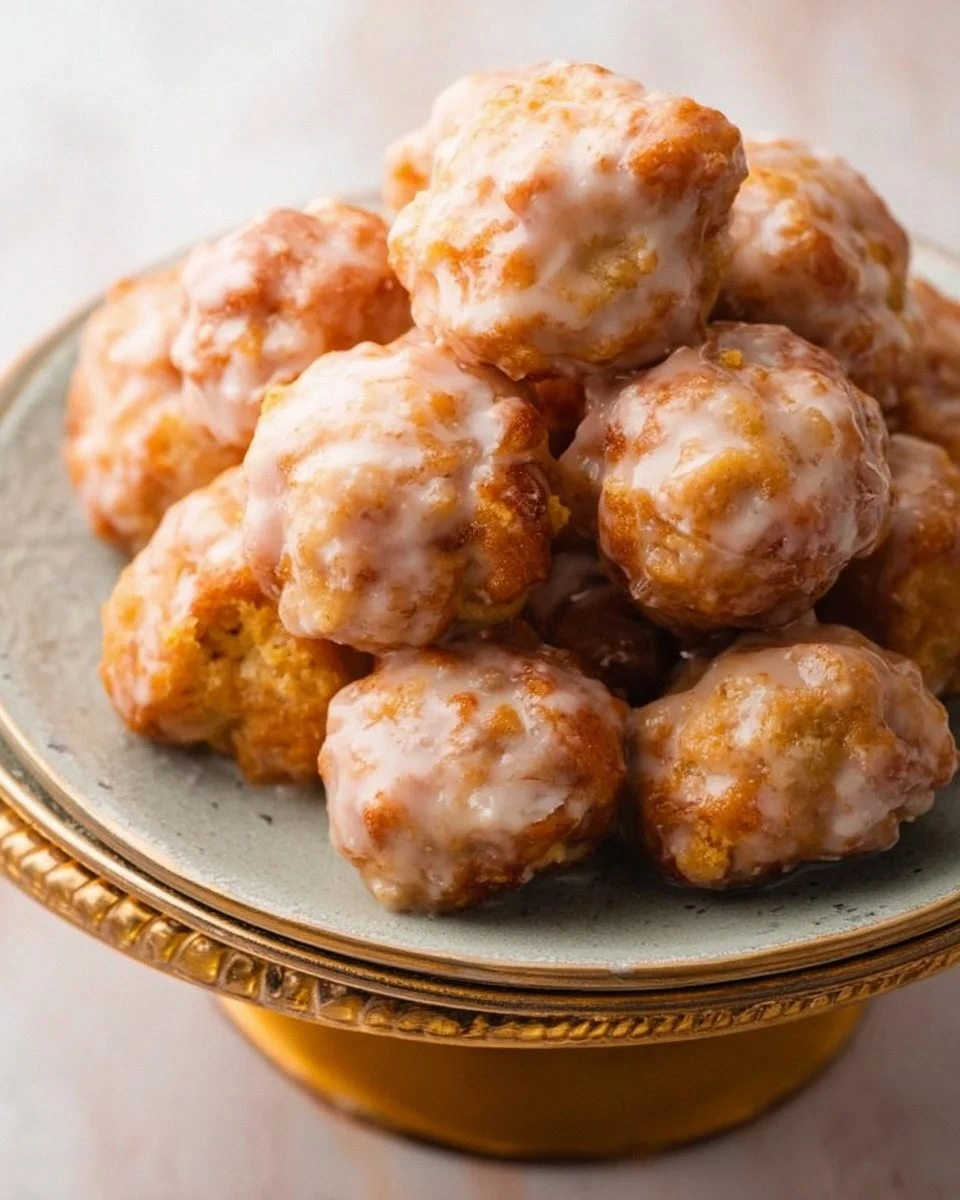
Fresh apples are the heart of this dish. I recommend a firm variety like Granny Smith or Honeycrisp; they hold their shape during frying and deliver a crisp bite that contrasts beautifully with the soft batter. The apples are diced small enough to distribute evenly but large enough to provide juicy bursts. If you prefer a sweeter profile, use Fuji apples and add a pinch more sugar. Finally, a dusting of powdered sugar right after frying adds a delicate sweet finish that melts into the warm crust.
Everything's prepped? Good. Let's get into the real action...
The Method — Step by Step
Start by heating your oil in a deep, heavy‑bottomed pot to 350°F (175°C). Use a candy thermometer for precision; if you don’t have one, drop a tiny piece of batter in—if it sizzles and rises to the surface within 2 seconds, you’re golden. This is the moment of truth, because oil that’s too hot will burn the exterior before the inside cooks, and oil that’s too cool will leave you with greasy, soggy bites.
While the oil warms, whisk together the dry ingredients: flour, baking powder, baking soda, salt, cinnamon, nutmeg, and sugar. This ensures even distribution of leavening agents and prevents clumps. I dare you to taste the dry mix now—there’s already a hint of sweet spice that promises greatness.
In a separate bowl, combine the wet ingredients: eggs, buttermilk, melted butter, vanilla, and a splash of melted butter for extra richness. Whisk until smooth, then gently fold in the diced apples. The apples should be lightly coated, which helps them stay intact during frying.
Now, create a well in the dry mixture and pour the wet batter in, stirring just until combined. Over‑mixing will develop gluten and make the fritters tough; a few lumps are perfectly fine. This is where the batter starts to look like a thick pancake batter—soft, slightly sticky, and ready for the next step.
Using a small ice‑cream scoop or a tablespoon, gently drop batter into the hot oil, spacing them about two inches apart. The batter should sizzle immediately, forming a crisp crust that pulls away from the pan within 30 seconds. Keep an eye on the color—once they turn a deep golden brown, flip them once to ensure even cooking.
Fry each batch for 3‑4 minutes total, turning once, until the exterior is a perfect amber and the interior registers 190°F (88°C) on an instant‑read thermometer. When you lift a fritter, you should see the edges pulling away from the pan—a visual cue that the crust is set and ready.
Using a slotted spoon, transfer the cooked bites to a wire rack set over a baking sheet lined with paper towels. This allows excess oil to drip away, keeping each bite crisp. While they’re still hot, dust them generously with powdered sugar; the heat will melt the sugar slightly, creating a glossy finish.
Serve the fritter bites warm, with a side of caramel sauce or a dollop of whipped cream if you’re feeling extra indulgent. Picture yourself pulling this out of the oven (or frying pot), the whole kitchen smelling incredible, and friends gathering around for that first bite. That sizzle when it hits the pan? Absolute perfection.
That’s it—you did it. But hold on, I’ve got a few more tricks that’ll take this to another level, like a quick glaze or a surprise sprinkle of toasted pecans that add a buttery crunch.
Insider Tricks for Flawless Results
The Temperature Rule Nobody Follows
Most home cooks set the oil to “medium‑high” and hope for the best. The truth? Precise temperature is everything. Keep the oil between 340°F and 360°F throughout frying; if it drops below 330°F, the batter will absorb too much oil, turning soggy. I keep a small digital thermometer on the counter and adjust the burner every few minutes. A friend once tried to skip this step and ended up with a batch that tasted like fried dough—no one wants that.
Why Your Nose Knows Best
Before you even check the color, trust your sense of smell. A buttery, nutty aroma indicates the crust is forming correctly, while a burnt smell means the oil’s too hot. This sensory cue is faster than any timer and prevents over‑cooking. If you’re ever unsure, take a tiny bite—if the interior feels doughy, give it another 30 seconds.
The 5‑Minute Rest That Changes Everything
After frying, let the bites rest on a wire rack for at least five minutes before dusting with powdered sugar. This short pause lets steam escape, preserving the crispness, while the sugar adheres better to a slightly cooled surface. I once dusted them immediately and ended up with a soggy coating that fell right off the plate.
Oil Choice Matters
Use a neutral‑tasting oil with a high smoke point—canola, peanut, or grapeseed are ideal. Olive oil adds a bitter note that clashes with the sweet spices. If you’re allergic to nuts, stick with canola; it won’t interfere with the flavor profile.
Double‑Dip for Extra Crunch
For an ultra‑crunchy exterior, dip the first-fried bites back into a thin layer of batter and fry them a second time for 30 seconds. This creates a double‑crust that shatters like thin ice when you bite into it. I tried this once at a brunch, and the reaction was priceless—people kept asking for the “secret coating.”
Creative Twists and Variations
This recipe is a playground. Here are some of my favorite ways to switch things up:
Maple‑Bacon Bliss
Swap the powdered sugar dusting for a drizzle of pure maple syrup and sprinkle crumbled crisp bacon on top. The salty‑sweet combo elevates the bites into a brunch‑worthy treat that will have everyone reaching for more.
Apple‑Cranberry Crunch
Fold in a handful of dried cranberries and a tablespoon of rolled oats into the batter. The cranberries add a tart pop, while the oats give an extra chew that mimics a granola texture—perfect for a fall snack.
Spiced Chai Infusion
Replace the cinnamon and nutmeg with a chai spice blend (cardamom, ginger, cloves, and black pepper). This gives the fritters an exotic, warm flavor profile that pairs beautifully with a side of vanilla bean ice cream.
Gluten‑Free Goodness
Use a 1:1 gluten‑free flour blend in place of all‑purpose flour, and add a teaspoon of xanthan gum to maintain structure. The result is just as fluffy, and you can serve these at a gluten‑free gathering without missing a beat.
Vegan Velvet
Swap the eggs for a flax‑egg (1 tablespoon ground flaxseed + 3 tablespoons water) and replace butter with coconut oil. Use plant‑based milk and a vegan powdered sugar for dusting. The flavor shifts slightly, but the texture remains delightfully airy.
Caramel‑Apple Drizzle
Prepare a quick caramel sauce (butter, brown sugar, heavy cream) and drizzle it over the warm bites just before serving. The caramel adds a buttery depth that makes the apple flavor sing even louder.
Storing and Bringing It Back to Life
Fridge Storage
Place cooled fritter bites in an airtight container lined with a paper towel to absorb excess moisture. They’ll stay fresh for up to three days. When ready to eat, reheat in a 350°F oven for 5‑7 minutes to revive the crispness.
Freezer Friendly
Arrange the bites on a parchment‑lined tray and freeze until solid, then transfer to a zip‑top bag. They’ll keep for up to two months. To reheat, bake straight from frozen at 375°F for 10‑12 minutes; the interior will heat through while the exterior regains its crunch.
Best Reheating Method
For the ultimate revival, lightly spray the bites with cooking oil and pop them in a hot skillet over medium heat for 2‑3 minutes per side. Add a tiny splash of water to the pan and cover briefly; the steam helps the interior stay moist while the exterior crisps up.