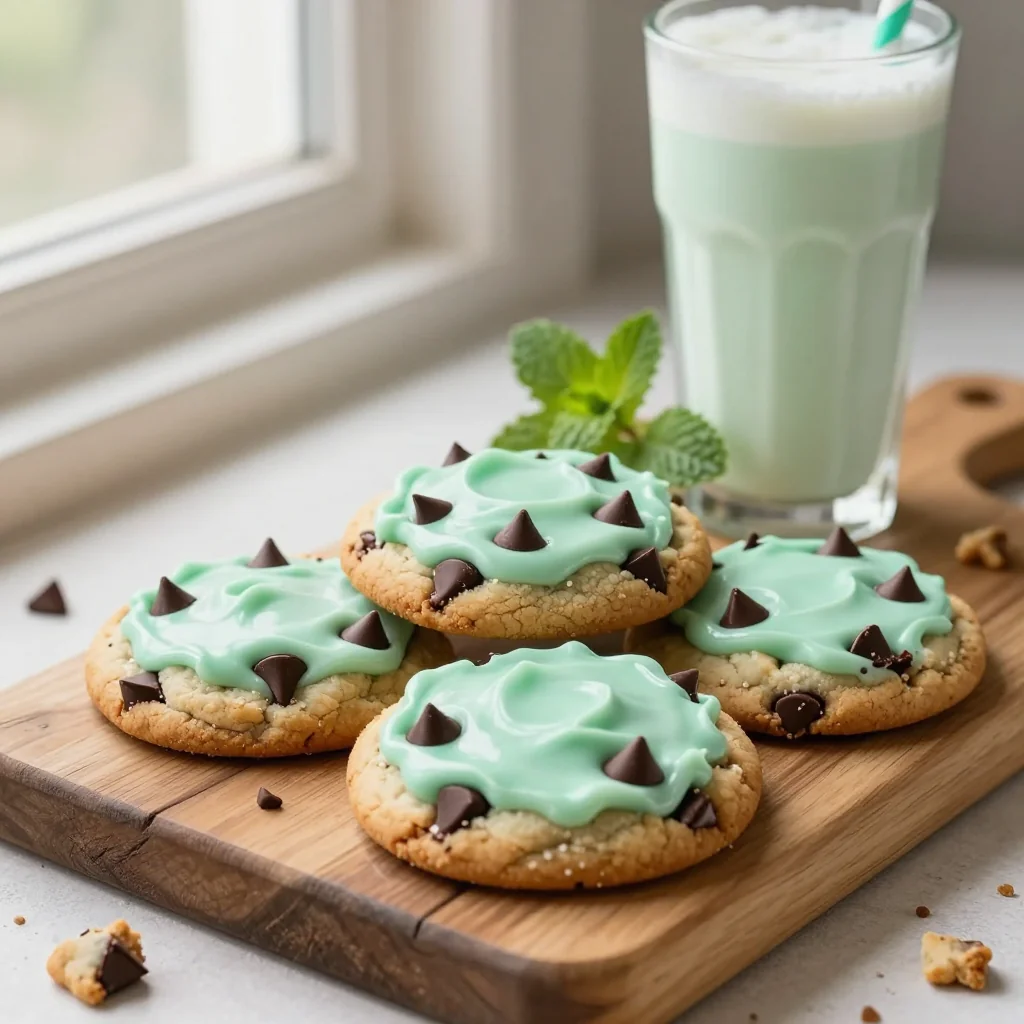
A vibrant, mint‑infused twist on the classic chocolate chip cookie that captures the spirit of a St. Patrick’s Day shake.

When I was ten, my grandmother would whisk a frothy, neon‑green shake into the kitchen on St. Patrick’s Day, and the whole house would fill with a sweet, minty perfume that felt like a celebration in a glass. I still remember the way the cool mint danced with the rich vanilla, turning an ordinary afternoon into a memory that sparkles every time I close my eyes.
The Shamrock Shake, originally a fast‑food staple, has become a cultural icon, symbolising both nostalgia and the joy of indulgence. Translating that iconic flavor into a handheld cookie was my way of preserving that magic while adding a comforting, chewy texture that makes each bite feel like a hug.
In this article, I’ll walk you through every nuance of the recipe: from selecting the freshest mint to mastering the perfect crumbly‑soft centre. You’ll learn why a dash of peppermint extract, a swirl of green food coloring, and the right balance of chocolate chips create a cookie that looks as good as it tastes.
Grab your mixing bowls, preheat the oven, and let’s embark on a flavorful adventure that will bring a burst of St. Patrick’s Day cheer to your kitchen any day of the year.
🌟 Why This Recipe Will Capture Your Heart
These cookies combine the beloved nostalgia of a classic shake with the comforting familiarity of a soft‑chewy cookie, making them perfect for celebrations or a simple afternoon treat.
- ✨ Irresistible Flavor Fusion: The bright mint pairs with dark chocolate chips, delivering a refreshing bite that never overwhelms.
- ✨ Eye‑Catching Appearance: A subtle green hue makes them instantly festive, perfect for themed parties or Instagram posts.
- ✨ Simple Ingredient List: All items are pantry staples, and you’ll find everything you need at a typical grocery store.
- ✨ Adjustable Sweetness: You control the sugar level, allowing you to make them less sweet for a more sophisticated palate.
- ✨ Perfect Texture: A crisp edge with a chewy centre, achieved by a precise balance of butter, sugar, and baking soda.
- ✨ Versatile Serving Options: Serve warm with a glass of cold milk, crumble over ice cream, or freeze for a quick snack.
🥗 Ingredients
📝 Complete Ingredient List
For the Cookie Dough:
For the Chocolate Mix‑Ins:
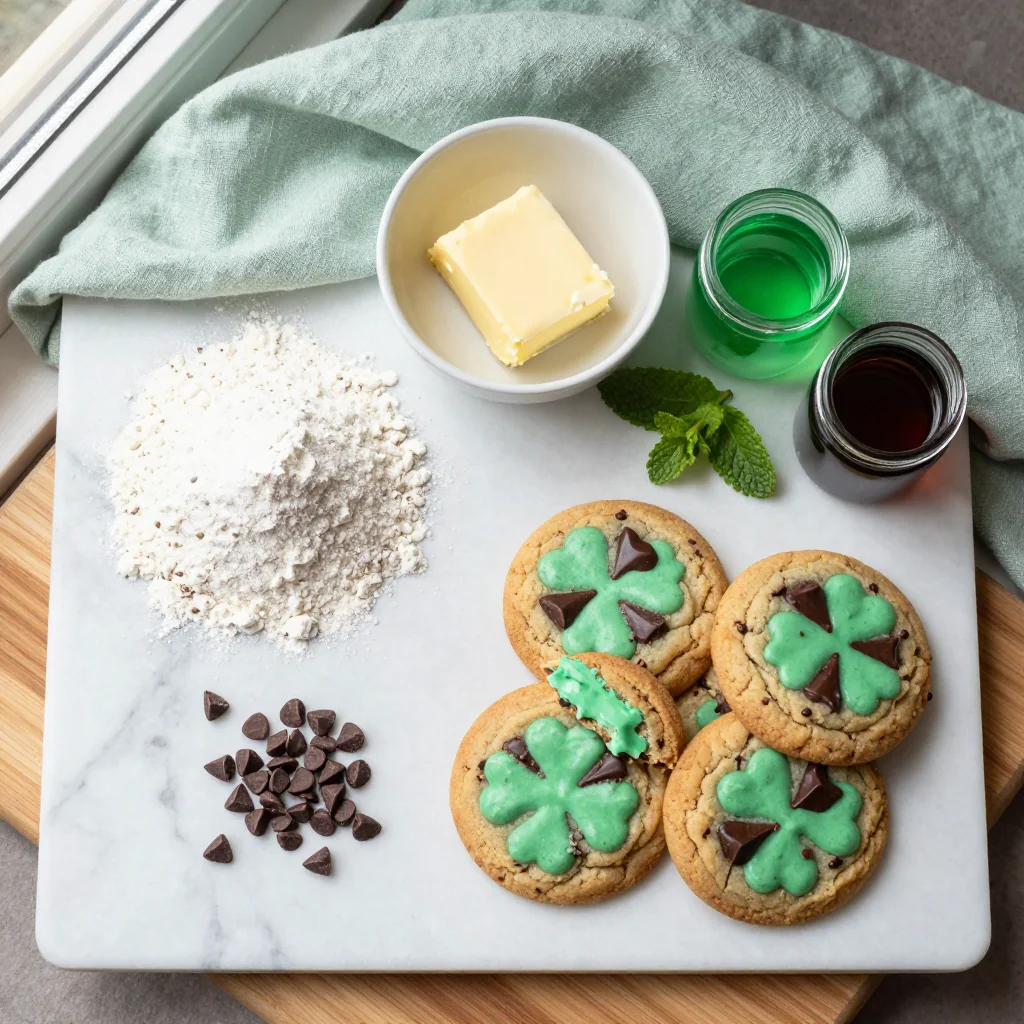
🔍 Focus on Key Ingredients
Unsalted Butter
Butter provides the rich, tender crumb that defines a good cookie. Use real butter, not margarine, and let it soften at room temperature for easy creaming with the sugars. The fat content ensures the edges crisp while the centre stays soft.
Peppermint Extract
A high‑quality peppermint extract delivers a clean, cooling sensation without bitterness. A little goes a long way—over‑extracting can make the flavor harsh, so stick to the precise amount.
Mint Chocolate Chips
These chips combine dark chocolate with real mint oil, giving you that unmistakable Shamrock Shake flavor. If you can’t find them, blend regular chocolate chips with a few drops of peppermint oil for a DIY version.
🔄 Quick Substitutions
| If you don’t have… | Use instead… |
|---|---|
| Peppermint extract | 1 tsp of crushed peppermint candy dissolved in warm water |
| Mint chocolate chips | Regular chocolate chips + ½ tsp peppermint oil |
| Unsalted butter | Salted butter (reduce added salt by ¼ tsp) |
👨🍳 Step‑by‑Step Instructions
Follow these detailed steps to achieve perfectly green, mint‑infused cookies with a chewy center and a crisp edge.
📋 Phase 1: Preparation & Mise en Place
Gather all tools and ingredients before you begin to ensure a smooth workflow.
Preheat the Oven & Prepare Baking Sheets
Set your oven to 175 °C (350 °F). Line two baking sheets with parchment paper or silicone mats. This prevents sticking and ensures even browning.
Sift Dry Ingredients
In a medium bowl, whisk together the flour, baking soda, and salt. Sifting aerates the flour and prevents clumps, giving the cookies a lighter texture.
🔥 Phase 2: Creaming & Mixing
Create a silky base that will hold the chocolate chips and mint flavor.
Cream Butter and Sugars
In a large stand mixer fitted with the paddle attachment, beat the softened butter, granulated sugar, and brown sugar on medium‑high speed for 2‑3 minutes, until pale and fluffy. The air incorporated here is key to a light cookie.
Add Egg, Vanilla, and Peppermint Extract
Crack the egg into the bowl, then add vanilla and peppermint extracts. Mix on low until just combined. The batter should look glossy and slightly thick.
Incorporate Dry Ingredients
Gradually add the sifted flour mixture to the wet ingredients, mixing on low. Stop when the dough just comes together; over‑mixing can develop gluten, making the cookies tough.
Color and Fold in Chocolate
If using food coloring, drizzle it over the dough and fold gently until the green hue is uniform. Then fold in the semisweet chocolate chips, mint chocolate chips, and crushed peppermint candies (if using) with a rubber spatula.
✨ Phase 3: Baking, Finishing & Serving
Transform the prepared dough into golden‑brown, mint‑kissed cookies.
Scoop and Space Cookies
Using a 2‑tablespoon cookie scoop, portion dough onto the prepared sheets, spacing them about 2 inches apart. Lightly press the tops with a spatula if you prefer a flatter cookie.
Bake Until Edges Are Golden
Slide the sheets into the preheated oven and bake for 10‑12 minutes, or until the edges turn a light golden brown while the centre remains soft. Rotate the sheets halfway through for even color.
Cool on Wire Racks
Allow the cookies to rest on the baking sheet for 2 minutes, then transfer them to a wire rack to cool completely. This prevents them from becoming soggy.
Serve and Enjoy
Serve the cookies warm with a glass of cold milk, or store them in an airtight container for up to a week. They also pair beautifully with a scoop of vanilla ice cream for an indulgent dessert.
💡 Expert Tips & Tricks
🛒 Choosing the Right Ingredients
Opt for European‑style butter with at least 82 % fat for a richer flavor. When buying peppermint extract, read the label—some brands contain alcohol, which can affect the final taste. Fresh mint leaves are optional but can be blended into the butter for an extra burst of natural aroma.
🔪 Preparation Techniques
Room‑temperature butter creams more efficiently, creating tiny air pockets that expand during baking. Use a silicone spatula to fold in chocolate chips; this prevents them from breaking and keeps the chips intact.
🌡️ Mastering the Bake
Every oven behaves slightly differently. If you have an oven thermometer, aim for 175 °C (350 °F). For a chewier centre, lower the temperature to 165 °C and extend baking by 2‑3 minutes.
🍽️ Presentation & Service
Arrange cookies on a pastel‑green platter and garnish with a dusting of powdered sugar mixed with a pinch of mint extract. Serve alongside a chilled glass of vanilla milkshake for a full‑blown Shamrock experience.
🏆 Pro Chef Secrets
Professional bakers know that the smallest details make the biggest difference. Below are techniques that elevate these cookies from home‑cooked to bakery‑level.
- 🎯 Chill the Dough: After mixing, refrigerate the dough for at least 30 minutes. This solidifies the butter, reducing spread and enhancing flavor development.
- 🎯 Use a Digital Scale: Measuring flour by weight (280 g) eliminates the variability of spoon‑and‑level methods, ensuring consistent texture.
- 🎯 Salted Butter Finish: For a subtle flavor contrast, finish the cookies with a light sprinkle of flaky sea salt just after they emerge from the oven.
- 🎯 Double‑Bake for Crunch: If you prefer a crunchier cookie, bake a second time at 150 °C for 5 minutes after the initial bake.
- 🎯 Incorporate Cream of Tartar: Adding ¼ tsp of cream of tartar to the dry mix stabilizes the leavening, giving a more uniform rise.
- 🎯 Freeze for Future Batches: Portion the dough into balls, freeze on a tray, then transfer to a zip‑lock bag. Bake directly from frozen, adding an extra minute to the bake time.
“The secret to a great cookie is not just the ingredients, but the love and precision you bring to each step.” — Thomas Keller
🔄 Variations & Adaptations
These cookies are a versatile canvas. Feel free to experiment with flavors, textures, and dietary needs.
🥬 Vegetarian / Vegan Version
Replace the egg with ¼ cup of unsweetened applesauce and use a plant‑based butter alternative. Swap dairy chocolate chips for vegan dark chocolate chips, and ensure the peppermint extract is alcohol‑free.
- Applesauce provides moisture and binding without compromising flavor.
- Vegan butter keeps the rich mouthfeel while remaining dairy‑free.
🌶️ Flavor Variations
Explore different taste profiles by tweaking the mix‑ins or extracts.
Spicy Version
Add ¼ tsp of cayenne pepper to the dry mix and sprinkle a pinch of sea salt on top before baking for a sweet‑heat contrast.
Mediterranean Version
Replace half of the chocolate chips with chopped pistachios and a drizzle of honey after baking for a nutty, floral twist.
Asian Inspired Version
Swap peppermint extract for 1 tsp of matcha powder and use white chocolate chips. The result is a delicate green cookie with a subtle tea aroma.
⚠️ Dietary Adaptations
Gluten‑Free
Use a 1:1 gluten‑free flour blend (e.g., rice flour, potato starch, and tapioca flour) and add ½ tsp xanthan gum to mimic gluten’s elasticity.
Lactose‑Free
Swap butter for lactose‑free margarine and ensure chocolate chips are dairy‑free.
Low‑Calorie
Reduce sugar by ¼ cup, replace half of the butter with unsweetened applesauce, and use dark chocolate chips (70 % cocoa) for a richer flavor with fewer calories.
👶 Kid‑Friendly Version
Omit the peppermint extract and food coloring, using only vanilla extract and regular chocolate chips. This creates a classic chocolate chip cookie that kids love while still offering a hint of mint from the optional crushed peppermint candies.
📦 Storage & Reheating
🧊 Conservation
In the Refrigerator:
- Duration: 5 days
- Container: Airtight glass jar or zip‑lock bag
- Tip: Place a paper towel at the bottom to absorb excess moisture.
In the Freezer:
- Duration: 3 months
- Method: Freeze individually on a tray, then transfer to a freezer‑safe bag.
- Defrosting: Thaw at room temperature for 30 minutes or microwave on low for 10 seconds.
💡 Note: For optimal texture, reheat before serving rather than eating cold.
♨️ Reheating
🔥 Oven (Recommended):
- Preheat to 150 °C (300 °F).
- Place cookies on a baking sheet, cover loosely with foil.
- Heat for 5‑7 minutes, until warm throughout.
- Remove foil and bake an additional 2 minutes for a crisp edge.
⚡ Microwave (Quick):
- Place a cookie on a microwave‑safe plate.
- Cover with a damp paper towel.
- Heat on medium power for 15‑20 seconds.
- Check and repeat in 5‑second bursts if needed.
🍳 Skillet:
Heat a non‑stick skillet over low heat, add a tiny drizzle of butter, and warm each side for 30 seconds. This revives the crispness without drying the centre.
🍷 Perfect Pairings
🥗 Side Dishes
- Fresh Fruit Salad: A mix of berries and kiwi adds acidity that balances the sweetness.
- Light Green Tea: The subtle bitterness complements the minty flavor.
- Whipped Cream with a Hint of Lime: Adds a creamy, citrusy contrast.
🍷 Wine & Beverage Matches
- Prosecco: Its bright bubbles lift the rich chocolate notes.
- Riesling (off‑dry): The slight sweetness mirrors the cookie’s sugar.
- Non‑Alcoholic Option: A chilled mint lemonade or a vanilla milkshake.
🍰 Complementary Courses
Begin with a light citrus salad, follow the cookies with a scoop of vanilla bean ice cream, and finish with a drizzle of chocolate ganache for a cohesive, indulgent dessert experience.
❓ Frequently Asked Questions
Q: Can I use a different type of chocolate?
A: Absolutely! Dark chocolate chips give a richer flavor, while white chocolate chips add extra sweetness. Just keep the total volume of chips roughly the same to maintain texture.
Q: How do I prevent the cookies from spreading too much?
A: Chill the dough for at least 30 minutes and use a higher oven temperature for a shorter time. Also, avoid over‑creaming the butter and sugar.
Q: Is the green food coloring necessary?
A: It’s optional. The mint extract already imparts a subtle green hue, but food coloring intensifies the festive color without affecting flavor.
Q: What can I substitute for peppermint extract?
A: Use crushed peppermint candies dissolved in warm water, or a combination of mint leaves blended into the butter. Both provide a natural mint flavor.
Q: Can I make these cookies ahead of time for a party?
A: Yes. Bake them a day before, store in an airtight container, and reheat briefly before serving. They retain their flavor and texture remarkably well.
Q: How do I adjust the recipe for more or fewer servings?
A: Use the portion‑adjuster on the recipe card below. It automatically scales all numeric ingredient quantities based on the number of servings you select.
🎉 Let’s Get Baking!
These Shamrock Shake Mint Chocolate Chip Cookies bring together the joy of a classic shake and the comfort of a home‑baked treat. With a vibrant green hue, a perfect balance of mint and chocolate, and a texture that’s both chewy and crisp, they’re sure to become a staple in your dessert repertoire. Whether you’re celebrating St. Patrick’s Day, looking for a festive party snack, or simply craving something sweet and minty, this recipe delivers every time.
Give them a try, experiment with the variations, and don’t forget to share your results. Your feedback helps the community grow, and seeing your beautiful photos inspires others to create.
Have you tried this recipe?
Leave a comment and rating below! Share your photos on Instagram with #ShamrockCookieMagic for a chance to be featured.
Shamrock Shake Mint Chocolate Chip Cookies
Mint‑infused, chocolate‑studded cookies that look as festive as they taste.
📝 Ingredients
Cookie Dough
Chocolate Mix‑Ins
👨🍳 Instructions
- Preheat oven to 175 °C (350 °F) and line two baking sheets.
- Sift flour, baking soda, and salt into a bowl.
- Cream butter, granulated sugar, and brown sugar until light and fluffy.
- Add egg, vanilla, and peppermint extract; mix on low.
- Combine dry ingredients with wet mixture; stir until just combined.
- Color & fold in chocolate chips and optional peppermint candies.
- Scoop dough onto sheets, spacing 2 inches apart.
- Bake for 10‑12 minutes, until edges turn golden.
- Cool on wire racks for 5 minutes.
- Serve warm with milk or store in an airtight container.
🥗 Nutrition (per serving)
*Values are estimates based on standard ingredients.
📚 You Might Also Like
Matcha White Chocolate Cookies
Lemon Blueberry Scones
Chocolate Espresso Brownies


💬 Comments & Reviews
Leave a Comment
[User comments will appear here]