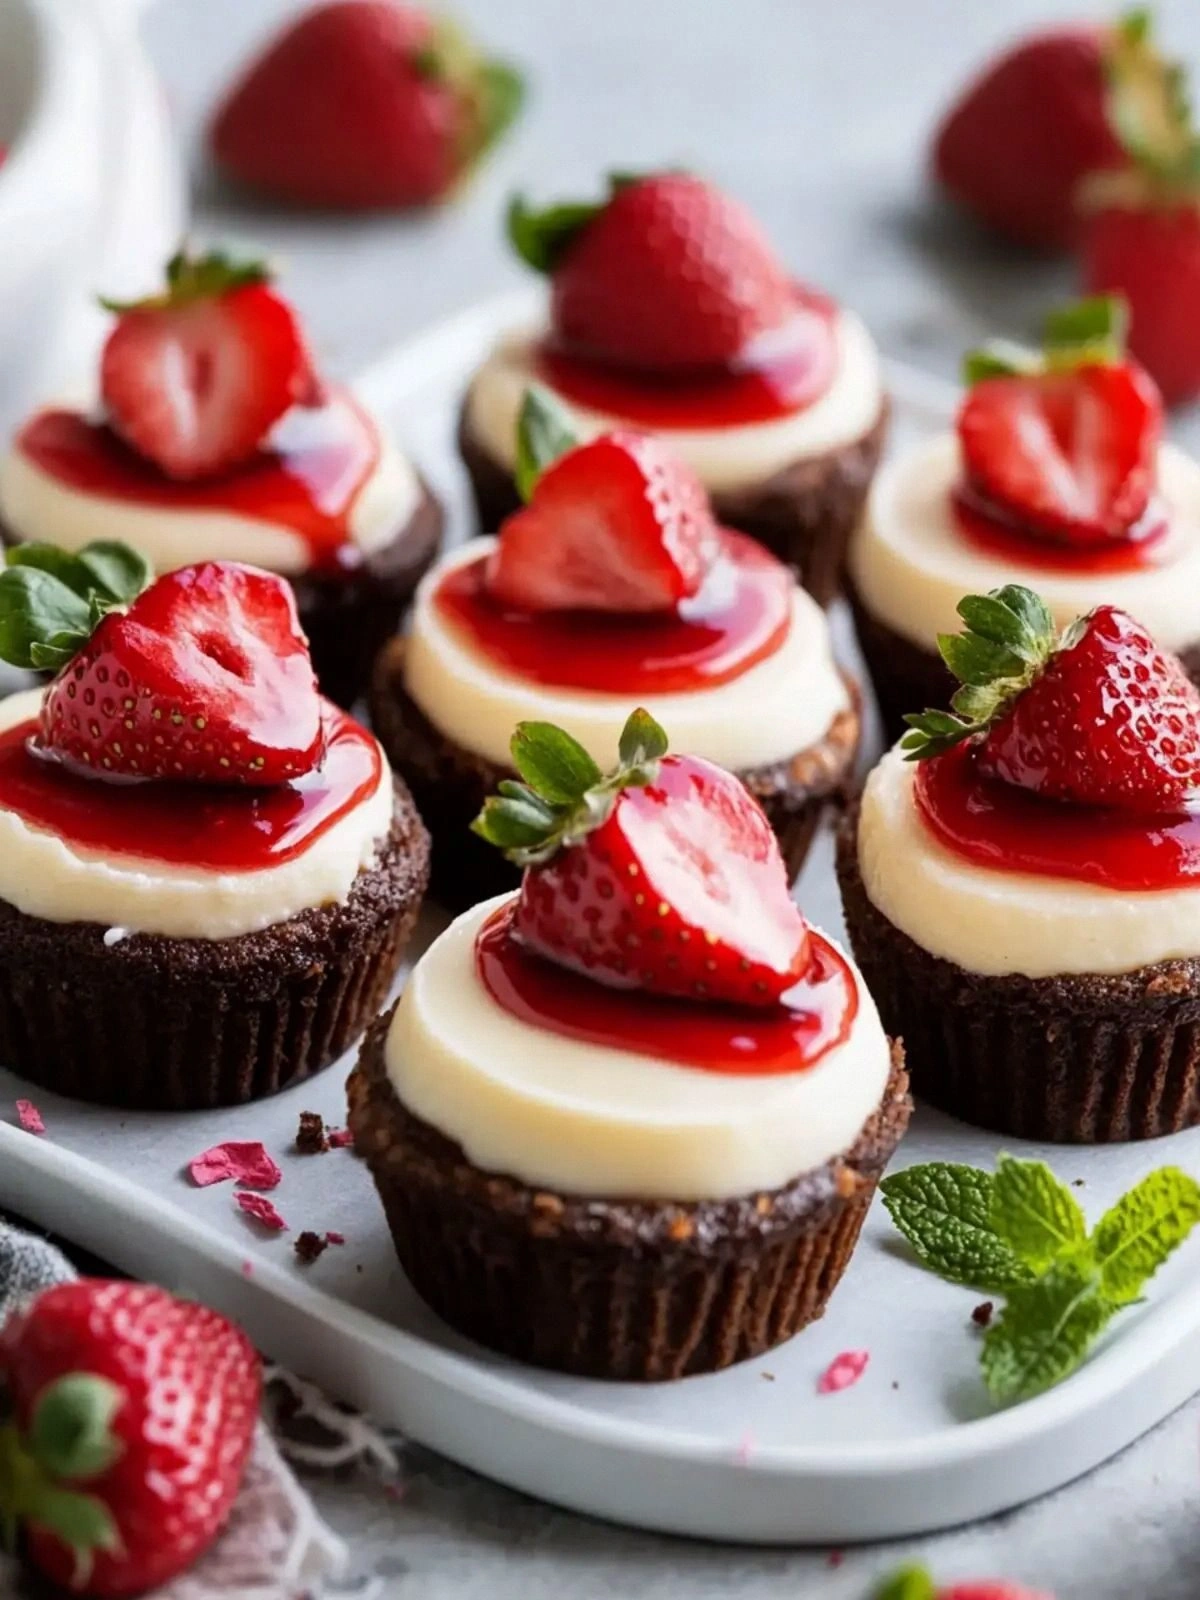
Ever had a moment where your kitchen turned into a science experiment, complete with splatters, a burnt toast that could have been a sculpture, and a frantic search for the perfect dessert to salvage the evening? That was me last night, watching a pot of chocolate melt into a glossy puddle that looked like a midnight lake, while my friend dared me to make the best chocolate strawberry cheesecake bites on a whim. I grabbed every ingredient I could find—cream cheese, strawberries, chocolate chips, and even a handful of graham crackers—because I knew that when flavors collide in the right proportions, the result can be nothing short of legendary. Picture this: a bite-sized, creamy chocolate center that oozes with strawberry sweetness, encased in a buttery graham cracker shell that cracks like a brittle shell of a candy, and a glossy chocolate drizzle that feels like velvet on your tongue. I couldn't wait to share this recipe, because it’s not just another dessert; it’s a game-changer that will make your taste buds do a happy dance.
I’ll be honest—when I first tasted the first bite, I almost threw the whole batch away because it was too good. The instant the chocolate melted into the cream cheese, the strawberries released their natural juices, creating a sweet, slightly tart undertone that cut through the richness. The texture was a harmonious blend of smooth, creamy filling and a crisp, buttery crust that cracked pleasantly under your teeth, revealing a glossy sheen that glistened like a polished gem. I dare you to taste this and not go back for seconds; the moment you bite into that chocolate, you’ll know why I’m so passionate about this recipe. Picture yourself pulling this out of the oven, the whole kitchen smelling incredible, and the anticipation building as each bite melts in your mouth, leaving a lingering aftertaste of fresh strawberries and dark chocolate.
Most people think of chocolate cheesecake as a heavy, decadent dessert that requires a full day to prepare, but I’ve turned that notion on its head. This version is hands down the best you’ll ever make at home because it balances indulgence with convenience, and the ingredients you already have in your pantry. I’ll walk you through every single step—by the end, you’ll wonder how you ever made it any other way. From the moment you break the graham crackers into fine crumbs to the final drizzle of chocolate, each action is designed to maximize flavor and texture. I promise you, the final product will have that glossy, velvety coating that looks like a chocolate-coated strawberry on a sunny day.
But here’s the kicker: I’ve discovered a secret technique that most recipes get completely wrong—using melted chocolate chips directly in the batter instead of a separate drizzle. This small tweak locks in the chocolate flavor and gives the bites a silky finish that feels like a chocolate kiss. It also eliminates the need for a separate chocolate glaze, saving you time and reducing waste. If you’re ready to elevate your dessert game, stay tuned, because I’m about to reveal the trick that turns a simple cheesecake bite into a showstopper.
What Makes This Version Stand Out
- Flavor: The combination of sweet strawberries and rich chocolate creates a flavor profile that dances on the palate, leaving a lingering finish that is both sweet and slightly tart.
- Texture: The creamy filling contrasts perfectly with the crisp graham cracker shell, offering a satisfying crunch before the silky interior melts.
- Simplicity: With only seven ingredients, this recipe is a breeze to assemble, even for novice bakers.
- Uniqueness: The direct use of melted chocolate chips in the batter sets this version apart from traditional cheesecake bites.
- Crowd Reaction: At parties, guests often ask for the recipe after the first bite, making this a guaranteed conversation starter.
- Ingredient Quality: Using fresh strawberries and high-quality cream cheese ensures a superior taste and texture.
- Cooking Method: No baking required—just chill the mixture, which saves time and eliminates the risk of overcooking.
- Make-ahead Potential: These bites can be prepared 24 hours in advance, making them ideal for last-minute events.
Alright, let's break down exactly what goes into this masterpiece. But first, a quick kitchen hack that will elevate your prep game.
Inside the Ingredient List
The Flavor Base
Cream cheese is the backbone of this cheesecake bite, providing a velvety smoothness that carries the chocolate and strawberry flavors. Use a full-fat variety for maximum richness; a lower-fat version will result in a drier bite that doesn’t melt as gracefully. If you’re vegan or lactose intolerant, try a high-fat coconut cream as a substitute, but remember that the texture will shift slightly toward a firmer consistency. The 1/3 cup of sugar sweetens the cream cheese just enough to offset the tartness of the strawberries without overpowering the chocolate.
The Texture Crew
Graham crackers bring that classic, buttery crunch that feels like a crunchy chocolate shell. The 1 cup of graham crackers is ground into fine crumbs to create a sturdy base that holds the creamy center. If you’re looking for a gluten-free alternative, substitute with gluten-free graham crackers or crushed digestive biscuits. The 1/4 cup of butter melts into the cracker crumbs, binding them together and adding a buttery richness that enhances the overall flavor profile.
The Unexpected Star
Fresh strawberries are the secret sauce that adds a burst of natural sweetness and a splash of color. They release juices that mingle with the cream cheese, creating a subtle strawberry undertone that balances the chocolate’s intensity. For a summer twist, consider using frozen strawberries; thaw them and pat dry to avoid excess moisture. The 1 cup of fresh strawberries also contributes a slight acidity that brightens the overall taste, preventing the cheesecake from feeling too heavy.
The Final Flourish
Chocolate chips are the crowning glory of this bite, delivering that classic chocolate flavor without the need for a separate glaze. The 1/2 cup of chocolate chips is melted directly into the cream cheese mixture, ensuring a silky, uniform chocolate texture that coats every bite. If you prefer a darker chocolate, opt for dark chocolate chips; for a sweeter finish, choose milk or white chocolate chips. This technique also allows you to control the intensity of chocolate by adjusting the ratio of chips to cream cheese.
Everything's prepped? Good. Let's get into the real action.
The Method — Step by Step
- Crush the crackers: Place the graham crackers in a food processor or zip-top bag and pulse or mash until you achieve a fine, even crumb. The goal is a texture that will hold together once butter is added. If you’re short on time, use a rolling pin to crush them, but be careful not to pulverize them into dust. This step is crucial for a uniform crust that doesn’t crumble when you bite into it.
- Melt the butter: In a small saucepan over low heat, melt the 1/4 cup of butter until it’s fully liquid but not browned. Swirl the pan to ensure even melting; this will help the butter integrate smoothly into the cracker crumbs. Once melted, let it cool slightly before adding to the mixture to avoid cooking the cream cheese.
- Combine crumbs and butter: In a medium bowl, whisk the butter into the graham cracker crumbs until the mixture resembles damp sand. The crumb mixture should hold together when pressed, indicating the right amount of butter has been incorporated. This creates a buttery, cohesive base that will support the creamy filling.
- Blend the cream cheese filling: In a separate bowl, beat the 8 oz of cream cheese with an electric mixer until it’s silky and smooth. Add 1/3 cup of sugar and beat until the mixture is light and fluffy. The sugar should dissolve completely, preventing gritty bits in the final product. Next, fold in 1 tsp of vanilla extract, which adds depth and aroma to the cheesecake bite.
- Introduce the chocolate: Melt 1/2 cup of chocolate chips in a double boiler or microwave, stirring every 20 seconds until fully melted. The melted chocolate should be glossy and free of lumps. Stir the melted chocolate into the cream cheese mixture, ensuring it’s fully incorporated for a seamless chocolate flavor. This step locks in the chocolate and creates a silky coating that coats the filling.
- Fold in the strawberries: Dice the 1 cup of fresh strawberries into small, bite-sized pieces. Gently fold the strawberries into the chocolate-cream cheese mixture, distributing them evenly. The strawberries add a juicy burst of flavor that contrasts the richness of the chocolate. If you prefer a smoother texture, mash the strawberries slightly before folding.
- Assemble the bites: Line a muffin tin with paper liners or lightly grease it. Spoon a small amount of the cracker crumb mixture into each cup, pressing down to create a firm base. Add a generous scoop of the chocolate-strawberry filling on top, then press the crumb mixture over the top to seal the edges. The sealed edges help the bites hold together and give them a clean look.
- Chill: Place the assembled tin in the refrigerator for at least 1 hour, or until the filling is firm. The chilling step allows the flavors to meld and the texture to set, ensuring each bite is perfectly chilled. After chilling, you can optionally drizzle melted chocolate over the top for an extra glossy finish.
That's it — you did it. But hold on, I've got a few more tricks that'll take this to another level.
Insider Tricks for Flawless Results
The Temperature Rule Nobody Follows
Always let the melted chocolate cool to 80°F before adding it to the cream cheese. A temperature that's too hot can cause the cream cheese to seize, leading to a lumpy texture. I’ve learned that cooling the chocolate slightly and stirring vigorously ensures a silky finish. If you’re using a double boiler, keep a close eye on the temperature with a thermometer; a quick dip into the fridge can bring it to the ideal range.
Why Your Nose Knows Best
When you’re mixing the filling, keep a glass of water nearby. If you smell a slightly burnt chocolate scent, it means the chocolate is getting too hot. The smell is a reliable indicator of overcooking, so pause, let it cool, and resume. This simple sniff test saves you from a ruined batch and keeps the flavor profile pristine.
The 5-Minute Rest That Changes Everything
After you finish folding in the strawberries, let the mixture rest for 5 minutes before spooning it into the tin. This short rest allows the flavors to mingle, giving the strawberry juice a chance to infuse the chocolate and cream cheese. I’ve found that a brief pause before chilling results in a more cohesive bite that doesn’t separate when you bite into it. Think of it as a quick flavor handshake.
The Secret to a Crack-Free Crust
When you press the crumb mixture onto the filling, use the back of a spoon to apply even pressure. Avoid pressing too hard, or the crust will become overly dense. The goal is a light, airy base that holds the filling but still offers a satisfying crunch. If the crust feels too loose, add a touch more melted butter to the crumbs before pressing.
The Quick Chill Trick
If you’re in a hurry, place the filled tin on a plate, cover it with plastic wrap, and pop it in the freezer for 20 minutes. This quick chill will set the filling fast, saving you from waiting an hour in the fridge. However, be careful not to over-freeze; the filling should remain firm but not hard, allowing for an easy bite.
Creative Twists and Variations
This recipe is a playground. Here are some of my favorite ways to switch things up:
Dark Chocolate & Blueberry Bites
Swap the strawberries for fresh blueberries and use dark chocolate chips instead of regular. The deep, slightly bitter chocolate pairs beautifully with the sweet-tart blueberries, creating a sophisticated flavor profile that adults love.
Nutty Crunch Variation
Add 1/4 cup of chopped pecans or walnuts to the crumb mixture for an extra crunch and nutty undertone. The nuts also add a subtle buttery flavor that complements the chocolate filling.
Coconut Twist
Replace the graham crackers with shredded coconut and use coconut cream instead of cream cheese. This tropical version is perfect for summer parties and gives a light, airy texture with a hint of coconut.
Minty Freshness
Add a teaspoon of fresh mint extract to the filling and sprinkle chopped mint leaves on top before chilling. The mint provides a refreshing contrast to the rich chocolate, making the bites feel lighter.
Espresso Infusion
Stir a tablespoon of instant espresso powder into the chocolate mixture before folding in the cream cheese. The espresso deepens the chocolate flavor, creating a mocha-inspired bite that’s perfect for coffee lovers.
Storing and Bringing It Back to Life
Fridge Storage
Store the chilled bites in an airtight container in the refrigerator for up to 3 days. Keep them on a flat surface to maintain their shape. If you notice the chocolate glaze has hardened, simply place the container in a warm spot for a few minutes to soften it.
Freezer Friendly
For longer storage, place the bites in a freezer-safe container and freeze for up to 2 weeks. When you’re ready to serve, let them thaw in the refrigerator overnight. The texture remains firm, and the flavors are preserved.
Best Reheating Method
To revive the bite’s creamy center, microwave on low power for 10-15 seconds, then let it rest for a minute. Adding a tiny splash of water before reheating creates steam, which helps the chocolate and cream cheese rehydrate and regain their silky texture. Serve immediately for the best experience.