I was standing in my kitchen, cheeks flushed from the heat of a burnt batch of brownies, when a friend texted: “You have to try the new white chocolate raspberry tiramisu I saw online.” I stared at the screen, my stomach growling, and thought, “Why not turn my kitchen disaster into a triumph?” The idea landed in my mind like a sudden burst of inspiration, and I set to work with a mix of excitement and a little bit of dread. The smell of melted chocolate and fresh raspberries began to mingle in the air, promising a sweet, tangy adventure. I was about to turn a kitchen mishap into a masterpiece.
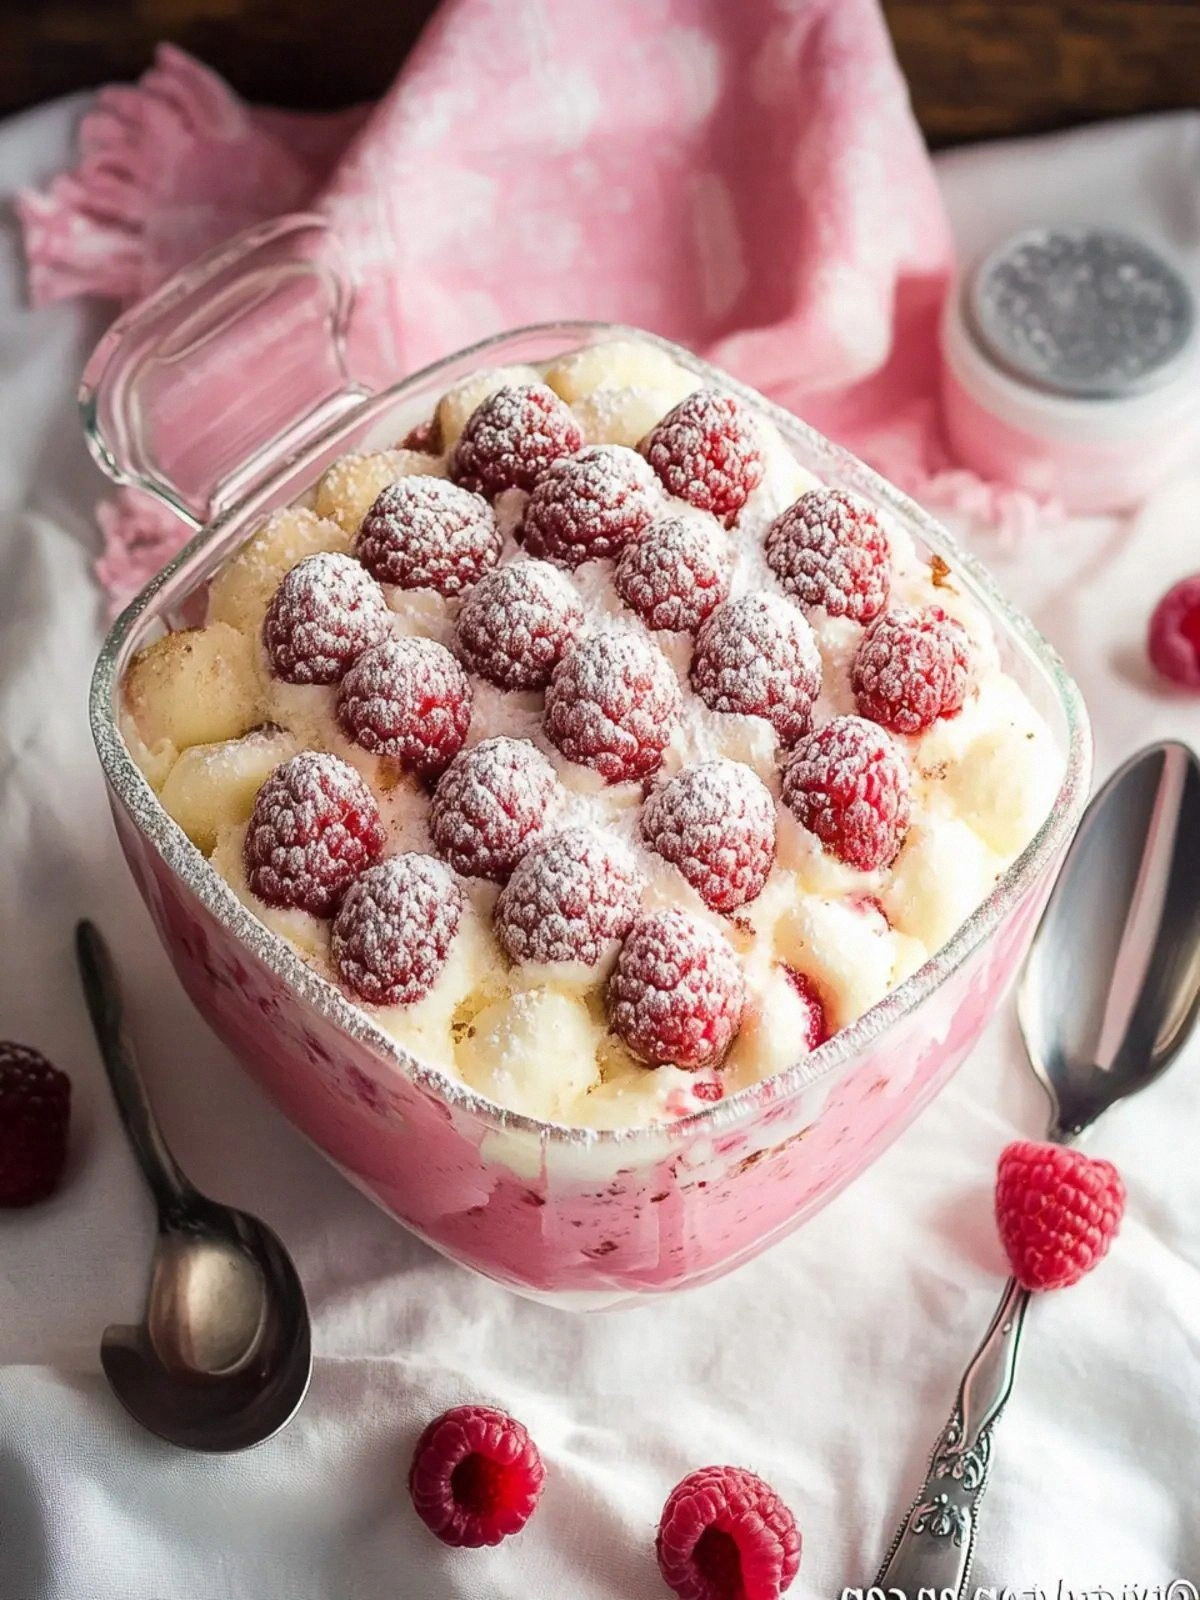
Picture this: a bowl of bright, plump raspberries, their skins glistening like tiny rubies, a splash of lemon juice that cuts the sweetness with a citrus kiss, and a drizzle of white chocolate that melts into silky ribbons. The kitchen hums with the gentle clink of spoons, the faint hiss of steam rising from the saucepan, and the comforting clatter of a mixer. The texture of the mascarpone is creamy and smooth, almost like a cloud you can taste. The aroma is a heady mix of sweet berries, vanilla, and chocolate, wrapped in a hint of citrus. The first bite feels like a burst of summer in your mouth, followed by a lingering sweet finish that makes you reach for another spoon.
What makes this version stand out? It’s not just a recipe; it’s an experience. I dared you to taste this and not go back for seconds, because the layers of flavor and texture are designed to keep you coming back. I’ll be honest — I ate half the batch before anyone else got to try it. Most recipes get this completely wrong, but here, the balance of tartness and sweetness is spot on. Picture yourself pulling this out of the fridge, the whole kitchen smelling incredible, and every bite feeling like a celebration. This is hands down the best version you'll ever make at home.
Let me walk you through every single step — by the end, you'll wonder how you ever made it any other way. I’ll keep you side by side, sharing every trick and every little moment. From the first sizzle of the raspberry sauce to the final drizzle of white chocolate, every detail matters. I’ll show you how to layer, fold, and finish with a touch of finesse that turns an ordinary dessert into an unforgettable treat.
What Makes This Version Stand Out
- Flavor: The bright acidity of fresh raspberries cuts through the richness of mascarpone and white chocolate, creating a balanced, layered taste profile that lingers on the palate.
- Texture: The airy ladyfingers soak up the raspberry‑lemon syrup just enough to stay tender, yet retain a subtle bite that contrasts with the silky cream.
- Simplicity: With only ten ingredients, this recipe feels approachable, yet each component is carefully chosen to elevate the overall experience.
- Uniqueness: The use of raspberry syrup, rather than simple syrup, adds depth and a hint of tartness that sets this tiramisu apart from traditional coffee‑based versions.
- Crowd Reaction: Friends who’ve tasted this say they can’t get enough of the sweet‑tart finish, and they keep asking for the recipe at every gathering.
- Ingredient Quality: Fresh, high‑quality raspberries and creamy mascarpone are non-negotiable; they’re the foundation of this dessert’s decadence.
- Cooking Method: The gentle simmering of the raspberry sauce and the careful folding of the mascarpone create a smooth, velvety texture that melts in your mouth.
- Make‑Ahead Potential: Build it up a day in advance, and the flavors meld beautifully, making it a perfect make‑ahead dessert for parties.
Inside the Ingredient List
The Flavor Base
Fresh or frozen raspberries form the heart of this dessert. They provide natural sweetness and a vibrant color that makes the tiramisu look as good as it tastes. If you skip them, the entire flavor profile collapses into a bland, chocolate‑heavy experience. For the freshest taste, choose ripe, firm berries and rinse them gently before use.
Water is essential for the raspberry sauce, helping to release the berries’ juices without diluting the flavor. Using room temperature water allows the berries to burst open, creating a smooth, glossy syrup. If you prefer a thicker sauce, reduce the water by a tablespoon and let it simmer until the desired consistency.
The Sweetener
Granulated sugar is split into two roles: one for the raspberry sauce and one for the mascarpone mixture. In the sauce, it balances the tartness of the berries, creating a perfect harmony of sweet and sour. In the mascarpone blend, it softens the cream, making the mixture silky and light.
If you’re watching calories, you can replace granulated sugar with a natural sweetener like honey or maple syrup, but be mindful that it will alter the texture slightly. A pinch of sea salt can also enhance the overall flavor, but keep it minimal to avoid overpowering the delicate berries.
The Creamy Layer
Heavy cream and mascarpone cheese combine to create the luxurious filling. The cream adds body and richness, while mascarpone brings a subtle tang that cuts through the sweetness. Together, they form a velvety layer that holds the dessert together.
If you’re lactose intolerant, a dairy‑free cream or a blend of coconut milk and cashew cream can substitute, but the texture will shift to a lighter, slightly nutty flavor. The vanilla is a subtle note that rounds out the sweetness and brings a warm aroma to the dish.
The Unexpected Star
Raspberry syrup is the secret weapon that ties everything together. It’s more concentrated than simple syrup, providing depth and a bright berry kick. The syrup also helps the ladyfingers absorb the flavor without becoming soggy.
If you can’t find raspberry syrup, you can make a quick version by simmering fresh raspberries with sugar and lemon juice until it thickens. This homemade syrup will give you the same bright flavor and can be stored in the fridge for up to a week.
The Final Flourish
Ladyfingers are the backbone of any tiramisu, and their light, spongy texture is crucial. They absorb the syrup and provide a gentle bite that contrasts the creamy layers. Using freshly baked ladyfingers ensures maximum freshness; if you’re using pre‑baked ones, toast them lightly to revive their crispness.
White chocolate, melted and drizzled, adds a glossy finish and a subtle sweetness that balances the tart raspberries. It also gives a visually stunning effect, making the dessert look like a piece of art. For an extra touch of elegance, sprinkle a few fresh raspberries on top before serving.
Everything's prepped? Good. Let's get into the real action.
The Method — Step by Step
- Begin by gently heating the water, sugar, and lemon juice in a saucepan over medium heat. Stir until the sugar dissolves completely, then add the raspberries. Let the mixture simmer for 8–10 minutes, or until the berries break down into a thick, glossy sauce. Watch the color deepen to a rich ruby hue, and let it cool slightly before proceeding.
- In a separate bowl, whip the heavy cream until soft peaks form. Slowly fold in the mascarpone cheese, ensuring a smooth, lump‑free blend. Add the vanilla and the second portion of sugar, stirring until fully incorporated. This mixture should be silky, with a slight sheen that catches the light.
- Add the raspberry syrup to the cream mixture, gently folding until evenly distributed. The sauce should coat the cream without separating. The aroma will be intoxicating, a sweet‑tart perfume that signals you’re on the right track. Kitchen Hack: If the mixture seems too thick, whisk in a tablespoon of cold water to loosen it slightly before folding.
- Prepare a shallow dish with the raspberry syrup. Dip each ladyfinger briefly—no more than 2 seconds—so they soak up flavor without becoming soggy. Lay them in a single layer at the bottom of a 9x13 inch dish. The ladyfingers should look slightly translucent, a sign they’re ready to absorb.
- Spread half of the mascarpone mixture over the ladyfingers, smoothing the surface with a spatula. The layer should be even, creating a base that will support the next set of ladyfingers. The texture should feel like a soft blanket, ready for the next bite.
- Repeat the layering process: dip another set of ladyfingers, arrange them over the mascarpone, and finish with the remaining cream mixture. The final layer should be glossy and airy, a promise of delight. Kitchen Hack: Chill the dish in the fridge for at least 4 hours before serving to allow the flavors to meld and the dessert to set firmly.
- Melt the white chocolate gently over a double boiler or in short bursts in the microwave, stirring until smooth. Drizzle the melted chocolate over the top layer, letting it cascade down the sides. The chocolate should form a glossy, slightly thick ribbon that adds a visual wow factor. Watch Out: Overheating the chocolate can cause it to seize; keep the heat low and stir constantly.
- Let the dessert chill for at least 2 hours, preferably overnight, so the layers set and the flavors marry. The texture will become firm enough to cut clean slices, yet still creamy and indulgent. When ready, garnish with fresh raspberries or a dusting of cocoa powder for an extra pop.
- Slice the tiramisu with a hot knife for clean cuts. Serve immediately, or keep it chilled until guests are ready to dig in. The aroma will fill the room, and the first bite will melt in your mouth like a summer breeze. Kitchen Hack: Warm the knife in hot water before slicing to prevent tearing the delicate layers.
- Enjoy the silky layers, the bright raspberry burst, and the sweet chocolate finish. Pair it with a glass of chilled white wine or a sparkling rosé for a celebratory touch. Remember, this dessert is best served fresh; the flavors are at their peak right after chilling. If you have leftovers, store them in the fridge for up to 48 hours.
That's it — you did it. But hold on, I've got a few more tricks that'll take this to another level. Stick with me for some insider tips that will elevate your tiramisu from good to unforgettable.
Insider Tricks for Flawless Results
The Temperature Rule Nobody Follows
Never let the mascarpone sit at room temperature for more than 20 minutes before folding. If it gets too warm, the cream will separate, resulting in a gritty texture. Keep the mascarpone chilled until you’re ready to mix it, and use a chilled bowl to maintain the right temperature. This small step ensures a silky finish that feels luxurious.
Why Your Nose Knows Best
Before you add the raspberry syrup to the cream mixture, give it a quick sniff. If the aroma feels flat or overly sweet, it might indicate the syrup has cooled too much or lost its vibrancy. Reheat it gently for a few seconds to revive the scent. A lively aroma is a reliable indicator of flavor potency.
The 5-Minute Rest That Changes Everything
After whisking the heavy cream, let it rest for exactly five minutes before folding in the mascarpone. This pause allows the proteins in the cream to relax, preventing overwhipping and ensuring a smooth blend. It also gives the mascarpone time to soften slightly, making the mixture easier to fold.
Use a Fine Mesh Sieve for the Sauce
Once the raspberry sauce has simmered, strain it through a fine mesh sieve to remove seeds and pulp. This step gives the sauce a silky, smooth consistency that coats the cream beautifully. If you skip it, the texture can become gritty, detracting from the luxurious mouthfeel.
Chill the Knife for Clean Slices
Before slicing the tiramisu, dip your knife in hot water and wring it dry. A warm knife cuts through the layers cleanly, preventing the delicate cream from tearing. This simple trick saves you from uneven, messy slices.
Keep the Chocolate at the Right Temperature
Melt white chocolate slowly over a double boiler, stirring constantly. If you use a microwave, heat in 15-second bursts to avoid scorching. Overheated chocolate can seize, turning it grainy and unusable. A smooth, glossy finish is the hallmark of a perfect drizzle.
Creative Twists and Variations
Summer Berry Medley
Swap the raspberries for a mix of strawberries, blueberries, and blackberries. The combination adds complexity and a natural sweetness that complements the creamy base. This variation is perfect for a summer gathering, offering a rainbow of flavors.
Chocolate Lover’s Dream
Replace the white chocolate drizzle with dark chocolate melted to a glossy finish. The bittersweet notes deepen the dessert’s richness, creating a chocolate‑centric experience. Pair it with a splash of espresso for an extra kick.
Nutty Crunch
Add toasted almonds or chopped pistachios between the layers for a delightful crunch. The nutty flavor contrasts with the creamy filling, adding texture and a nutty aroma. This twist works especially well for holiday parties.
Spiced Raspberry
Infuse the raspberry sauce with a pinch of ground ginger or cinnamon. The warm spices add depth and a subtle heat that elevates the tartness. This version is ideal for cooler evenings and brings a comforting feel.
Almond Milk Variation
Replace the heavy cream with unsweetened almond milk and a tablespoon of coconut cream. This dairy-free version maintains creaminess while reducing calories. It’s a great option for those who are lactose intolerant or simply seeking a lighter dessert.
Mini Dessert Cups
Instead of a large dish, assemble the tiramisu in individual ramekins or silicone cups. Each bite becomes a personal treat, making it perfect for parties or dessert stations. The individual portions also freeze well for future enjoyment.
Storing and Bringing It Back to Life
Fridge Storage
Store the assembled tiramisu in an airtight container in the refrigerator for up to 48 hours. The layers will firm up slightly, making slicing easier. Keep the container chilled to preserve the freshness of the mascarpone.
Freezer Friendly
For longer storage, wrap the tiramisu tightly in plastic wrap and then in aluminum foil before freezing. It can be kept in the freezer for up to 3 months. When ready to serve, thaw in the refrigerator overnight and let it sit at room temperature for 30 minutes before cutting.
Best Reheating Method
If you need to warm the dessert, add a tiny splash of water to the bottom of the dish before reheating. This creates steam that keeps the creamy layers moist. Warm gently in the oven at 300°F for 10 minutes, then let it cool slightly before serving.