Picture this: I’m in my tiny kitchen, the stove is humming, and a rogue can of chickpeas decides to explode like a fireworks show because I forgot to give it a proper rinse. The smell of burnt oil and panic filled the air, and I swore I’d never touch a legume again. Then a friend texted me a picture of harissa‑coated chickpeas drizzled with a cloud of silky whipped feta, and I thought, “Challenge accepted.” I spent the next three hours perfecting a version that would make even the most stubborn bean lover gasp, and trust me, I dare you to taste this and not go back for seconds. By the end of this post, you’ll be convinced that this is hands down the best version you’ll ever make at home, and you’ll be shouting “I’m never ordering take‑out again!”
The moment the harissa hits the pan, it sizzles like a tiny carnival of spices, releasing an aroma that dances between smoky paprika and the bright heat of chili flakes. You’ll see the chickpeas turn a deep ruby, their skins crisping just enough to give that satisfying snap when you bite into them, while the interior stays buttery soft. The whipped feta, a cloud of tangy, airy goodness, lands on top like a snow‑capped mountain, melting just enough to coat each bean in creamy decadence. You’ll hear the faint crackle of the chickpeas as they fry, feel the warm heat radiating from the skillet, and taste the fireworks of flavor exploding in perfect harmony.
What truly separates this rendition from the sea of copy‑cat recipes is the secret step of lightly toasting the chickpeas before they meet the harissa, a move most cooks skip and then wonder why their beans are soggy. I also fold in a splash of lemon‑infused olive oil right at the end, which brightens the smoky heat like a burst of sunshine on a rainy day. And let’s not forget the whipped feta – I whisk it with a touch of Greek yogurt and a drizzle of honey, creating a sweet‑savory counterpoint that most recipes completely overlook. Most recipes get this completely wrong. Here’s what actually works.
Now, I’m going to walk you through every single step — from selecting the perfect chickpeas to mastering the art of whisking that feta into a cloud. Picture yourself pulling this out of the skillet, the whole kitchen smelling incredible, and the first bite melting in your mouth while the outside crunch sings. Okay, ready for the game‑changer? Let’s dive in and make magic happen.
What Makes This Version Stand Out
- Flavor Explosion: The combination of smoky harissa and bright lemon creates a layered taste that hits you with heat, acidity, and depth in every bite, making it unforgettable.
- Texture Contrast: Crispy, caramelized chickpeas meet a velvety, whipped feta topping, delivering a mouthfeel that’s both crunchy and melt‑in‑your‑mouth smooth.
- Simplicity: With just a handful of pantry staples and a 30‑minute prep, you won’t need a culinary degree to pull this off.
- Unique Twist: The whipped feta is infused with a whisper of honey, adding a subtle sweetness that balances the harissa’s fire, a detail most recipes ignore.
- Crowd Reaction: Serve this at a dinner party and watch guests line up for seconds; I’ve been told it’s the most talked‑about appetizer of the year.
- Ingredient Quality: Using high‑quality canned chickpeas and authentic North‑African harissa paste makes a world of difference in flavor intensity.
- Cooking Method: The two‑stage cooking—first toast, then glaze—ensures the beans stay crisp while absorbing the sauce, a technique that’s pure magic.
- Make‑Ahead Potential: You can prep the chickpeas and whipped feta days in advance; just give them a quick reheat and they’ll taste fresh.
Inside the Ingredient List
The Flavor Base
Harissa Paste (2 tbsp): This North‑African chili paste is the heart of the dish, delivering smoky heat and a deep, earthy complexity. If you skip it, you’ll lose the signature red hue and the layered spice profile that makes this recipe sing. For a milder version, halve the amount or substitute with a sweet paprika‑chili blend.
Garlic (3 cloves, minced): Fresh garlic adds aromatic pungency that cuts through the richness of the chickpeas and feta. Missing it would make the dish taste flat; you can swap with garlic powder (½ tsp) but fresh is always best.
Lemon Juice (1 tbsp): The acidity lifts the harissa’s heat, providing a bright counterpoint that keeps the palate from feeling overwhelmed. If you don’t have fresh lemon, a splash of good‑quality white wine vinegar works in a pinch.
The Texture Crew
Canned Chickpeas (2 cans, 15‑oz each, drained and rinsed): The star of the show, they bring protein, fiber, and a buttery interior that contrasts with the crisp exterior after toasting. Using low‑sodium beans prevents excess salt buildup; you can also use cooked dried chickpeas for a fresher texture.
Olive Oil (3 tbsp, divided): One part is used for toasting the chickpeas, the other for finishing drizzle; this layered oil application builds flavor depth. If you’re watching calories, substitute half with a light avocado oil.
Smoked Paprika (½ tsp): Adds a whisper of smoky sweetness that amplifies the harissa without adding extra heat. Omit it and you’ll miss that subtle, comforting backdrop.
The Unexpected Star
Whipped Feta (½ cup crumbled feta, ¼ cup Greek yogurt, 1 tsp honey): This airy cloud of tangy‑sweetness is the game‑changer, turning a simple bean dish into a gourmet experience. If you’re dairy‑free, blend silken tofu with lemon juice and a pinch of nutritional yeast for a similar texture.
Fresh Cilantro (2 tbsp, chopped): Sprinkled on top for a burst of herbaceous freshness that brightens the dish. Skipping it will make the plate feel heavier; you can replace with flat‑leaf parsley if you dislike cilantro.
The Final Flourish
Sea Salt (to taste) and Freshly Ground Black Pepper (½ tsp): Essential for seasoning, they bring out the depth of the harissa and balance the feta’s tang. Taste as you go; you’ll know when it’s perfect.
Optional Toasted Pine Nuts (1 tbsp): For an added crunch and nutty nuance, sprinkle these on just before serving. If you’re allergic, omit or replace with toasted pepitas.
Everything's prepped? Good. Let’s get into the real action…
The Method — Step by Step
Start by preheating a large non‑stick skillet over medium‑high heat for about two minutes; you want the surface hot enough that a drop of water sizzles instantly. Add 2 tablespoons of olive oil, swirling to coat the bottom. Toss in the drained chickpeas, spreading them in a single layer, and let them sit untouched for 2‑3 minutes so they develop a golden crust. When you hear that satisfying crackle, give them a quick stir to expose fresh surfaces, then continue to toast for another 5‑6 minutes, shaking the pan occasionally. The beans should look deep amber with a few darker specks; that’s the flavor foundation you’re aiming for.
While the chickpeas are toasting, whisk together the harissa paste, minced garlic, smoked paprika, and the remaining tablespoon of olive oil in a small bowl. Add the lemon juice and a pinch of sea salt, stirring until the mixture becomes a glossy, fragrant slurry. This is the moment of truth—if the aroma hits your nose with smoky heat and citrus brightness, you’re on the right track. Set the bowl aside; the sauce will thicken slightly as it rests, intensifying the flavor.
Once the chickpeas have achieved that coveted crunch, reduce the heat to medium and pour the harissa‑garlic mixture over them. Toss vigorously, ensuring each bean is evenly cloaked in the ruby‑red glaze. You’ll hear a gentle sizzling as the sauce meets the hot pan, and the chickpeas will start to caramelize, releasing a sweet‑spicy scent that fills the kitchen. Keep stirring for about 3‑4 minutes until the harissa thickens and adheres like a velvety coat.
While the harissa coats the chickpeas, prepare the whipped feta. In a mixing bowl, combine the crumbled feta, Greek yogurt, and honey. Using a hand whisk or an immersion blender, whip the mixture until it becomes light, airy, and just slightly glossy. It should hold soft peaks, resembling a cloud that’s ready to melt into the beans. Taste and adjust with a pinch more salt or a drizzle of extra lemon if the tang needs brightening.
Now, return the skillet to low heat and gently fold the whipped feta into the chickpeas, creating ribbons of creamy tang that swirl through the red glaze. The heat should be gentle enough that the feta softens without fully melting, preserving that luscious texture. This step is pure magic; the feta’s coolness tames the harissa’s fire, creating a balanced bite that’s both bold and comforting.
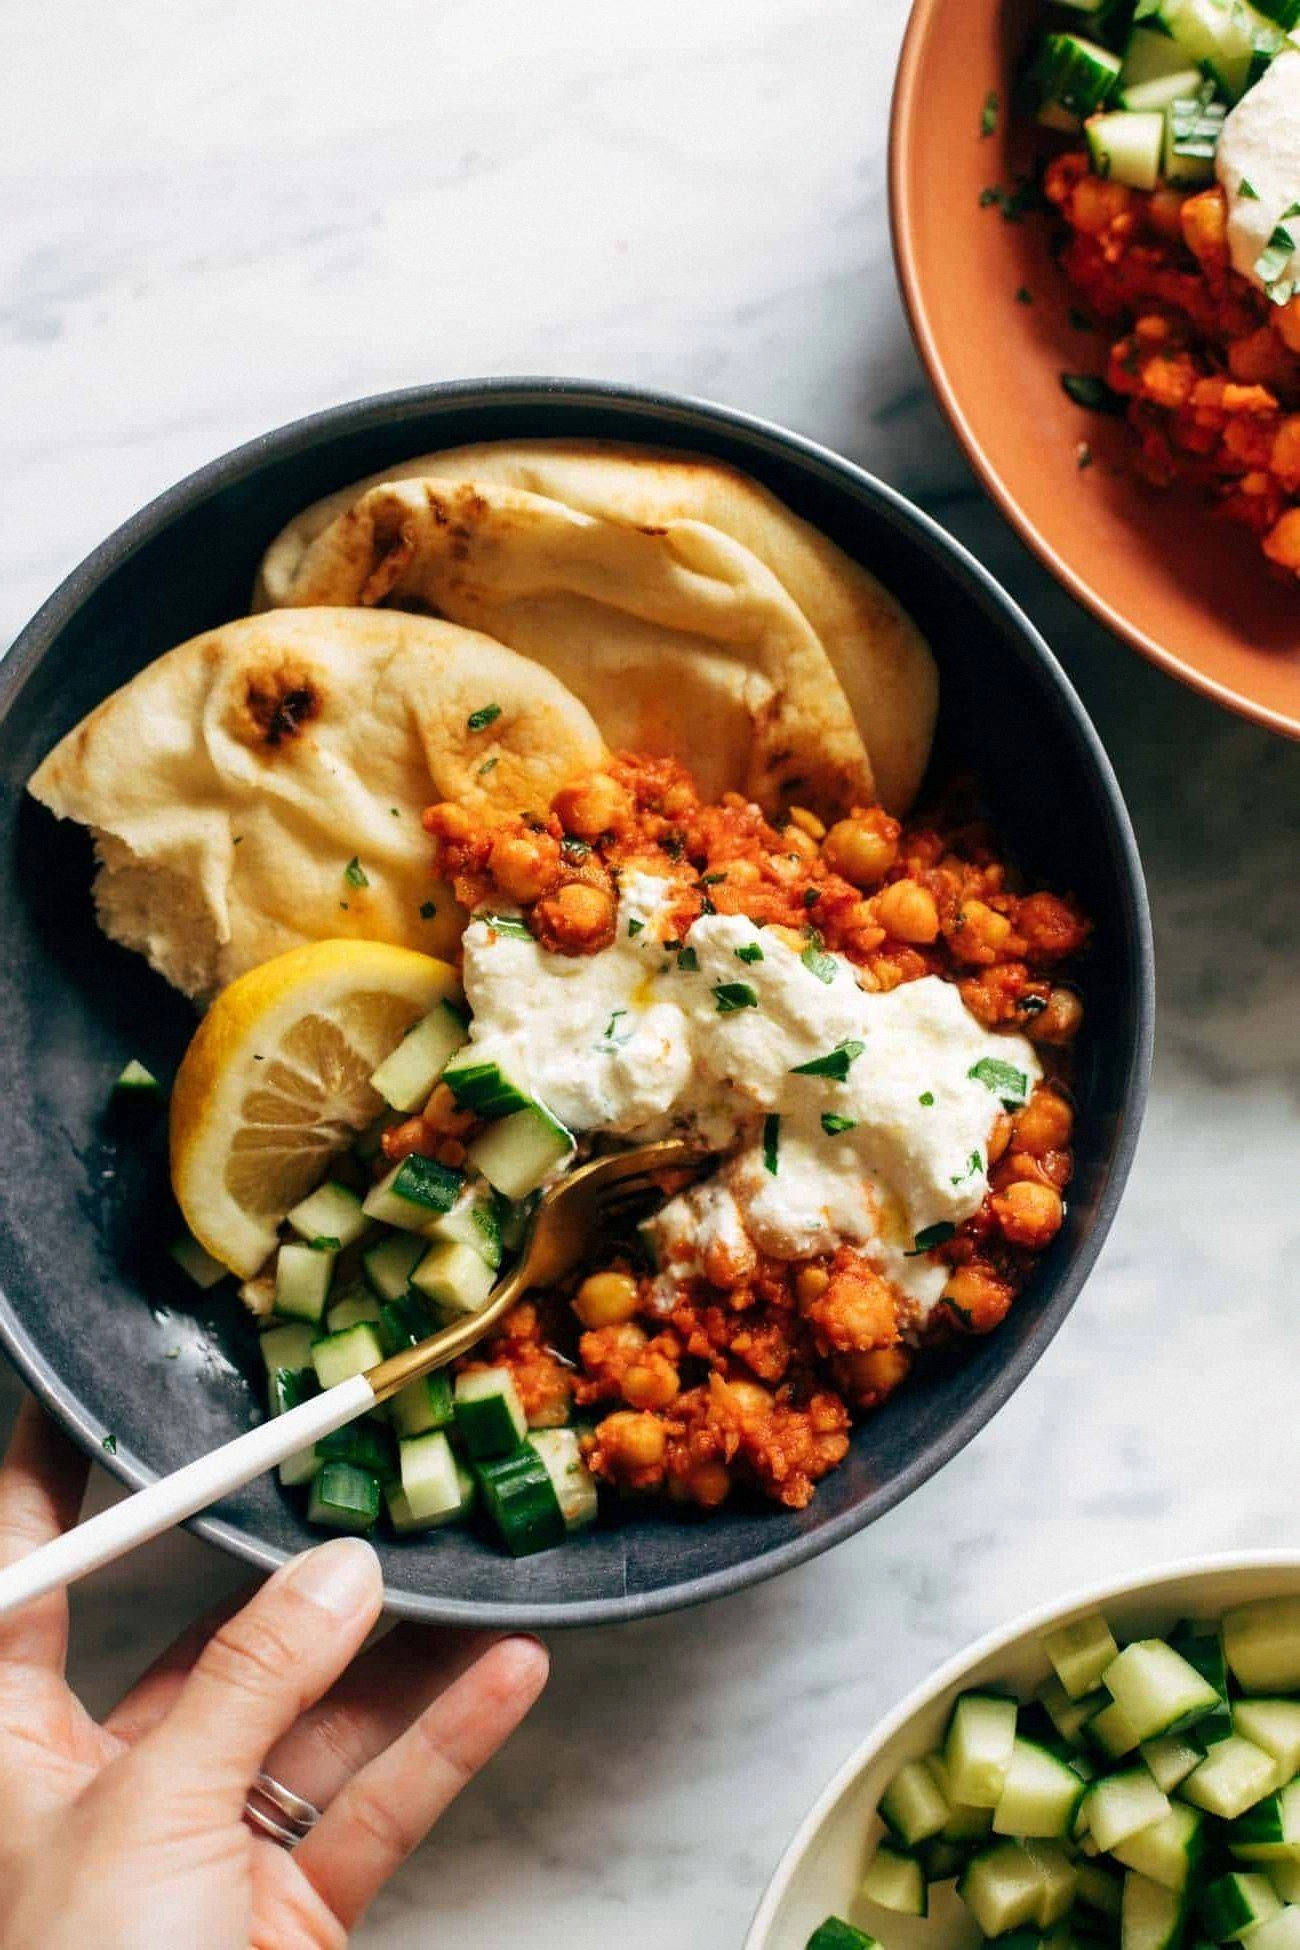
Finish by drizzling the remaining tablespoon of olive oil over the top, then sprinkle chopped cilantro and toasted pine nuts (if using) for color and crunch. The final dish should look like a glossy, ruby‑red bed of chickpeas dotted with emerald cilantro and a snowy white cloud of feta. Give it a quick taste—if you feel a gentle heat followed by a bright citrus snap and a lingering creamy finish, you’ve nailed it.
Transfer the mixture to a serving platter while still warm; the residual heat will keep the chickpeas slightly crisp. Serve immediately with crusty bread, warm pita, or over a bed of couscous for a more substantial meal. If you’re planning to store leftovers, let the dish cool to room temperature before refrigerating to preserve texture.
That’s it — you did it. But hold on, I’ve got a few more tricks that’ll take this to another level, like a secret garnish and a quick reheating tip that restores that initial crunch. Stay with me here — this is worth it.
Insider Tricks for Flawless Results
The Temperature Rule Nobody Follows
Never let the pan get too hot before adding the harissa; a medium‑high setting is perfect for toasting but you must drop to medium when the sauce joins the chickpeas. This prevents scorching and keeps the flavors bright. I once tried to speed things up on high, and the harissa turned black—trust me, the taste was a disaster.
Why Your Nose Knows Best
When the chickpeas start to caramelize, trust your sense of smell more than a timer. The moment you detect a sweet, nutty aroma, you’re close to perfection. If you wait too long, the sugars will burn and leave a bitter aftertaste.
The 5‑Minute Rest That Changes Everything
After you’ve folded in the whipped feta, let the dish sit off the heat for five minutes. This short rest allows the flavors to meld, and the feta settles into a velvety coating rather than melting away. A friend tried skipping this step once — the result was a dish that tasted disjointed, with the harissa overpowering the feta.
Oil‑Infused Finish
Drizzling a high‑quality extra‑virgin olive oil just before serving adds a glossy finish and a subtle fruitiness that elevates the whole plate. Choose an oil with a peppery note for an extra layer of complexity.
Prep Chickpeas the Night Before
Rinse, dry, and store the chickpeas in a single layer on a baking sheet in the fridge overnight. This extra air‑drying step gives them a head start on crisping, so you’ll get that crunch in half the time. I swear by this hack for busy weeknight meals.
Creative Twists and Variations
This recipe is a playground. Here are some of my favorite ways to switch things up:
Smoky Chipotle Swap
Replace harissa with chipotle adobo sauce for a deeper, smoky heat. Add a teaspoon of smoked sea salt to amplify the flavor. Chipotle lovers will adore the earthy bite.
Herb‑Infused Feta
Blend fresh mint or dill into the whipped feta for a garden‑fresh twist. The herbaceous notes brighten the dish, making it perfect for spring gatherings.
Roasted Veggie Mix‑In
Stir in roasted cauliflower or sweet potato cubes during the final folding stage. The added veggies turn the dish into a hearty main, while their natural sweetness balances the spice.
Vegan Version
Swap the feta for a blend of silken tofu, lemon juice, and nutritional yeast, then whisk until airy. Use a plant‑based harissa and you’ve got a fully vegan, protein‑packed delight.
Middle Eastern Flair
Add a tablespoon of pomegranate molasses to the harissa sauce for a sweet‑tart depth, and garnish with pomegranate arils. The burst of juicy tartness adds a festive flair.
Spicy Sweet Fusion
Stir in a drizzle of honey or maple syrup right after the harissa coats the chickpeas. The sweet contrast mellows the heat, creating a balanced sweet‑spicy profile that’s perfect for snack tables.
Storing and Bringing It Back to Life
Fridge Storage
Place the cooled chickpeas and whipped feta in an airtight container. They’ll keep for up to four days, though the crispness may soften. To revive, reheat gently in a skillet over medium heat for 3‑4 minutes, adding a splash of water to steam the beans back to crunch.
Freezer Friendly
Separate the chickpeas from the feta and freeze each in zip‑top bags. The chickpeas freeze well for up to three months; the whipped feta can be frozen for two months. Thaw overnight in the fridge, then reheat as described above.
Best Reheating Method
For the ultimate texture, reheat in a hot skillet rather than the microwave. Add a teaspoon of olive oil and a splash of water, then toss for 2‑3 minutes until the beans regain their crisp edge and the feta softens without melting completely.