Picture this: I was standing in my kitchen, the scent of vanilla and chocolate swirling around me, when my friend dared me to bake a cheesecake that would make the crowd go wild. I laughed, because I’ve always thought cheesecake was the queen of desserts, but my friend insisted that a brownie‑cheesecake hybrid would be the ultimate comfort food. The kitchen lights flickered as I tossed butter into a pan, and the sound of butter sizzling was like a tiny fireworks show. The moment that first crack of chocolate hit the pan was a symphony of aroma that made my stomach do cartwheels. I was already craving the first bite, but the real test was yet to come.
The room was alive with the crunch of chocolate chips melting into a glossy, velvety sauce that coated the batter like a silky blanket. My fingertips tingled with the heat of the oven, and I could hear the timer click‑clack like a drumbeat counting down to dessert glory. The air smelled of caramelized sugar and toasted cocoa, a promise of sweet, buttery bliss. When the first slice slid out, the cheesecake was a perfect balance of creamy interior and crisp, chocolatey crust—an edible hug that felt like a warm blanket on a cold night.
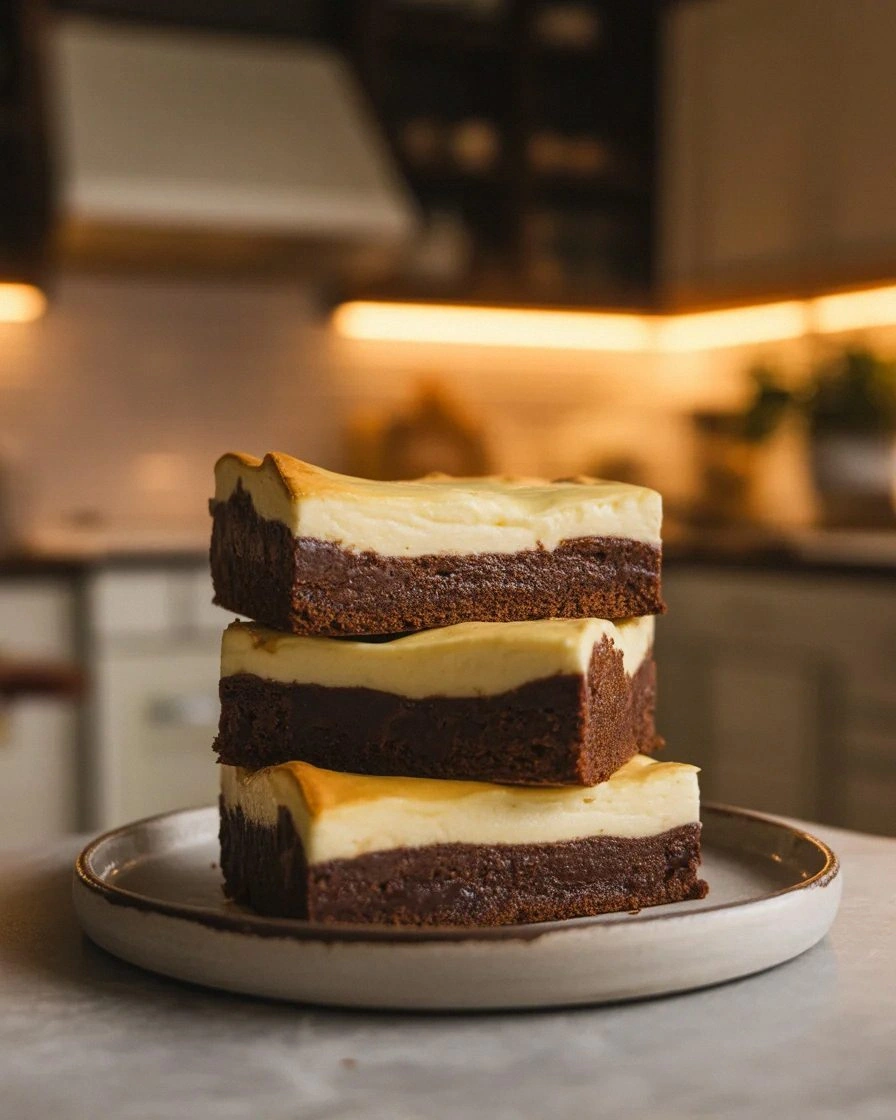
This version is hands down the best you’ll ever make at home because it marries the classic richness of cheesecake with the indulgent depth of chocolate brownies. The batter is light and airy, yet dense enough to support a silky filling that never feels heavy. The chocolate chips are strategically placed so they melt into pockets of gooey sweetness, while the cocoa powder gives a subtle depth that elevates every bite. It’s a dessert that can be served at a wedding, a family gathering, or even just a quiet evening with a cup of tea. The secret? A precise balance of butter, sugar, and the right temperature control that ensures the cheesecake doesn’t crack and the brownies stay fudgy.
I dare you to taste this and not go back for seconds—once you’ve had a bite, you’ll wonder how you ever survived without it. And if you’re skeptical, just picture yourself pulling this out of the oven, the whole kitchen smelling incredible, and watching the edges rise just enough to give a hint of that classic chocolate brownie crunch. Let me walk you through every single step—by the end, you’ll wonder how you ever made it any other way.
What Makes This Version Stand Out
- Flavor: The blend of creamy cream cheese with a buttery brownie base creates a double‑layered taste that satisfies both dessert lovers and chocolate enthusiasts. The subtle hint of vanilla in both the batter and filling ties everything together like a well‑orchestrated symphony.
- Texture: The crust is crisp yet tender, thanks to the melted butter and cocoa powder, while the filling remains silky smooth without the dreaded “cheese‑y” aftertaste. The chocolate chips add pockets of molten bliss that explode in your mouth.
- Simplicity: Even though it’s a two‑layered dessert, the recipe uses only eleven ingredients, all of which you probably already have in your pantry. No special equipment is required—just a standard oven and a mixing bowl.
- Uniqueness: Most cheesecake recipes rely on a graham cracker crust; this one swaps that for a chocolate brownie base, giving it a richer, deeper flavor profile that stands out in any dessert lineup.
- Crowd Reaction: The moment you plate it, the look on people’s faces is priceless. The combination of chocolate and creamy cheese is a universal crowd‑pleaser that can be served at parties or as a show‑stopper for a special occasion.
- Ingredient Quality: Using high‑quality cream cheese and real butter gives the dessert a luxurious mouthfeel that can’t be replicated with lower‑grade substitutes. The chocolate chips add a premium touch that elevates the overall experience.
- Cooking Method: The dual‑bake approach ensures that the crust sets perfectly while the filling cooks evenly, preventing cracks or over‑browning. This method is foolproof and doesn’t require a water bath.
- Make‑ahead Potential: The cheesecake can be prepared a day ahead, chilled, and served straight from the fridge. The flavors deepen, and the texture remains silky, making it a convenient option for busy evenings.
Alright, let's break down exactly what goes into this masterpiece.
Inside the Ingredient List
The Flavor Base
The foundation of this dessert starts with 1 cup of melted butter, which brings a silky richness that coats the crust and prevents it from becoming too dry. Butter also caramelizes slightly, giving the base a subtle nutty undertone that pairs beautifully with the chocolate. If you skip the butter, the crust will feel thin and crumbly, and the chocolate chips won’t melt as smoothly. A good alternative for those with dairy sensitivities is to use clarified butter or a high‑smoke‑point oil like grapeseed; however, the flavor profile will shift toward a lighter, less buttery taste.
The Texture Crew
All-purpose flour (1.5 cups) and cocoa powder (0.5 cup) form the structural backbone of the crust. The flour ensures the batter holds together, while the cocoa powder adds depth and a hint of bitterness that balances the sweetness. If you want a gluten‑free version, substitute the flour with a 1:1 gluten‑free blend, but keep in mind that the texture will become slightly denser. The chocolate chips (1 cup) are the star of the show—choose semi‑sweet or dark chocolate based on your preference. The chips melt into pockets of gooey chocolate that provide a satisfying contrast to the creamy filling.
The Unexpected Star
Cream cheese (8 oz) is the heart of the filling, delivering a velvety mouthfeel that melts in your mouth. It’s important to bring the cream cheese to room temperature before mixing; this prevents lumps and ensures a silky texture. If you prefer a tangier flavor, you can add a teaspoon of lemon zest or a splash of lemon juice; the acidity brightens the richness. A common mistake is using low‑fat cream cheese, which can cause the filling to crack when it cools. Stick with full‑fat for the best results.
The Final Flourish
The second sugar (0.5 cup) and the additional egg yolk (1) elevate the filling’s density and richness, while the extra vanilla extract (1 tsp) adds aromatic depth that lingers on the palate. The eggs act as binders, ensuring the cheesecake sets properly without becoming rubbery. If you’re looking for a vegan version, you can replace the eggs with flaxseed meal mixed with water (1 tablespoon flaxseed + 3 tablespoons water per egg). However, the texture will be slightly different, and you may need to adjust baking time.
Everything's prepped? Good. Let's get into the real action.
The Method — Step by Step
- Preheat your oven to 325°F (165°C). Line a 9‑inch springform pan with parchment paper and lightly grease the sides with butter or non‑stick spray. This step ensures your cheesecake slides out smoothly, avoiding those dreaded stuck edges that ruin the presentation.
- In a medium bowl, whisk together the melted butter, 2 cups of sugar, and 1 teaspoon vanilla extract until the mixture is glossy and free of lumps. The butter’s silky texture will coat the flour and cocoa, creating a cohesive batter that won’t separate during baking.
- Sift the all‑purpose flour and cocoa powder into the butter mixture, then fold gently until just combined. Overmixing can introduce air pockets that lead to cracks; aim for a smooth, uniform batter that feels like a thick batter.
- Stir in the chocolate chips, making sure they’re evenly distributed. The chips will melt into pockets of molten chocolate that give the cheesecake its signature indulgent texture.
- Press the batter into the bottom of the prepared pan, creating an even layer. Use the back of a spoon or a flat spatula to smooth the surface. This step is crucial for a consistent crust that sets evenly.
- Bake the crust for 15 minutes, or until it’s set and the edges just start pulling away from the pan. The crust should have a slight golden hue but not brown; this ensures a tender base that won’t overpower the filling.
- While the crust bakes, prepare the filling: beat the cream cheese on medium speed until it’s smooth and free of lumps. The smoother the cream cheese, the less likely the filling will crack when cooling.
- Add the 0.5 cup of sugar, the extra egg yolk, and the second teaspoon of vanilla extract to the cream cheese, then beat again until the mixture is silky and pale. The yolk adds richness and helps the filling set without becoming rubbery.
- Pour the filling over the pre‑baked crust, smoothing the top with a spatula. The filling should be level with the crust to avoid over‑baking the edges.
- Bake the cheesecake for an additional 30 minutes, or until the center is set but still slightly jiggly. The edges should be firm while the center remains creamy—this is the sweet spot for a perfect cheesecake.
- Once baked, turn off the oven and crack the door open slightly. Let the cheesecake sit inside the oven for 1 hour to cool gradually. This trick prevents cracks caused by rapid temperature changes.
- After an hour, remove the cheesecake from the oven and let it cool completely at room temperature. Then refrigerate for at least 4 hours, preferably overnight, to allow the flavors to meld and the texture to firm up.
- When ready to serve, run a knife around the edges of the pan, release the springform, and slice with a hot, dry knife for clean cuts. Serve chilled, optionally topped with fresh berries or a drizzle of chocolate sauce.
That's it — you did it. But hold on, I've got a few more tricks that'll take this to another level.
Insider Tricks for Flawless Results
The Temperature Rule Nobody Follows
Most people bake cheesecakes at a higher temperature, which leads to cracks and uneven textures. The secret is to keep the oven at a low, steady 325°F. This gentle heat allows the filling to set slowly, preventing the surface from tightening too quickly and cracking. I once tried baking at 375°F and the cheesecake split in half, which was a disaster. Stick to the lower temperature for a flawless finish.
Why Your Nose Knows Best
Before you pull the cheesecake out of the oven, trust your nose. If it smells like warm butter and chocolate, you’re good. If you detect a sharp, metallic scent, the eggs might be overcooked. Your olfactory system is a reliable indicator of the cake’s internal temperature and moisture content.
The 5‑Minute Rest That Changes Everything
After baking, let the cheesecake rest in the oven with the door ajar for 60 minutes. This gradual cooling step is essential for preventing cracks. I once skipped it, and the cheesecake split in half. The rest time also helps the flavors to meld, creating a more cohesive taste profile.
Use a Water Bath for Extra Creaminess
If you’re prone to cracks, try a water bath. Place the springform pan in a larger baking dish and fill the dish with boiling water up to the side of the pan. This ensures even heat distribution and reduces the risk of cracks. The trade‑off is a slightly longer baking time, but the result is worth it.
Freeze for a Quick Dessert
If you’re in a hurry, you can freeze the cheesecake after it’s fully baked and chilled. Freeze for up to two weeks, then thaw in the refrigerator overnight. The texture remains silky, and the chocolate chips stay gooey.
Serve with a Surprise
Add a dollop of whipped cream or a drizzle of raspberry coulis on top before serving. The bright acidity cuts through the richness and adds a playful contrast. My friends always ask for the secret, and I can’t resist sharing it.
Creative Twists and Variations
This recipe is a playground. Here are some of my favorite ways to switch things up:
Nutty Crunch
Add 1 cup of chopped pecans or walnuts to the crust for a buttery crunch that pairs beautifully with the chocolate. The nuts also add a subtle earthy flavor that complements the creamy filling.
Caramel Swirl
Swirl a handful of caramel sauce into the batter before baking. The caramel adds a sweet, buttery note that contrasts the chocolatey base, creating a multi‑layered flavor experience.
Minty Fresh
Stir in a teaspoon of peppermint extract into the filling. The mint provides a refreshing aftertaste that balances the richness of the cheesecake, making it perfect for summer parties.
Espresso Boost
Add a tablespoon of espresso powder to the batter. The coffee flavor deepens the chocolate notes and adds a subtle bitterness that elevates the overall taste.
Berry Burst
Top the finished cheesecake with a layer of fresh strawberries or blueberries before serving. The fruit adds a burst of tartness that cuts through the creaminess.
Almond Delight
Replace the all-purpose flour with almond flour for a nutty, gluten‑free crust. The almond flour gives a slightly chewy texture and a subtle nutty flavor that complements the chocolate chips.
Storing and Bringing It Back to Life
Fridge Storage
Store the cheesecake in an airtight container in the refrigerator for up to 5 days. The airtight seal prevents the cake from absorbing odors from other foods, preserving its rich flavor. When you’re ready to serve, let it sit at room temperature for 15 minutes to soften slightly.
Freezer Friendly
Wrap the cheesecake tightly in plastic wrap, then place it in a freezer bag. Freeze for up to 2 weeks. When you’re ready to enjoy, thaw in the refrigerator overnight. The texture remains silky, and the chocolate chips stay gooey.
Best Reheating Method
If you need to reheat the cheesecake, place it in a preheated oven at 300°F for 10 minutes, or until warmed through. Add a splash of water to the bottom of the pan before reheating; the steam will help the cheesecake regain its moisture and prevent it from drying out.