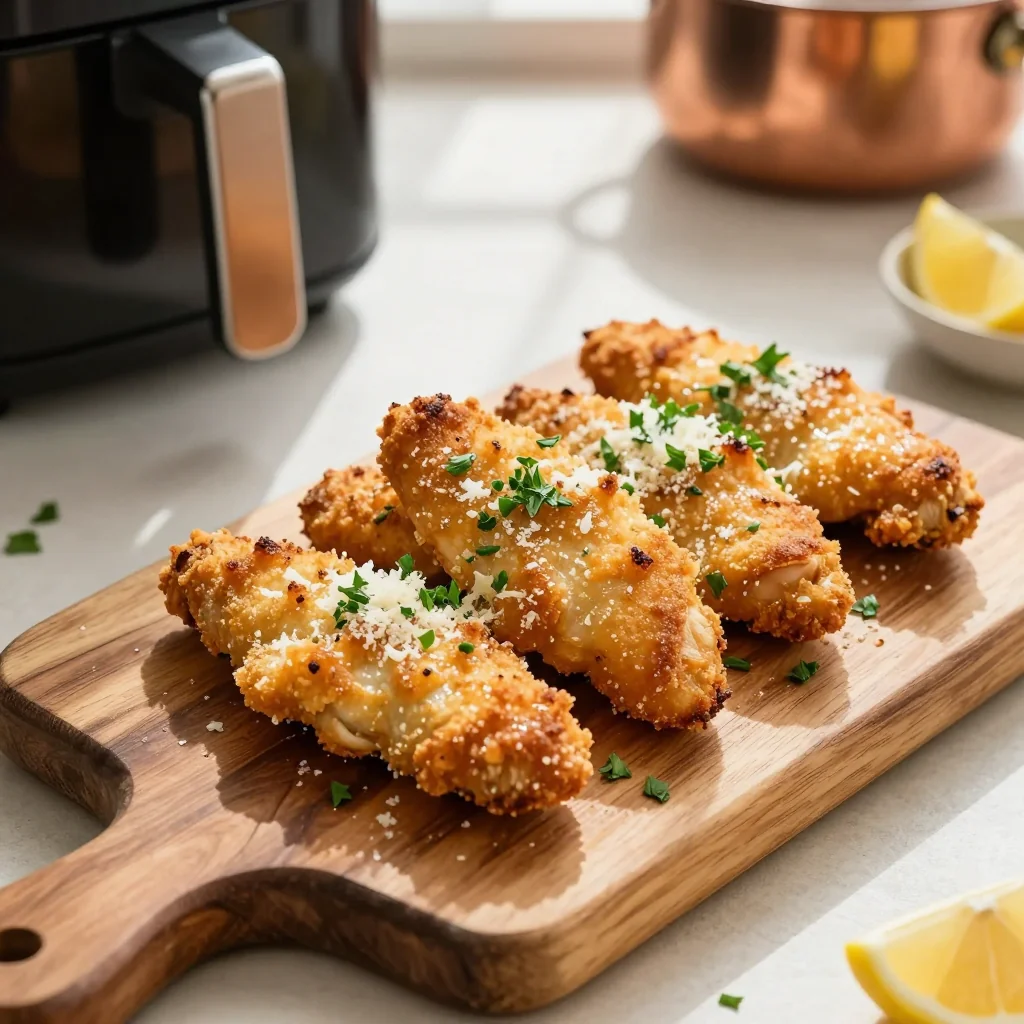
Crispy, garlicky chicken tenders that are ready in minutes—perfect for busy weeknights or game‑day snacking.
I still remember the first time I tasted a perfectly crisp chicken tender—its golden crust sang with the aroma of garlic and Parmesan, while the meat inside stayed juicy and tender. That memory took root during a rainy weekend when I was craving comfort food but didn’t want to spend hours in the kitchen. I turned to my trusty air fryer, a device that has become a culinary sidekick for quick, healthier meals, and the result was pure magic.
Garlic Parmesan Chicken Tenders have a lineage that stretches back to classic Italian tavola fare, where simple ingredients are transformed into unforgettable flavors. The combination of garlic, a sharp cheese, and a light, crunchy coating is a hallmark of Mediterranean comfort cooking. By using an air fryer, we preserve the soul of the dish while cutting down on oil, making it a smarter choice for everyday cooking.
In this article, I’ll walk you through every nuance—from selecting the right chicken pieces, to mastering the coating, to achieving that perfect air‑fryer crisp. You’ll learn why each step matters, how to adapt the recipe for different dietary needs, and how to store leftovers without losing that coveted crunch.
So grab your apron, preheat that air fryer, and let’s turn a humble pantry staple into a crowd‑pleasing masterpiece that you’ll want to make again and again.
🌟 Why This Recipe Will Win Your Heart
From the first bite to the last, this dish balances flavor, texture, and convenience in a way that few home‑cooked meals can.
- ✨ Irresistible Crunch: The panko‑Parmesan coating creates a light, airy crust that stays crisp thanks to the rapid hot‑air circulation of the air fryer.
- ✨ Bold Garlic‑Parmesan Flavor: Fresh garlic powder and real grated Parmesan meld into a savory perfume that makes the tenders impossible to ignore.
- ✨ Healthier Than Fried: You get that fried‑like texture with up to 80% less oil, keeping calories lower without sacrificing taste.
- ✨ Speedy Preparation: From start to plate in under 30 minutes, ideal for busy families or last‑minute gatherings.
- ✨ Versatile Serving Options: Serve as a main dish, a snack, or a party appetizer with dipping sauces, salads, or wraps.
- ✨ Easy Portion Scaling: The built‑in portion adjuster lets you instantly recalculate ingredient amounts for any number of guests.
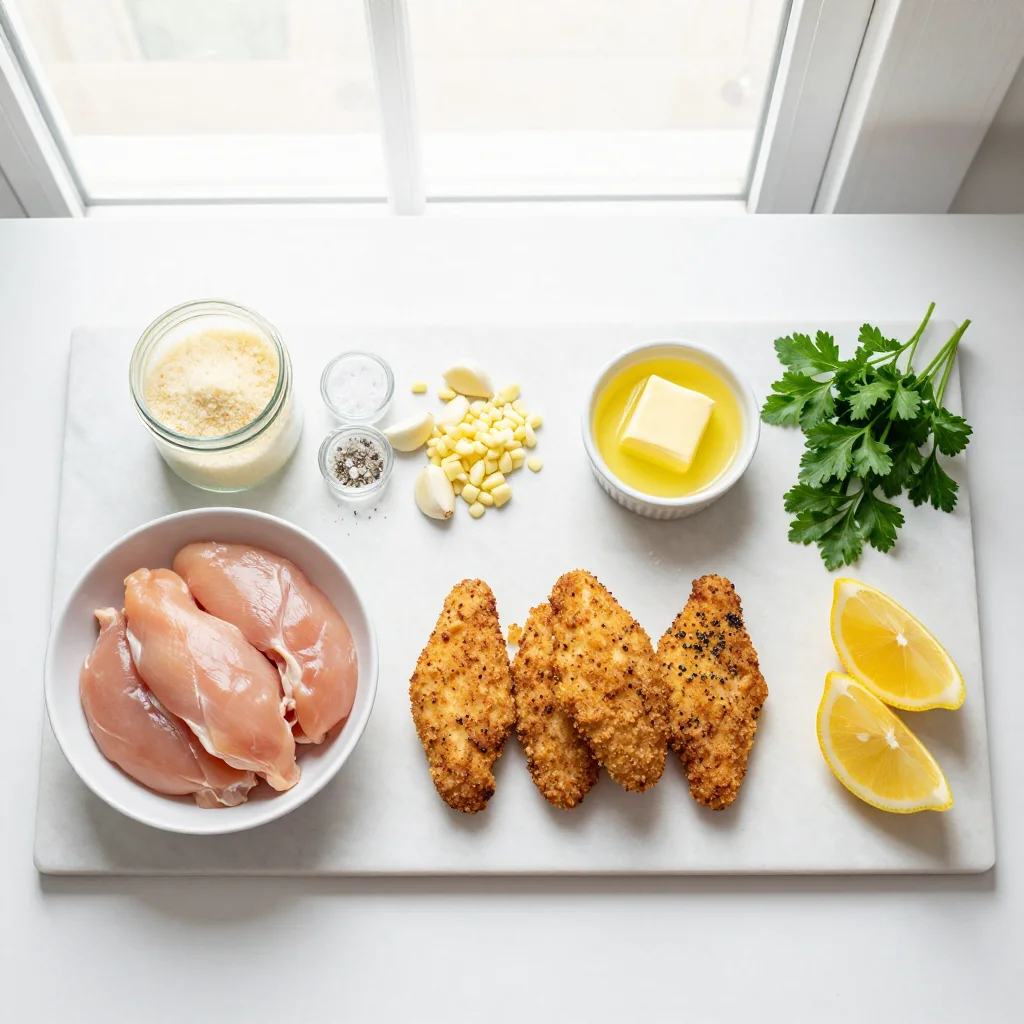
🥗 The Ingredients
📝 Complete Ingredient List
For the Chicken:
- 900 g chicken breast tenders (about 2 lbs)
- 1 tsp salt
- 0.5 tsp black pepper
- 1 tsp garlic powder
- 1 tsp onion powder
For the Breading:
- 120 g all‑purpose flour
- 2 large eggs
- 2 tbsp water
- 100 g Parmesan cheese, grated
- 120 g panko breadcrumbs
- 2 tbsp fresh parsley, chopped
For the Garnish/Sauce (optional):
- 1 tbsp olive oil (for spray)
- 1 lemon cut into wedges
- ½ cup Greek yogurt
- 1 tsp Dijon mustard
- 1 clove garlic, minced
- Pinch salt
🔍 Focus on Key Ingredients
Chicken Breast Tenders
Chicken breast tenders are naturally tender because they come from the inner pectoral muscle, which sees less connective tissue than other cuts. Choosing fresh, skinless tenders ensures an even cooking time and prevents the meat from drying out. If you can’t find pre‑cut tenders, simply slice boneless, skinless breasts into 1‑inch strips, then gently pound them to uniform thickness.
Parmesan Cheese
Real Parmigiano‑Reggiano brings a salty, nutty depth that powdered cheese can’t match. Grating it yourself just before coating preserves its aromatic oils, giving each bite a burst of umami. For a slightly sharper profile, use a blend of Parmesan and Pecorino Romano.
Panko Breadcrumbs
Panko, a Japanese-style breadcrumb, creates a light, airy crust that stays crisp even after a short air‑frying cycle. Its larger flakes trap air, allowing the exterior to become golden without becoming soggy. If you prefer a gluten‑free version, substitute with gluten‑free panko or crushed cornflakes.
🔄 Quick Substitutions
| If you don’t have… | Use instead… |
|---|---|
| Fresh chicken tenders | Chicken breast cut into strips |
| Parmesan cheese | Pecorino Romano or grated Asiago |
| Panko breadcrumbs | Gluten‑free panko or crushed cornflakes |
👨🍳 Step‑by‑Step Instructions
Follow these detailed steps to achieve perfectly crisp, garlic‑infused chicken tenders that stay juicy inside.
📋 Phase 1: Preparation & Mise en Place
Gather and prep all components before you start the air fryer.
Season the Chicken
Pat the chicken tenders dry with paper towels. In a large bowl, combine the chicken with salt, black pepper, garlic powder, and onion powder. Toss until each piece is evenly coated. The seasoning not only flavors the meat but also helps the coating adhere during frying.
Prepare the Breading Station
Set up three shallow dishes. In the first, place the flour. In the second, whisk together eggs and water until smooth. In the third, combine grated Parmesan, panko breadcrumbs, and chopped parsley. Mix the dry ingredients thoroughly so the Parmesan distributes evenly.
🔥 Phase 2: Coating & Air‑Frying
Create a golden crust and cook the tenders to perfection.
Dredge the Chicken
Take each seasoned chicken piece, dip it first into the flour, shaking off excess, then into the egg wash, and finally roll it in the Parmesan‑panko mixture. Press gently to ensure the coating sticks. The triple‑layer method yields a crunchy exterior while sealing in juices.
Preheat the Air Fryer
Set your air fryer to 200 °C (390 °F) and let it preheat for 3 minutes. A hot start ensures the coating crisps instantly upon contact.
Arrange and Spray
Lightly spray the air‑fryer basket with olive oil. Place the coated chicken tenders in a single layer, leaving a small gap between each piece. Spray the tops of the tenders with a thin mist of oil; this helps the coating achieve a deep golden hue.
Cook the Tenders
Cook at 200 °C for 6 minutes, then flip each tender and spray the other side lightly. Continue cooking for another 6 minutes, or until the internal temperature reaches 74 °C (165 °F) and the coating is a rich amber color. The total cooking time is about 12 minutes.
✨ Phase 3: Finishing & Plating
Final checks, sauce preparation, and serving.
Check Doneness
Insert a meat thermometer into the thickest part of a tender; it should read 74 °C (165 °F). If you don’t have a thermometer, cut one open—there should be no pinkness and the juices run clear.
Prepare the Garlic Yogurt Dip (optional)
In a small bowl, whisk together Greek yogurt, Dijon mustard, minced garlic, a squeeze of lemon juice, and a pinch of salt. Adjust seasoning to taste. This cool, tangy dip balances the richness of the tenders.
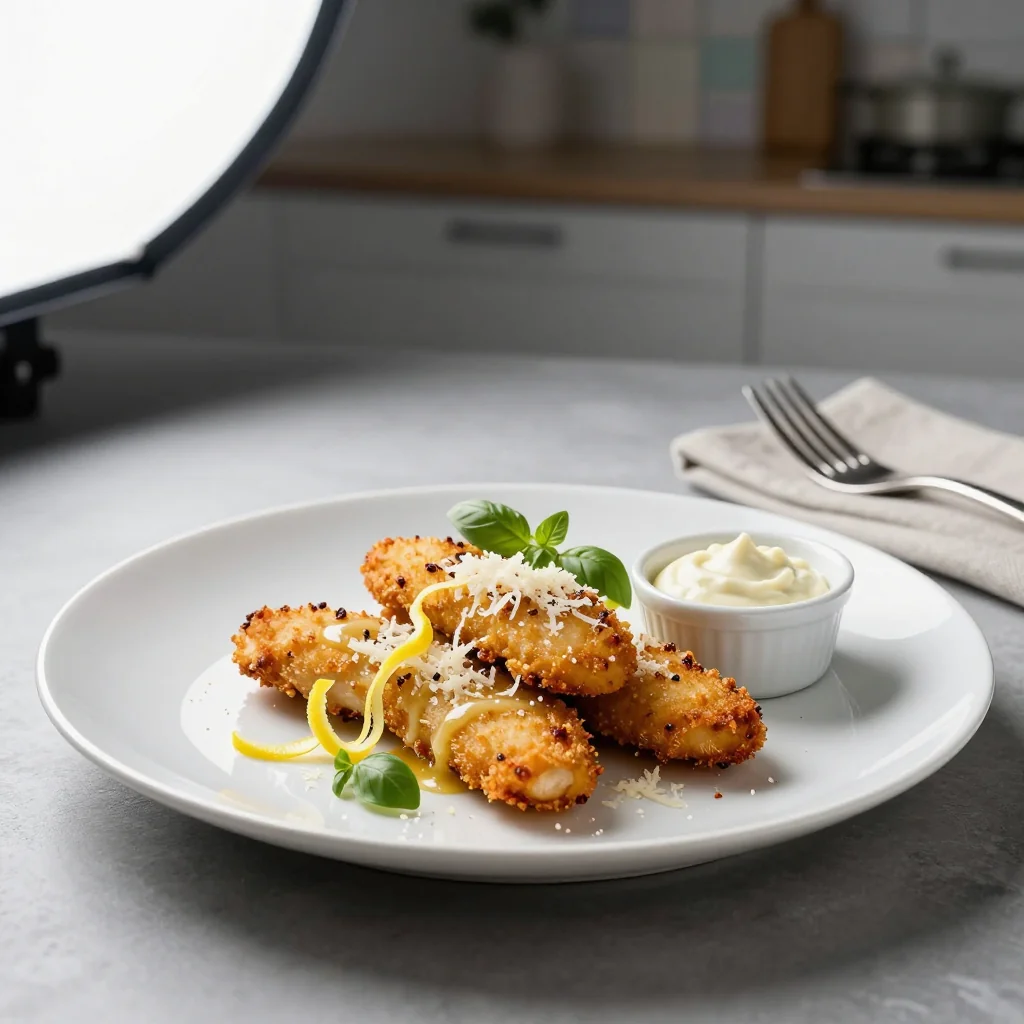
Plate the Tenders
Arrange the golden chicken tenders on a serving platter. Garnish with fresh parsley and lemon wedges. Serve the dip in a small ramekin on the side. For extra visual appeal, drizzle a tiny drizzle of olive oil over the top.
Enjoy Immediately
Serve while hot for maximum crunch. Pair with a crisp salad or fries, and watch them disappear in seconds!
💡 Expert Tips & Tricks
🛒 Choosing the Right Ingredients
Opt for chicken breasts that are firm, pinkish, and free of any gray spots. Freshly grated Parmesan releases more aroma than pre‑grated packets, which often contain anti‑caking agents. When buying panko, select a brand that lists whole wheat or rice flour for a lighter texture. Lastly, use a high‑quality olive oil spray; it atomizes better and prevents excess oil buildup.
🔪 Preparation Techniques
Patting the chicken dry is essential; moisture interferes with the coating’s adhesion. For uniform cooking, cut all strips to roughly the same thickness—about 1 cm. If you have time, marinate the chicken in a little lemon juice and garlic for 15 minutes; this adds depth without compromising the crisp.
🌡️ Mastering the Cooking Process
Preheating the air fryer is non‑negotiable; it jump‑starts the Maillard reaction, giving you that golden crust. Flip the tenders halfway through cooking to ensure both sides brown evenly. If you notice the coating darkening too quickly, lower the temperature to 190 °C (375 °F) and extend the cooking time by a minute or two.
🍽️ Presentation & Service
Serve the tenders on a wooden board for a rustic feel, or use a sleek white platter for a modern look. Sprinkle extra chopped parsley and a pinch of flaky sea salt just before serving. Pair with a bright citrus salad to cut through the richness, and you have a restaurant‑quality plate.
🏆 Pro Tips
Professional chefs know that subtle adjustments make the difference between good and unforgettable.
- 🎯 Use a Double‑Coat Technique: After the first coating, dip the tenders again in the egg wash and a second layer of the Parmesan‑panko mix. This creates an ultra‑crisp exterior without adding extra calories.
- 🎯 Salt the Flour: Adding a pinch of salt to the flour layer seasons the interior of the chicken, ensuring flavor penetrates all the way through.
- 🎯 Rest the Coated Chicken: Let the coated tenders sit on a wire rack for 5 minutes before air‑frying. This helps the coating set, reducing the chance of it falling off during cooking.
- 🎯 Add a Touch of Smoked Paprika: Mixing ½ tsp smoked paprika into the breadcrumb mixture gives a subtle smoky depth that pairs beautifully with garlic.
- 🎯 Finish with a Light Drizzle of Truffle Oil: For a gourmet twist, drizzle a few drops of truffle oil over the hot tenders just before serving.
- 🎯 Use a Meat Thermometer: Consistent internal temperature ensures safety and juiciness. Overcooking by even a minute can dry out the meat.
"Great food is about balance—flavor, texture, and timing. When you master those, the dish sings." — Chef Marco Bianchi
🔄 Variations & Adaptations
This recipe is a versatile canvas. Below are several ways to customize it for different tastes, diets, and occasions.
🥬 Vegetarian/Vegan Version
Replace chicken with firm tofu or cauliflower florets. For tofu, press it to remove excess water, cut into strips, and follow the same coating process. For cauliflower, break into bite‑size florets and increase cooking time to 15‑18 minutes, shaking the basket halfway.
- Substitution 1: 400 g firm tofu, pressed and sliced.
- Substitution 2: 1 large cauliflower head, broken into florets.
🌶️ Flavor Variations
Play with herbs and spices to create global twists that keep the base technique intact.
Spicy Version:
Add ½ tsp cayenne pepper and 1 tsp smoked chipotle powder to the breadcrumb mix. Serve with a sriracha‑yogurt dip for extra heat.
Mediterranean Version:
Mix 1 tsp dried oregano, 1 tsp lemon zest, and ¼ cup finely chopped sun‑dried tomatoes into the coating. Pair with tzatziki and a cucumber‑tomato salad.
Asian Fusion Version:
Incorporate 1 tbsp toasted sesame seeds, 1 tsp five‑spice powder, and a splash of soy sauce into the egg wash. Serve with a sweet chili sauce and pickled vegetables.
⚠️ Dietary Adaptations
Gluten‑Free:
Use gluten‑free panko or crushed rice crackers, and replace all‑purpose flour with a 1:1 gluten‑free flour blend.
Lactose‑Free:
Substitute Parmesan with a lactose‑free hard cheese such as Pecorino Romano, or use a dairy‑free nutritional yeast blend for a cheesy flavor.
Low‑Calorie:
Reduce the amount of oil spray, use a light coating of almond flour instead of all‑purpose flour, and serve with a side of steamed vegetables instead of fries.
👶 Family/Kids Version
Kids love milder flavors. Omit the garlic powder and reduce the black pepper. Serve with a honey‑mustard dip and a side of carrot sticks for a balanced meal that pleases picky eaters.
📦 Storage & Reheating
🧊 Conservation
Refrigerator:
- Duration: 3 days
- Recommended container: airtight plastic container or zip‑lock bag
- Tip: Place a paper towel on top to absorb excess moisture and keep the crust crisp.
Freezer:
- Duration: 2 months
- Method: Freeze the cooked, cooled tenders on a baking sheet, then transfer to a freezer‑safe bag.
- Defrosting: Thaw overnight in the refrigerator or use the air fryer’s “reheat” setting.
💡 For best texture, reheat from frozen using the air fryer rather than microwaving.
♨️ Reheating
🔥 Oven (Recommended):
- Preheat to 190 °C (375 °F).
- Place tenders on a wire rack over a baking sheet.
- Reheat for 8‑10 minutes, turning halfway.
- Finish with a 2‑minute burst of high heat (200 °C) for extra crisp.
⚡ Microwave (Quick):
- Cover with a microwave‑safe lid.
- Heat on medium power for 1 minute.
- Check and continue in 30‑second increments until hot.
- Optional: Transfer to a hot skillet for 1‑2 minutes to restore crispness.
🍳 Skillet:
Heat a non‑stick skillet over medium heat, add a splash of oil, and sauté the tenders for 2‑3 minutes per side until the coating regains its crunch.
🍷 Perfect Pairings
🥗 Side Dishes
- Arugula Lemon Salad: Peppery arugula tossed with lemon vinaigrette brightens the rich tenders.
- Sweet Potato Fries: Their natural sweetness balances the savory garlic‑Parmesan crust.
- Grilled Zucchini: Lightly charred zucchini adds a smoky note without overwhelming the palate.
🍷 Wine & Beverage Matches
- Chardonnay (oaked): Its buttery texture mirrors the Parmesan while its acidity cuts through the richness.
- Italian Pinot Grigio: Crisp and citrusy, it refreshes between bites.
- Non‑alcoholic: Sparkling water with a splash of grapefruit juice offers a bright, palate‑cleansing sip.
🍰 To Complete the Meal
Begin with a light tomato bruschetta, follow with the chicken tenders, and finish with a lemon‑ricotta cheesecake. The citrus thread runs through the entire menu, creating a harmonious dining experience.
❓ Frequently Asked Questions
Q: Can I use frozen chicken tenders?
Yes, but thaw them completely in the refrigerator first. Pat them dry to ensure the coating adheres. Frozen tenders may release more moisture, so you might need a slightly longer cooking time—check for an internal temperature of 74 °C.
Q: How do I make the coating gluten‑free?
Substitute the all‑purpose flour with a 1:1 gluten‑free flour blend and use gluten‑free panko or crushed cornflakes. The texture will remain light, and the flavor stays the same.
Q: Why does my coating fall off during cooking?
This usually happens when the chicken is too wet or the coating isn’t pressed firmly enough. Pat the meat dry, let the coated pieces rest on a wire rack for a few minutes, and press the breadcrumb mixture gently onto each piece before cooking.
Q: Can I bake these in a conventional oven?
Absolutely. Preheat a conventional oven to 220 °C (425 °F), place the tenders on a wire rack over a baking sheet, and bake for 20‑22 minutes, flipping halfway. The result will be slightly less crisp than the air fryer but still delicious.
Q: How do I store the leftover dip?
Transfer the dip to an airtight container and keep it refrigerated for up to 3 days. Stir well before serving; if it thickens, add a splash of milk or lemon juice to loosen it.
Q: Is it possible to prepare the entire recipe ahead of time?
Yes. You can coat the chicken, place it on a parchment‑lined tray, and store it uncovered in the refrigerator for up to 12 hours. When ready, simply air‑fry directly from the fridge, adding an extra minute or two to account for the cold start.
🎉 Let’s Get Cooking!
Garlic Parmesan Chicken Tenders Air Fryer combine the comfort of a classic comfort food with the convenience of modern kitchen technology. The recipe delivers a satisfying crunch, a burst of savory garlic‑Parmesan flavor, and the flexibility to adapt to any dietary need. Whether you’re feeding a family, hosting a game night, or preparing a quick weekday dinner, these tenders will become a staple in your culinary repertoire.
I hope you enjoy making and sharing this dish as much as I do. Feel free to experiment with the variations, tweak the spices, and make it your own. Your feedback, photos, and tips are always welcome—let’s keep the conversation cooking!
Have you tried this recipe?
Leave a comment and rating below! Share your photos on Instagram with #CrispyAirFryTenders for a chance to be featured.
Garlic Parmesan Chicken Tenders Air Fryer
Crispy, garlicky chicken tenders cooked to perfection in an air fryer.
📝 Ingredients
Chicken
Breading
Garnish & Sauce (optional)
👨🍳 Instructions
- 1
Season the chicken with salt, pepper, garlic powder, and onion powder; toss to coat evenly.
- 2
Set up three shallow dishes: flour, egg‑water wash, and Parmesan‑panko‑parsley mix.
- 3
Dredge each piece in flour, dip in egg wash, then press into the breadcrumb mixture.
- 4
Preheat the air fryer to 200 °C (390 °F) for 3 minutes.
- 5
Arrange tenders in a single layer, spray lightly with oil, and cook 6 minutes.
- 6
Flip, spray the other side, and cook another 6 minutes until golden and internal temp reaches 74 °C.
- 7
While cooking, whisk together Greek yogurt, Dijon, minced garlic, lemon juice, and a pinch of salt for the dip.
- 8
Serve the hot tenders with lemon wedges, garnish with parsley, and accompany with the yogurt dip.
- 9
Optional: drizzle a few drops of truffle oil for an upscale finish.
- 10
Enjoy immediately while the crust is at its crispiest.
🥗 Nutrition (per serving)
*Values are estimates based on standard ingredient data.
📚 You Might Also Like
Crispy Air Fryer Fish Fillets
Spicy Korean Chicken Wings
Lemon Herb Roasted Vegetables


💬 Comments & Reviews
Leave a Comment
[Reader comments will appear here]