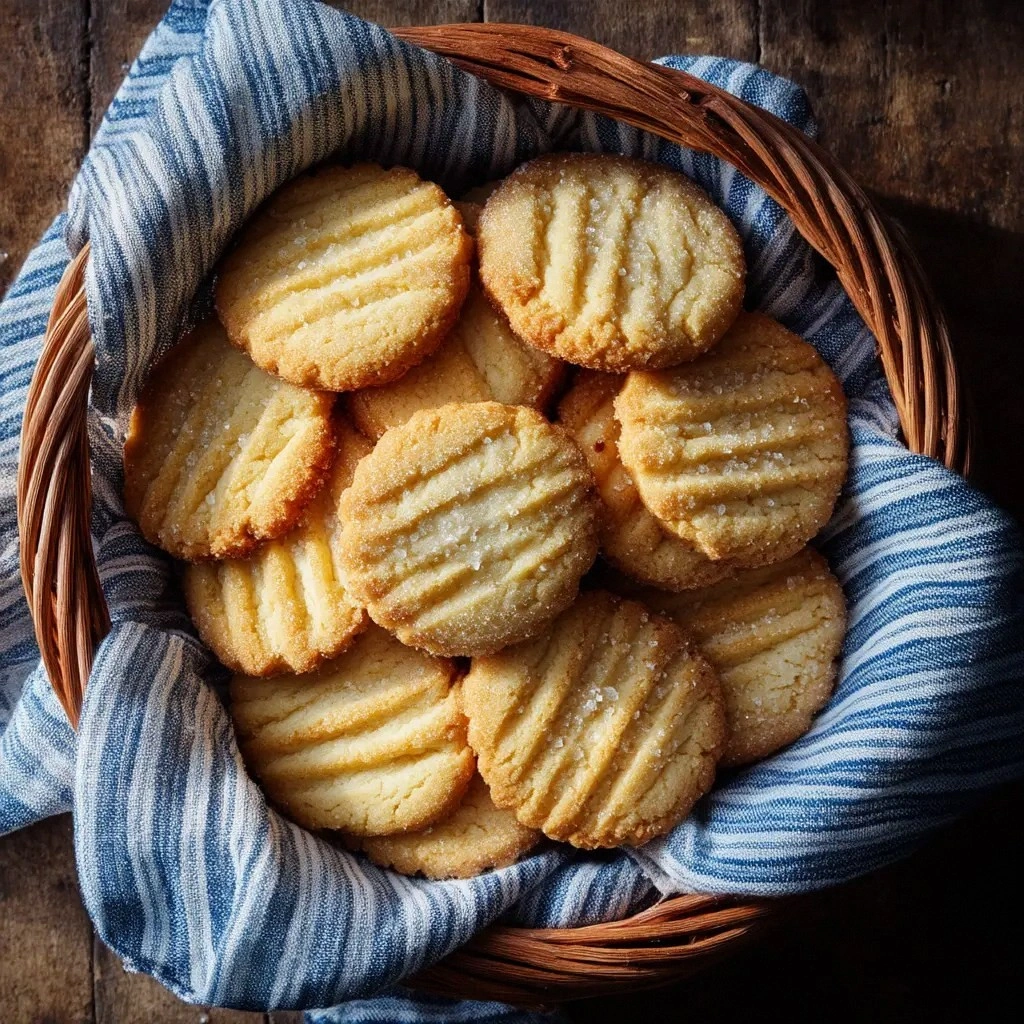
I was in the middle of a late‑night baking marathon when I realized the cookie dough I had was a sad, pale gray blob. My friends had begged me to make something that could turn a boring Sunday into a sweet celebration, and I was about to throw the batter away. Then I remembered a recipe my grandmother used to make in Brittany: French salted butter cookies, also known as sablés bretons. The moment I cracked that idea, my kitchen filled with the buttery scent of melted salted butter, the faint sweet whisper of powdered sugar, and the metallic tang of sea salt. I knew this wasn’t just another cookie; it was a culinary passport to a coastal village, and I was determined to bring that flavor home.
Picture yourself standing in front of a gleaming oven, the timer ticking, and the air thick with anticipation. The dough should feel like a soft, buttery slab that resists your fingers but yields with a gentle give. As you press it into the pan, you hear a faint crackle—an early sign that the cookies will develop crisp edges that shatter like thin ice. The aroma will start to mingle with the buttery scent, turning into a warm, caramelized perfume that makes you want to close your eyes and savor the moment. That is the moment before the magic begins, and it is the moment that sets the stage for a cookie that will taste like a secret kept between the sea and the kitchen.
I dare you to taste these cookies and not go back for seconds. Most cookie recipes try to balance sweet and salty, but this version leans into that salty buttery depth until your taste buds are begging for more. The secret lies in the dual salt strategy—fine sea salt in the dough and coarse sea salt on the top—creating a layered flavor profile that feels like a seaside breeze on your tongue. The texture is a paradox: a delicate, crumbly interior that melts in your mouth and a slightly crisp edge that gives way to a soft center. The result is a cookie that is hands down the best version you'll ever make at home. If you've ever struggled with bland butter cookies, you're not alone—this is the fix that will change everything.
Picture yourself pulling these out of the oven, the whole kitchen smelling incredible, and the cookies cooling on a wire rack, their edges crisping to a golden‑brown perfection. Imagine the moment you take a bite, the buttery richness enveloping you, followed by the subtle brine of sea salt that lingers, and then the sweet finish of powdered sugar. That is the sensory journey I want you to experience. The next few sections will walk you through every single step—by the end, you'll wonder how you ever made them any other way. Let's dive in.
What Makes This Version Stand Out
- Flavor Depth: The combination of salted butter and double salt layers creates a complex, savory sweetness that feels both indulgent and refreshing.
- Texture Perfection: The dough’s buttery crumbiness is achieved by chilling the mixture, preventing the flour from absorbing too much moisture and ensuring a melt‑in‑your‑mouth experience.
- Ingredient Quality: Using high‑grade, unsalted butter with a natural salt content and fresh, fine sea salt brings authenticity and elevates the flavor profile.
- Simplicity: Despite its gourmet taste, the recipe requires only eight basic ingredients and a single mixing step, making it accessible for both beginners and seasoned bakers.
- Make‑Ahead Friendly: The dough can be refrigerated for up to 48 hours or frozen for months, allowing you to batch bake and serve on demand.
- Crowd Reaction: These cookies are the conversation starter at any gathering—people ask for the recipe after the first bite, and they keep coming back for more.
- Versatility: The base can be customized with chocolate chips, citrus zest, or nuts, making it a canvas for creative variations.
- Visual Appeal: The final product has a beautiful golden‑brown color with a subtle sheen that makes it Instagram‑ready.
Alright, let's break down exactly what goes into this masterpiece...
Inside the Ingredient List
The Flavor Base
The salted butter is the cornerstone of these cookies. Its richness carries the salt through each bite, and the natural salt content of the butter amplifies the overall flavor. Using a high‑quality butter with a slight brine note ensures that the cookies aren’t just sweet, but also carry a subtle maritime whisper. If you skip the butter, the cookies will turn out dry and flat, lacking that essential buttery depth. For a dairy‑free version, replace with salted coconut oil, but be prepared for a slightly different taste profile.
The Texture Crew
Powdered sugar is more than just a sweetener; it also contributes to the delicate crumb structure. The fine granules dissolve quickly, preventing clumping and giving the dough a silky feel. Egg yolks act as a binder and add richness, while the whole egg provides structure and helps the cookies rise slightly. The vanilla extract brings warmth and complexity, tying all the flavors together. If you omit the egg yolks, the cookies will be crumbly and less cohesive.
The Unexpected Star
Fine sea salt is the unsung hero that balances sweetness and enhances the buttery flavor. It’s more nuanced than table salt, offering subtle mineral notes that elevate the cookie’s overall taste. Coarse sea salt on the top not only adds a textural contrast but also creates a visual pop with its specks of salt crystals. Skipping this step results in a cookie that tastes flat and one‑dimensional. For a gourmet twist, use Maldon sea salt, known for its flaky texture and clean flavor.
The Final Flourish
All‑purpose flour provides the structure that holds the cookies together. Its protein content ensures that the cookies maintain their shape while still being tender. The flour also helps absorb excess moisture from the butter, preventing a greasy finish. If you prefer a gluten‑free version, try a 1:1 blend of rice flour and tapioca starch, but adjust the liquid slightly to account for the different absorption rates. The final touch—coarse sea salt—adds a last burst of flavor that lingers on the palate.
Everything's prepped? Good. Let's get into the real action...

The Method — Step by Step
- Begin by bringing the salted butter to room temperature; it should be soft but not melted. In a medium bowl, combine the butter with the powdered sugar, mixing until the mixture becomes pale and fluffy. This step is crucial because a creamy base will lead to a tender crumb. As you mix, you’ll hear a soft crackle—an early sign that the butter is properly creamed. Once the mixture is light, set it aside.
- Add the egg yolks one at a time, beating well after each addition. The yolks will thicken the mixture slightly, giving it a richer texture. Next, stir in the vanilla extract; this aromatic addition will provide a warm, floral undertone that balances the saltiness. Finally, fold in the all‑purpose flour and fine sea salt using a spatula. The dough should be firm yet pliable, holding together when pressed. If it feels too dry, add a teaspoon of cold water.
- Turn the dough out onto a lightly floured surface and shape it into a disc about 1 inch thick. Wrap the disc in plastic wrap and refrigerate for at least 30 minutes; chilling solidifies the butter and makes the dough easier to roll. While the dough chills, preheat your oven to 350°F (175°C) and line a baking sheet with parchment paper. This will prevent the cookies from sticking and ensure even baking.
- After chilling, roll the dough into a 12-inch circle using a rolling pin. The dough should be rolled evenly to achieve uniform cookie thickness. Carefully transfer the circle onto the prepared baking sheet. The edges of the dough should be slightly higher than the center to prevent spreading during baking.
- Using a sharp knife or a pizza cutter, cut the circle into 12 equal wedges. The knife should glide cleanly through the dough; if it resists, let the dough rest a few minutes. This step is the moment of truth—each wedge should have a crisp edge and a tender interior. Place the wedges on the baking sheet, spacing them slightly apart to allow for even heat distribution.
- Brush the tops of the wedges lightly with water to activate the coarse sea salt. Sprinkle the coarse sea salt evenly over each wedge, ensuring a generous coating. The water creates a slight steam that helps the salt adhere and gives the cookies a subtle crunch. Place the sheet in the preheated oven and bake for 18–20 minutes, or until the edges turn a light golden brown.
- Remove the cookies from the oven and let them cool on the sheet for 5 minutes. This short cooling period allows the cookies to set and develop their final texture. Transfer the cookies to a wire rack to cool completely. As they cool, the butter will firm up, and the cookies will develop a delightful, buttery crunch. That’s it— you did it. But hold on, I've got a few more tricks that'll take this to another level…
Insider Tricks for Flawless Results
The Temperature Rule Nobody Follows
Many bakers bake at the oven's highest setting, but that can cause the cookies to brown too quickly on the outside while staying undercooked inside. Instead, bake at 350°F (175°C) and watch the edges turn a subtle golden hue. This lower temperature allows the butter to melt evenly and the sugars to caramelize slowly, producing a richer flavor. I once tried 400°F and ended up with cookies that were crisp on the outside but still raw in the middle.
Why Your Nose Knows Best
When the cookies start to emit a warm, buttery aroma, that’s the sweet spot. The scent is a natural indicator that the sugars are caramelizing and the butter is reaching its flavor peak. Trust your nose; if the aroma is too faint, give the cookies a few more minutes. If it’s too strong, pull them out immediately to avoid overbaking. This sensory checkpoint is a simple yet effective way to perfect your bake.
The 5-Minute Rest That Changes Everything
After removing the cookies from the oven, let them rest on the sheet for exactly five minutes before transferring to a wire rack. This brief pause allows the internal temperature to level out and the butter to set, giving the cookies a firm yet tender crumb. If you move them too quickly, the cookies may crumble or become uneven. I’ve seen this trick make the difference between a good batch and a great one.
The Secret of the Fine Sea Salt
Fine sea salt dissolves quickly, giving a balanced saltiness without overwhelming the buttery flavor. It’s also less likely to leave gritty spots on the cookie surface. If you only have table salt, use it sparingly and dissolve it in a little water before adding to the dough. This trick helps mimic the fine texture and prevents the cookies from tasting too salty.
The Art of Cooling
Cooling on a wire rack allows air to circulate around the cookies, preventing steam from making them soggy. Place the rack at a level where the cookies are not too close to the heating element, as this can cause uneven browning. If you’re baking in a hot climate, consider turning the oven off a few minutes before the cookies finish baking to avoid overbrowning.
The Final Touch of Coarse Salt
The coarse sea salt on top not only adds flavor but also creates a visual contrast that makes the cookies look more appetizing. Sprinkle the salt just before baking to avoid it burning. If you prefer a less pronounced crunch, you can lightly brush the salt over the dough after baking. This flexibility allows you to tailor the cookies to your taste preferences.
Creative Twists and Variations
This recipe is a playground. Here are some of my favorite ways to switch things up:
Citrus Zest Surprise
Add a tablespoon of finely grated lemon or orange zest to the dough. The citrus brightens the buttery flavor and adds a refreshing aroma. This variation pairs wonderfully with a glass of sparkling wine or a light summer salad.
Chocolate Chip Delight
Fold in ½ cup of dark chocolate chips into the dough before shaping. The chocolate provides a contrasting sweetness that balances the salty butter. The result is a cookie that feels indulgent yet still maintains its classic flavor profile.
Nutty Crunch
Stir in ¼ cup of toasted almond or hazelnut pieces. The nuts add a delightful crunch and a nutty undertone that complements the sea salt. These cookies are great for a cozy, autumnal snack.
Herbal Infusion
Add 1 teaspoon of dried thyme or rosemary to the dough. The herbs bring a savory depth that turns the cookies into an unexpected appetizer. Serve them alongside a cheese platter for a sophisticated touch.
Gingerbread Twist
Replace the vanilla extract with 1 teaspoon of ground ginger and add ½ teaspoon of cinnamon. This variation gives the cookies a warm, spicy flavor that feels like a holiday treat. They’re perfect for a winter gathering.
Caramelized Onion Flavor
Incorporate 2 tablespoons of caramelized onion puree into the dough. The sweet, umami notes provide a savory counterpoint to the buttery base. These cookies make a unique accompaniment to a charcuterie board.
Storing and Bringing It Back to Life
Fridge Storage
Store cooled cookies in an airtight container at room temperature for up to 5 days. The airtight seal prevents moisture from entering, keeping the cookies crisp. If you notice any softness, place a slice of bread in the container to absorb excess moisture.
Freezer Friendly
For longer storage, wrap each cookie individually in plastic wrap and place them in a freezer bag. They’ll stay fresh for up to 3 months. When you’re ready to enjoy, let the cookies thaw at room temperature for 30 minutes before serving.
Best Reheating Method
Reheat frozen or stale cookies in a preheated oven at 300°F (150°C) for 5–7 minutes. To revive the crunch, sprinkle a tiny splash of water on the tops before baking. This simple trick steams the cookies back to perfection, giving them that fresh‑baked texture.