Picture this: I’m standing in my kitchen, the timer on the stove blaring like a frantic alarm, and my roommate just shouted, “You promised burritos for dinner!” I had a half‑cooked chicken breast, a lonely bag of rice, and a jar of salsa that had been sitting on the counter for weeks. In the panic‑filled moment, I tossed everything together, wrapped it in a tortilla, and the result was a chaotic mess that somehow tasted like a fiesta in my mouth. That disaster turned into a revelation – a layered burrito that could survive the fridge, the freezer, and still taste like it was fresh off the grill. I dare you to taste this and not go back for seconds.
The aroma that filled my apartment was nothing short of intoxicating. The sizzling chicken hit the pan with a crackle that sounded like fireworks, while the beans simmered and released a buttery earthiness. The smell of warm rice mingled with fresh cilantro and the bright zing of lime, creating a symphony that made my nose dance. When I finally lifted the foil‑wrapped burrito, the steam rose like a cloud of anticipation, and the cheese on top melted into a glossy, golden blanket. My taste buds were already doing cartwheels, and my stomach was growling louder than a hungry bear.
Most burrito recipes either drown you in soggy fillings or leave you with a dry, flavorless roll. This version stands out because every layer is meticulously balanced – the chicken is seasoned just right, the beans are creamy but not mushy, and the salsa is fresh enough to cut through the richness of the cheese. The secret? A quick flash‑fry of the tortilla to give it a subtle crisp that holds up to the seven layers without getting soggy. Most recipes get this completely wrong. Here’s what actually works: a brief sear in a hot pan, a drizzle of lime, and a final bake that melds everything together into a cohesive masterpiece.
But the magic doesn’t stop at the flavor. I’m about to share a technique that will make your burritos stay fresh for up to four days, perfect for meal prep warriors who need a reliable, delicious lunch that won’t wilt under the office fridge. And there’s a surprise ingredient that most people overlook – a dash of smoked paprika that adds a smoky depth you’ll swear came from a backyard grill. Okay, ready for the game‑changer? Let me walk you through every single step — by the end, you’ll wonder how you ever made it any other way.
What Makes This Version Stand Out
- Flavor Explosion: Each layer brings its own punch – from the tangy salsa to the cool guacamole, creating a cascade of tastes that keep you reaching for the next bite.
- Texture Harmony: The crispy tortilla edges contrast with the creamy beans and the tender chicken, delivering a satisfying crunch and melt in every mouthful.
- Simplicity Meets Sophistication: You only need nine core ingredients, yet the result feels like a restaurant‑grade dish that took hours to perfect.
- Unique Layering Technique: By stacking the ingredients in a specific order, the moisture stays locked in, preventing sogginess and ensuring each bite is evenly flavored.
- Crowd‑Pleaser Factor: This burrito has become my go‑to for potlucks – people line up, and I’m constantly hearing “More, please!”
- Ingredient Quality: Using seasoned chicken and fresh salsa elevates the dish from “just okay” to “hands down the best version you’ll ever make at home.”
- Cooking Method: A quick pan‑sear followed by a short bake creates a golden crust that locks in juices and flavors.
- Make‑Ahead Potential: The seven‑layer structure holds up beautifully in the fridge or freezer, making it the ultimate meal‑prep hero.
Inside the Ingredient List
The Flavor Base
The seasoned chicken is the heart of this burrito. I use a pre‑seasoned chicken breast that’s been marinated in lime juice, garlic, and a pinch of cumin, which gives it a bright, zesty kick. If you skip the seasoning, you’ll end up with bland meat that can’t hold its own against the bold salsa and guacamole. A good swap is rotisserie chicken – just shred it and toss it with a splash of the original seasoning for instant flavor.
The Texture Crew
Beans and rice are the foundation that gives the burrito its body. The beans should be soft but still hold their shape; overcooking turns them mushy, while undercooking leaves a gritty bite. I recommend rinsing canned black beans and heating them with a pinch of smoked paprika for depth. For the rice, use long‑grain white rice cooked with a splash of chicken broth – it adds richness without making the burrito soggy. If you’re gluten‑free, swap the rice for quinoa; it adds a nutty crunch that pairs wonderfully with the other layers.
The Unexpected Star
Fresh salsa isn’t just a topping; it’s a flavor catalyst that brightens every other ingredient. I blend diced tomatoes, red onion, cilantro, jalapeño, and a squeeze of lime for a salsa that’s both sweet and fiery. Skipping fresh salsa for a jarred version will dull the overall profile. If you love heat, add an extra jalapeño or a dash of chipotle adobo sauce for a smoky punch.
The Final Flourish
Guacamole, sour cream, cheese, jalapeños, and lettuce add the finishing touches. The guacamole provides a buttery smoothness that balances the spice, while the sour cream adds a tangy coolness that prevents the burrito from feeling heavy. Cheese melts into a luscious blanket, and the jalapeños give a final burst of heat. Lettuce adds a crisp, refreshing crunch that lifts the whole dish. If you’re dairy‑free, replace cheese with a vegan cheddar and sour cream with coconut yogurt.
Everything's prepped? Good. Let's get into the real action...
The Method — Step by Step
Start by heating a large skillet over medium‑high heat and add a drizzle of olive oil. Once the oil shimmers, drop in the seasoned chicken pieces. Cook for 5‑7 minutes, turning occasionally, until the chicken is golden brown and reaches an internal temperature of 165°F. The sizzling should sound like a tiny fireworks display, and the edges will start pulling away from the pan – that’s your cue that the chicken is perfectly seared.
Kitchen Hack: Slice the chicken into thin strips before cooking; thinner pieces caramelize faster and distribute flavor more evenly throughout the burrito.While the chicken cooks, bring a pot of water to a boil, add a pinch of salt, and toss in the rice. Reduce to a simmer, cover, and let it cook for 15 minutes. Fluff with a fork once done and set aside. The rice should be tender but still have a slight bite – think “al dente” for the perfect texture that won’t turn mushy when layered.
In a separate saucepan, warm the beans over low heat, stirring occasionally. Add a pinch of smoked paprika and a splash of chicken broth for extra depth. Let them simmer for 3‑4 minutes until they’re heated through and slightly thickened. The beans should feel silky, not watery – that’s the secret to a cohesive burrito.
Now, assemble the salsa. Combine diced tomatoes, red onion, cilantro, jalapeño, and lime juice in a bowl. Season with a pinch of salt and a dash of cumin. Let it sit for 5 minutes so the flavors meld. You’ll notice the salsa brightening, the lime’s acidity cutting through the richness of the chicken – a perfect balance.
Grab a large flour tortilla and give it a quick 15‑second sear on each side in a hot, dry skillet. This creates a subtle golden crust that acts as a barrier against moisture. The tortilla should puff slightly and develop brown spots, reminiscent of a light toast. This step is pure magic; skip it and you’ll end up with a soggy wrap that falls apart.
Start layering: spread a thin layer of sour cream directly onto the center of the tortilla – this acts as a moisture‑locking base. Next, add a generous scoop of rice, spreading it evenly. Follow with the beans, then the chicken strips, and then a spoonful of fresh salsa. Top with guacamole, a sprinkling of shredded cheese, jalapeños, and finally a handful of shredded lettuce. Each layer should be visible when you look from the side, like a colorful, edible rainbow.
Fold the sides of the tortilla over the filling, then roll tightly from the bottom, tucking the seam as you go. Place the rolled burrito seam‑side down on a baking sheet lined with parchment. If you’re preparing multiple burritos, leave a little space between them to allow steam to escape.
Watch Out: Overfilling the tortilla will cause it to split during baking; keep the filling to about two‑thirds of the tortilla’s surface for a tight, secure roll.Preheat your oven to 375°F (190°C). Brush the top of each burrito lightly with a bit of melted butter or olive oil, then sprinkle extra cheese on top for a melty finish. Bake for 12‑15 minutes, or until the cheese is bubbling and the tortilla is golden brown. You’ll hear a faint crackle as the heat caramelizes the edges – that’s the sound of flavor locking in.
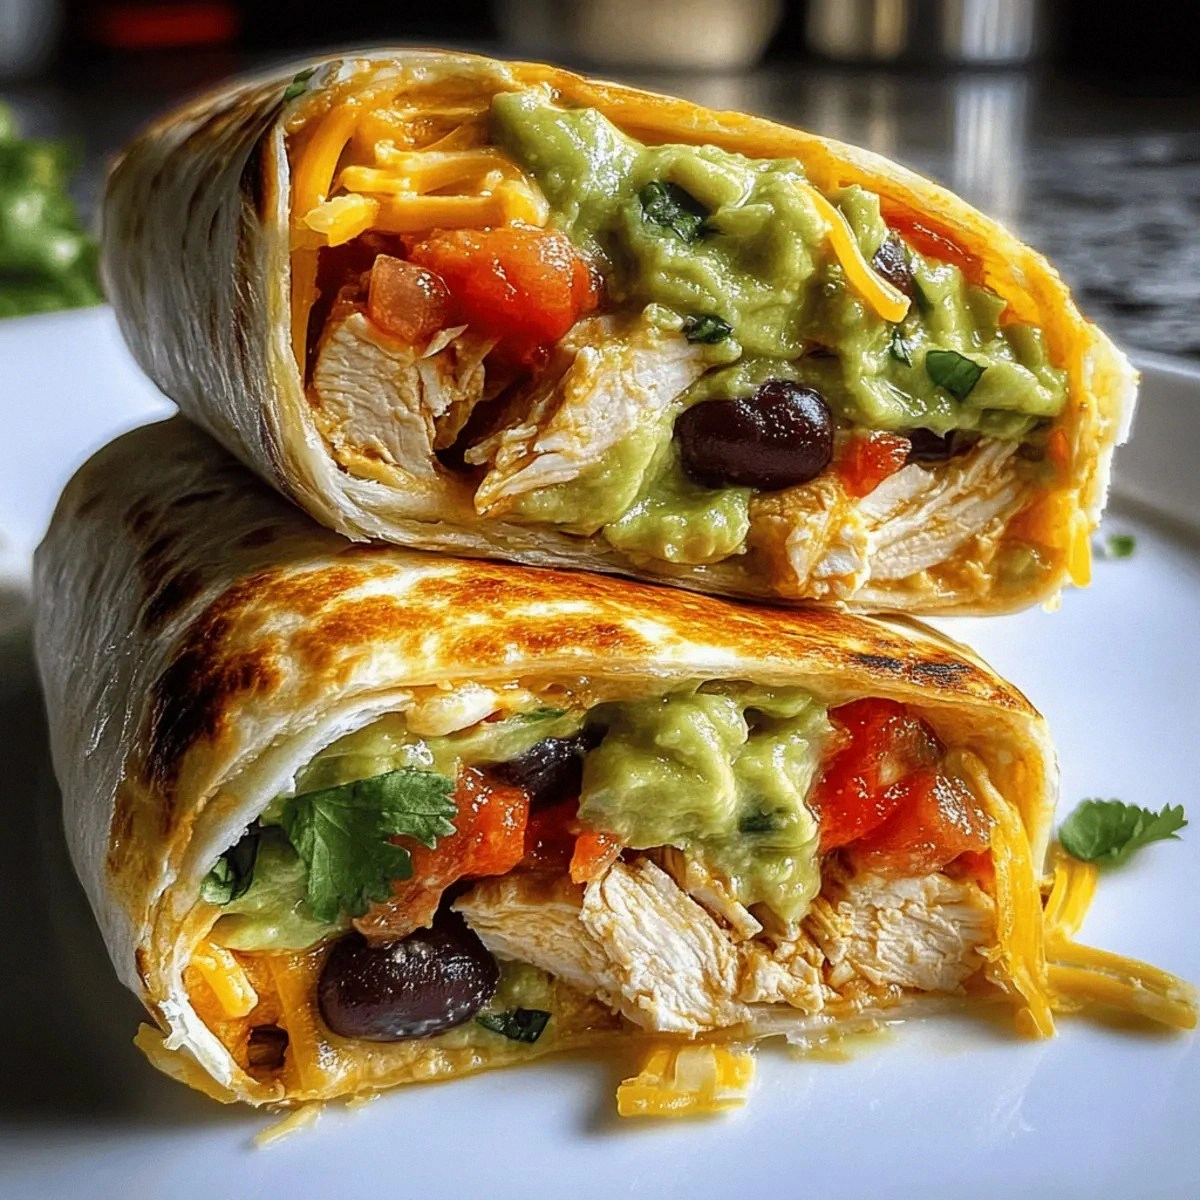
Remove the burritos from the oven and let them rest for 3‑4 minutes before slicing. This short rest lets the layers settle, preventing the fillings from spilling out when you cut into them. Slice each burrito in half diagonally, revealing the seven glorious layers. The cross‑section should look like a perfectly constructed skyscraper of color and texture.
Serve immediately with extra salsa and a wedge of lime on the side. If you’re meal‑prepping, let the burritos cool completely, then wrap each tightly in foil and store in airtight containers. They’ll stay fresh for up to four days in the fridge, or you can freeze them for up to two months – just reheat in the oven for that same crisp‑tortilla experience.
That's it — you did it. But hold on, I've got a few more tricks that'll take this to another level...
Insider Tricks for Flawless Results
The Temperature Rule Nobody Follows
Never cook the chicken on low heat. High heat creates a Maillard reaction, giving the meat that deep, caramelized flavor you crave. I once tried a low‑and‑slow approach, and the chicken turned out pale and rubbery – a disaster that ruined the whole burrito. Keep the skillet hot, and you’ll hear that satisfying sizzle that tells you the chicken is sealing in its juices.
Why Your Nose Knows Best
Use your sense of smell as a timer. When the chicken starts to emit a nutty, toasted aroma, it’s a sign the exterior is perfectly browned. Similarly, the moment the cheese begins to bubble and turn golden, you know the bake is done. Trusting your nose can save you from over‑cooking and preserve that delicate balance of textures.
The 5‑Minute Rest That Changes Everything
After baking, let the burritos rest for exactly five minutes. This pause allows the steam inside to redistribute, preventing the fillings from spilling out when you slice. I used to cut them right away and end up with a mess of rice and beans on the plate. That five‑minute wait is a game‑changer – the burrito holds together like a well‑engineered sandwich.
Layer Order Logic
Start with sour cream, then rice, beans, chicken, salsa, guac, cheese, jalapeños, and lettuce. This order ensures the moisture‑rich components are sandwiched between sturdier layers, keeping the tortilla from getting soggy. If you flip the order, the lettuce will wilt and the tortilla will become a soggy mess. Trust the stack, and you’ll get a perfect bite every time.
Freezer‑Friendly Packing
When freezing, wrap each burrito tightly in foil, then place them in a zip‑top bag. Adding a thin sheet of parchment between each burrito prevents them from sticking together. Thaw overnight in the fridge, then reheat as described earlier for a fresh‑out‑of‑the‑oven experience. Skipping the parchment leads to a mushy mess when you try to separate them later.
Creative Twists and Variations
This recipe is a playground. Here are some of my favorite ways to switch things up:
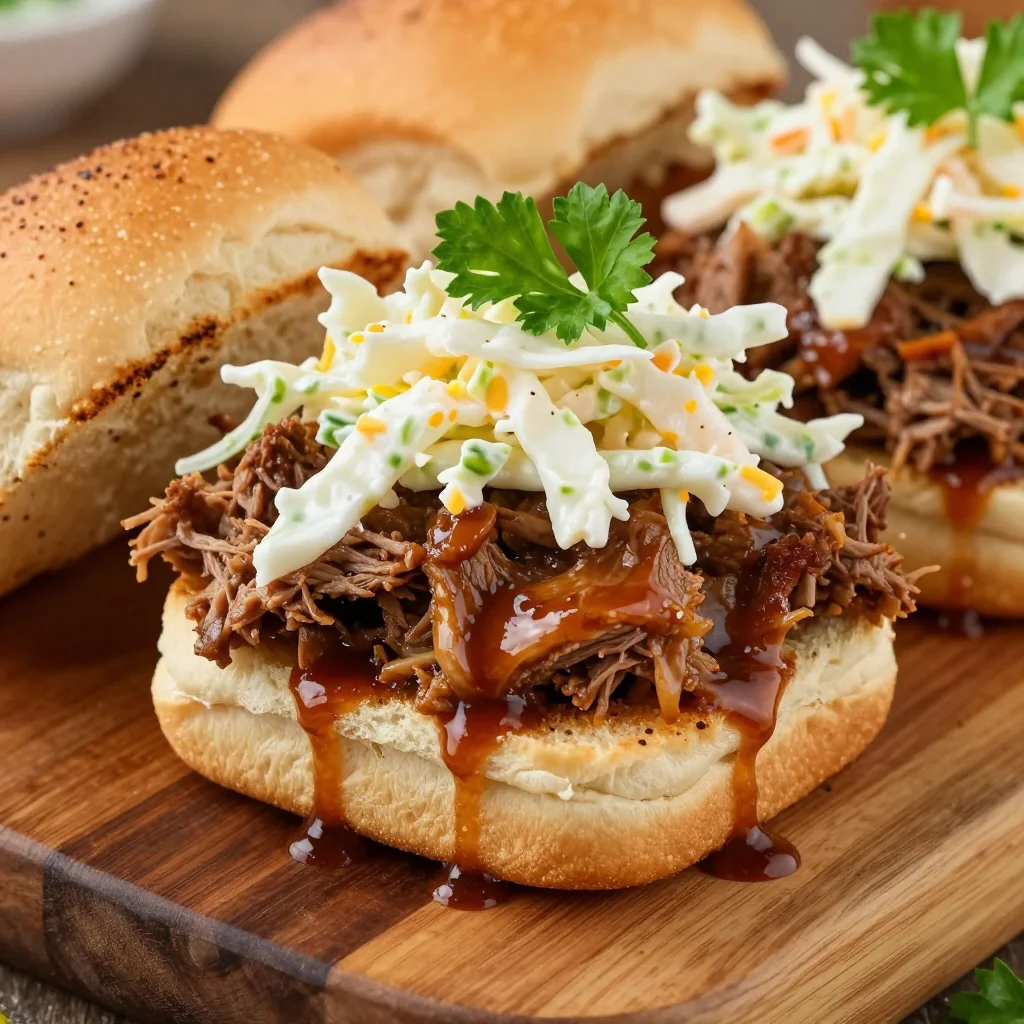
Southwest BBQ Chicken
Swap the seasoned chicken for shredded BBQ chicken tossed in a smoky chipotle sauce. The sweet‑smokey flavor pairs beautifully with the cool guacamole and gives the burrito a backyard‑grill vibe.
Vegetarian Power‑Bowl Burrito
Replace the chicken with grilled portobello mushrooms and add roasted sweet potatoes. The earthy mushrooms mimic the meaty texture, while the sweet potatoes add a caramelized sweetness that balances the heat.
Spicy Mango Madness
Stir diced mango into the salsa and add a pinch of habanero for a tropical heat wave. The mango’s sweetness cuts through the spice, creating a refreshing contrast that’s perfect for summer.
Cheesy Tex‑Mex Delight
Swap the cheddar‑style cheese for a blend of pepper jack and cotija. The pepper jack adds a mild heat, while cotija provides a salty crumble that elevates the overall flavor profile.
Breakfast Burrito Remix
Swap the rice for scrambled eggs and add a few strips of crispy bacon. The breakfast version still respects the seven‑layer concept but offers a morning‑friendly spin that’s perfect for brunch.
Low‑Carb Lettuce Wrap
Use large butter lettuce leaves instead of tortillas for a low‑carb, gluten‑free option. The crunch of the lettuce adds a fresh texture, and the fillings stay the same, making it a guilt‑free indulgence.
Storing and Bringing It Back to Life
Fridge Storage
Place each cooled burrito in an airtight container or wrap tightly in foil. They’ll stay fresh for up to four days. Before reheating, let them sit at room temperature for 10 minutes – this prevents a cold shock that can make the tortilla tough.
Freezer Friendly
Wrap each burrito in foil, then place in a zip‑top freezer bag. They can be frozen for up to two months. When ready to eat, move them to the fridge to thaw overnight. This slow thaw preserves the texture and flavor better than a rapid microwave defrost.
Best Reheating Method
Preheat your oven to 350°F (175°C). Unwrap the foil, place the burrito on a baking sheet, and bake for 12‑15 minutes. About halfway through, spray a tiny splash of water on the tortilla and cover loosely with foil – the steam revives the softness while the final minutes of uncovered baking restore crispness. The result is a burrito that tastes as fresh as the day you made it.