It was a blustery Friday night, the kind of evening that makes you question every decision you’ve made since the first time you tried to bake gingerbread. I had a handful of gingerbread cookies left over from last holiday, a box of graham crackers, a block of cream cheese that had been sitting in the fridge like a forgotten relic, and a sudden, irresistible urge to turn everything into something that would make the kitchen smell like a warm, spiced hug. I laughed at the absurdity of my plan, but as soon as I started mixing the crumbs with brown sugar and melted butter, the kitchen transformed into a fragrant laboratory where spices danced and the air hummed with possibility.
The first thing that struck me was the aroma—ginger and cinnamon mingling with the buttery sweetness of the graham crumbs, punctuated by a bright, citrusy lemon zest that cut through the heaviness. I could hear the gentle hiss as the butter melted, the subtle crackle of the chocolate as it began to soften, and the rhythmic clink of the mixing spoon against the bowl. My eyes were drawn to the golden-brown crust forming on the bottom of the pan, the way the edges were pulling away like the first frost of winter. The texture was a paradox: a firm, crumbly base that would later give way to a silky, creamy filling that swirled like molten lava. It was this interplay of textures that made me know, right then, that this recipe was going to be something special.
If you’ve ever tried a gingerbread dessert that ended up too dry or too soggy, or one that tasted like a cookie and a cake at the same time, you’ll know the frustration. This version, however, is hands down the best you’ll ever make at home. I’m not exaggerating. The combination of graham cracker crumbs and melted butter creates a foundation that holds the spices perfectly, while the cream cheese and sour cream give the filling a tang that balances the sweetness. The addition of cardamom and nutmeg gives it an unexpected depth, and the chocolate adds that rich, indulgent finish that makes it feel like a dessert you could eat for breakfast, lunch, or dinner. The secret? A no-bake method that locks in flavor without the need for an oven, saving time and energy while delivering a decadent treat.
I dare you to taste this and not go back for seconds. Picture yourself pulling this out of the fridge, the whole kitchen smelling incredible, and feeling the anticipation build as you cut into the first slice. The first bite is a burst of warm spices, a hint of citrus, and the creamy richness that lingers on your tongue. That sizzle when it hits the pan? Absolute perfection. And the best part? You can make it ahead of time and still feel like you’re serving something freshly baked. Let me walk you through every single step — by the end, you’ll wonder how you ever made it any other way.
What Makes This Version Stand Out
- Taste: The blend of ginger, cinnamon, lemon zest, cardamom, and nutmeg creates a layered flavor profile that feels both festive and sophisticated. The chocolate swirls add a hint of bittersweet decadence that keeps the dessert from feeling too sweet.
- Texture: The graham cracker base is crisp yet sturdy, while the cream cheese filling is silky and smooth, giving each bite a delightful contrast.
- Simplicity: No oven, no complicated techniques—just mix, chill, and serve. It’s the ultimate stress-free dessert for busy evenings.
- Uniqueness: The combination of spices with a chocolate-cream cheese filling is rarely seen in traditional gingerbread recipes, making this a standout treat.
- Crowd Reaction: Friends and family always ask for the recipe after the first tasting. It’s the kind of dish that turns a casual gathering into a memorable celebration.
- Ingredient Quality: Using high-quality cream cheese and real lemon zest elevates the flavor beyond the typical store-bought mixes.
- Cooking Method: The no-bake approach preserves the fresh, aromatic qualities of the spices, which can be lost with baking.
- Make‑Ahead Potential: This dessert can be prepared up to a week in advance, making it perfect for holiday parties or last-minute gatherings.
Alright, let’s break down exactly what goes into this masterpiece…
Inside the Ingredient List
The Flavor Base
The graham cracker crumbs form the backbone of this dessert, providing a subtle sweetness and a firm structure that holds everything together. They’re the unsung hero that gives the base a slight crunch and a buttery undertone. Skipping them would result in a mushier texture that would make it difficult to slice cleanly. If you prefer a gluten‑free version, opt for gluten‑free graham crackers or substitute with finely ground oats.
The brown sugar is what brings the caramel notes that balance the spices. It’s the sweet counterpoint to the sharpness of the ginger and cinnamon. If you’re watching your sugar intake, a small reduction (about 2 tablespoons) won’t dramatically alter the flavor, but the richness will be slightly diminished.
Unsalted butter, melted, acts as the binding agent. It coats the crumbs and sugar, creating a cohesive base that sets when chilled. The butter’s fat content is crucial; using low‑fat or butter substitutes will change the mouthfeel and may cause the mixture to separate. For a richer taste, use butter that’s been toasted until golden before adding it.
The Spice Ensemble
Ground ginger is the star of the show. It gives the dessert its characteristic warmth and a slight peppery kick that lingers on the palate. Freshly ground ginger has a brighter flavor than pre‑ground, so if you have a spice grinder, give it a go.
Ground cinnamon adds a sweet, woody aroma that complements the ginger. It’s the spice that ties the flavor profile together, creating a comforting, homey feel. If you’re allergic to cinnamon, a pinch of allspice can mimic its warmth, though the flavor will shift slightly.
Lemon zest injects a bright, citrusy note that cuts through the richness of the chocolate and cream cheese. It’s the secret ingredient that prevents the dessert from feeling too heavy. Use a microplane to zest the lemon, avoiding the bitter white pith.
Cardamom and nutmeg are the unexpected stars that elevate this recipe. Cardamom brings a subtle floral sweetness, while nutmeg adds a nutty, slightly sweet undertone. These spices are not commonly found in gingerbread, but they add depth and complexity that make this dessert truly unique.
The Creamy Layer
White baking chocolate is the source of the dessert’s glossy finish and rich chocolate flavor. The chocolate melts into the cream cheese mixture, creating a marbled effect that looks as good as it tastes. If you prefer a darker chocolate, use semi‑dark or dark chocolate; just be aware the bitterness will be more pronounced.
Cream cheese provides the creamy, tangy base that balances the sweetness of the chocolate and the spices. It also adds a silky mouthfeel that makes the dessert feel luxurious. For a lighter version, replace half the cream cheese with Greek yogurt, but keep in mind the texture will change.
Room‑temperature unsalted butter is added to the cream cheese mixture to smooth out the texture and give it a buttery richness. If you skip this step, the filling may feel too thick or grainy.
Sour cream brings a subtle tang that lifts the overall flavor profile and prevents the dessert from being overly sweet. It also adds moisture, keeping the filling from drying out. If you’re lactose intolerant, use a lactose‑free sour cream or coconut cream.
The Final Flourish
Vanilla extract is the finishing touch that rounds out the flavors, adding a subtle sweetness and depth. A splash of almond extract can be used as a variation for a nutty twist. Sea salt is essential for balancing the sweetness and enhancing the spices; it’s the final seasoning that makes the dessert feel complete.
Everything's prepped? Good. Let's get into the real action…
The Method — Step by Step
- Step 1: Prepare the base. In a medium bowl, combine 1 cup graham cracker crumbs, 1/4 cup brown sugar, and 1/2 cup melted unsalted butter. Stir until the mixture resembles wet sand. The texture should feel cohesive yet slightly crumbly. This is the moment you can hear the buttery aroma rising, signaling that the base is ready to set. If it feels too dry, add a teaspoon of melted butter; if too wet, add a tablespoon of crumbs.
- Step 2: Layer the base. Press the crumb mixture firmly into the bottom of a 9‑inch springform pan, creating an even layer. Use the back of a spoon or a flat-bottomed glass to smooth the surface. The edges should be slightly raised, forming a natural “wall” for the filling. Chill this layer in the fridge for 10 minutes to firm up before adding the filling.
- Step 3: Melt the chocolate. In a microwave‑safe bowl, combine 4 ounces white baking chocolate with 2 tablespoons unsalted butter. Heat in 30‑second intervals, stirring each time, until fully melted and smooth. The chocolate should be glossy and free of lumps. If you’re using a double boiler, stir constantly to prevent scorching. This step is critical; a properly melted chocolate will blend seamlessly with the cream cheese mixture.
- Step 4: Blend the creamy filling. In a separate bowl, beat 8 ounces cream cheese with 1/4 cup room‑temperature butter until creamy and smooth. Add 1/2 cup sour cream, 1 teaspoon vanilla extract, 1/4 teaspoon sea salt, 1 teaspoon ground ginger, 1 teaspoon ground cinnamon, 1 teaspoon lemon zest, 1/4 teaspoon ground nutmeg, and 1/4 teaspoon ground cardamom. Mix until all spices are evenly incorporated. The filling should have a silky, airy texture—no lumps, no grit. This is where the spices truly shine, infusing every bite with warmth and brightness.
- Step 5: Combine chocolate and cream cheese. Pour the melted chocolate into the cream cheese mixture. Fold gently until fully incorporated, creating a marbled effect. The chocolate should swirl through the cream cheese, giving the filling a beautiful speckled appearance. Taste a small spoonful; it should be rich but not overly sweet. If it feels too thick, add a teaspoon of sour cream to loosen it slightly.
- Step 6: Pour the filling. Spoon the creamy chocolate mixture over the chilled crumb base, spreading it evenly with a spatula. The filling should cover the base completely, forming a smooth, glossy layer. If you notice any gaps or unevenness, gently tap the pan on the counter to settle the filling. This step ensures that every bite has a balanced ratio of base to filling.
- Step 7: Chill to set. Place the pan in the refrigerator for at least 4 hours, preferably overnight, to allow the filling to set firmly. The dessert will firm up but remain creamy—think of it as a firm custard rather than a solid cake. During this time, the spices will meld together, creating a harmonious flavor profile. When you’re ready to serve, remove from the fridge and let it sit at room temperature for 10 minutes to soften slightly.
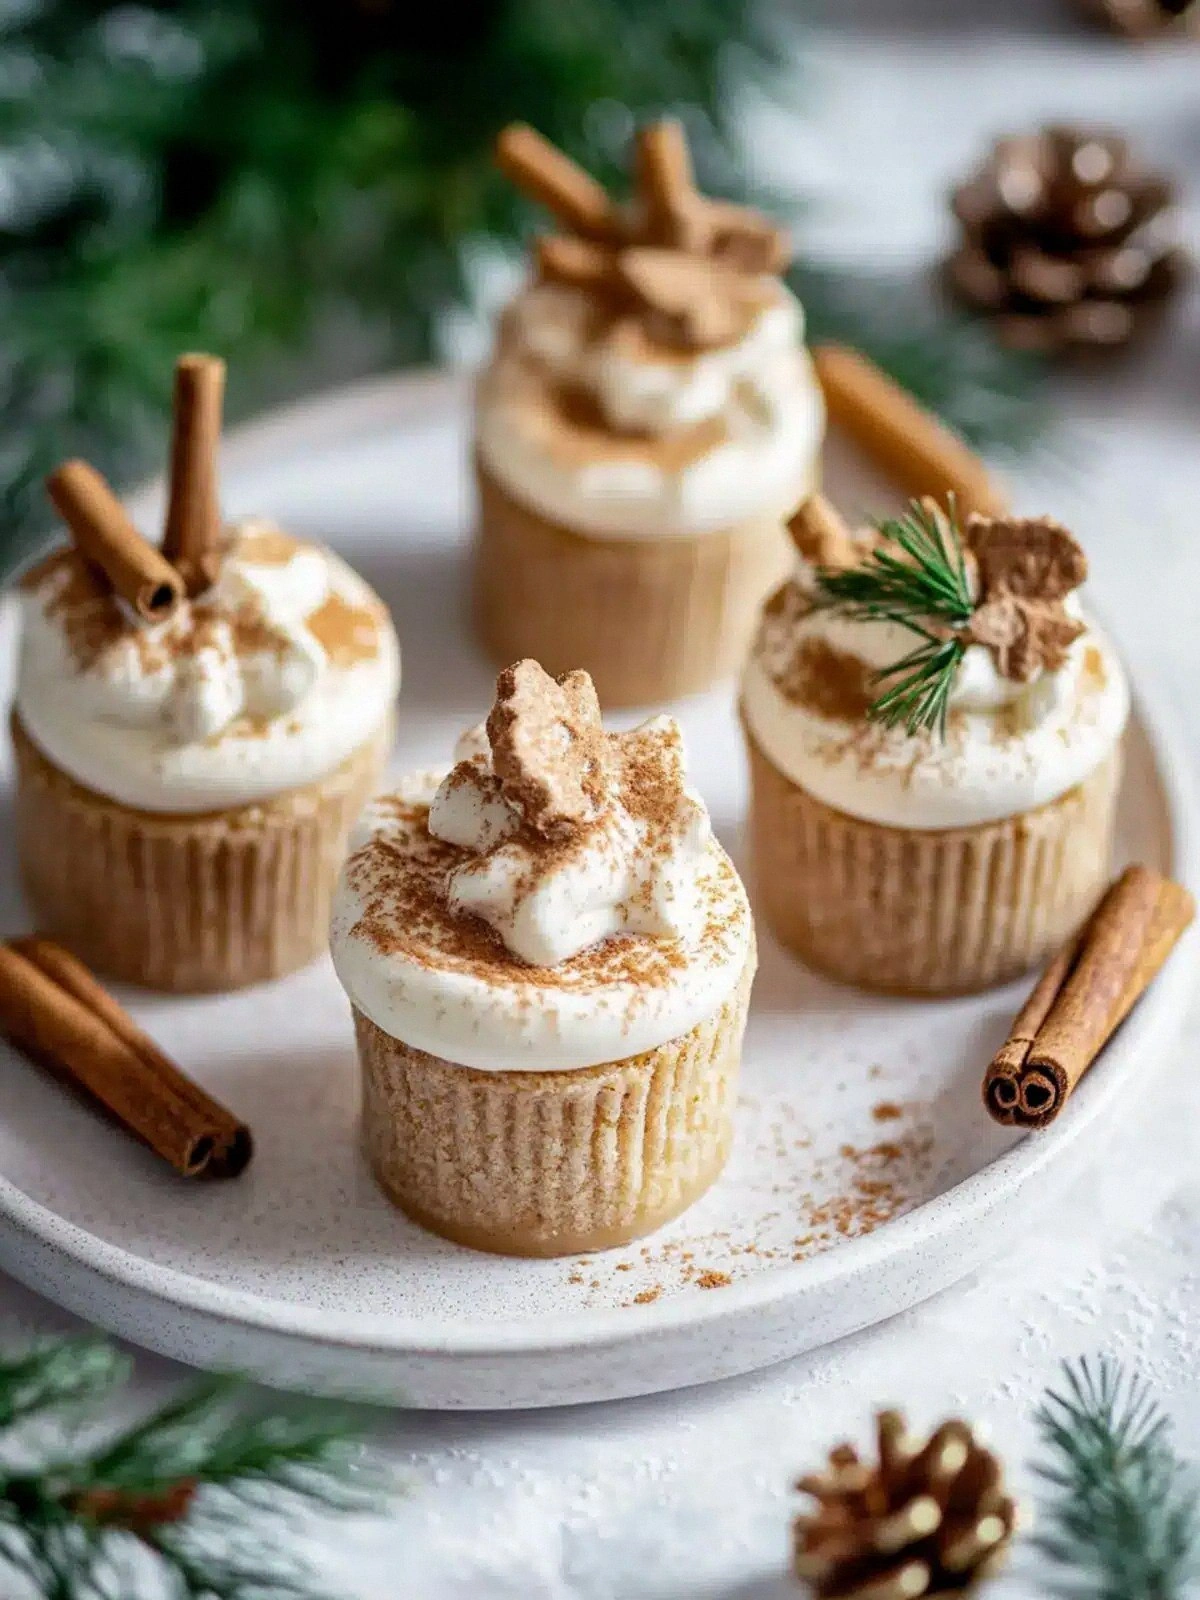
- Step 8: Serve. Release the springform pan, slice into wedges, and plate. The dessert will hold its shape beautifully, allowing you to see the marbled chocolate and the crisp base. Garnish with a dusting of powdered sugar or a drizzle of melted chocolate if desired. Each bite should deliver a burst of warm spices, a hint of citrus, and a silky, chocolatey finish that lingers on the palate. Enjoy the moment of triumph—you’ve just created a masterpiece.
That’s it — you did it. But hold on, I’ve got a few more tricks that’ll take this to another level…
Insider Tricks for Flawless Results
The Temperature Rule Nobody Follows
The key to a silky filling is keeping the chocolate and cream cheese at the right temperature. If the chocolate is too hot, it can cause the cream cheese to separate, resulting in a greasy texture. Conversely, if it’s too cold, the mixture will be stiff and difficult to spread. Aim for a warm, almost room temperature mixture that’s easy to stir but not melted. This small adjustment can mean the difference between a professional‑sounding dessert and a kitchen disaster.
Why Your Nose Knows Best
Before you add the spices, give the mixture a quick sniff. If the aroma feels flat, add a pinch more ginger or cinnamon. Your nose is a reliable indicator of flavor balance. A well‑balanced spice blend will have a warm, inviting scent that’s not overpowering. Trust your senses; they’re there to help you craft the perfect flavor profile.
The 5‑Minute Rest That Changes Everything
After pouring the filling, let the dessert rest on the counter for five minutes before chilling. This brief pause allows the mixture to settle, reducing the likelihood of air pockets forming when it sets. It also gives the spices a chance to mingle, enhancing the depth of flavor. Many people skip this step, but the difference is noticeable in the final product.
Use Fresh Lemon Zest for Brightness
The lemon zest is what gives this dessert its bright, citrusy lift. Use a microplane to zest the lemon, and avoid the bitter white pith. If you’re short on time, you can use a small amount of lemon zest from a grocery store pre‑zested product, but fresh zest will always deliver a cleaner, brighter flavor. This small detail elevates the entire dessert.
A Touch of Sea Salt Is All You Need
Adding 1/4 teaspoon of sea salt balances the sweetness and brings out the spices’ complexity. If you’re sensitive to sodium, use a pinch of kosher salt instead. Salt is a flavor enhancer; even a small amount can transform the dessert from good to unforgettable. It’s the secret ingredient that most people overlook.
Serve with a Light Cream
If you want to add an extra touch of luxury, serve the dessert with a dollop of lightly whipped cream. The airy cream pairs beautifully with the dense, spiced filling, creating a textural contrast that delights the palate. Keep the cream light; you don’t want to overpower the flavors of the gingerbread.
Creative Twists and Variations
This recipe is a playground. Here are some of my favorite ways to switch things up:
Nutty Gingerbread Delight
Swap the graham cracker crumbs for toasted almond flour and add a handful of chopped toasted almonds to the base. The nutty flavor complements the spices, creating a dessert that feels both classic and adventurous.
Chocolate‑Chip Gingerbread Surprise
Add a handful of white chocolate chips to the chocolate filling just before pouring. The chips melt slightly, creating a marbled pattern that’s visually stunning and adds a sweet burst of chocolate in every bite.
Spiced Apple Gingerbread
Fold in 1/4 cup of finely diced apples and a pinch of cinnamon to the filling. The apples add a subtle tartness that pairs beautifully with the warm spices, making this dessert perfect for fall gatherings.
Coconut Gingerbread Twist
Replace the cream cheese with coconut cream and use shredded coconut in the base. The tropical flavor profile gives the dessert a unique twist, ideal for those who love the combination of ginger and coconut.
Margarita‑Inspired Gingerbread
Add a splash of tequila and a pinch of orange zest to the filling. The citrus notes and subtle alcohol kick create a sophisticated dessert that’s perfect for cocktail parties.
Vegan Gingerbread Version
Use vegan butter, dairy‑free cream cheese, and coconut milk in place of sour cream. The texture remains creamy, and the spices stay bold. This version is great for guests who prefer plant‑based desserts.
Storing and Bringing It Back to Life
Fridge Storage
Store the dessert in an airtight container in the refrigerator for up to one week. Keep it away from strong odors, as the spices can absorb them. When ready to serve, let it sit at room temperature for 10 minutes to soften slightly, making it easier to slice.
Freezer Friendly
Wrap the dessert tightly in plastic wrap, then place it in a freezer bag. It will keep well for up to three months. To thaw, transfer the dessert to the refrigerator overnight. If you want to serve it immediately, let it sit at room temperature for 30 minutes, but be careful not to let it melt.
Best Reheating Method
Reheating can be tricky because the dessert is no-bake. To refresh the texture, place the slices in a microwave on low power for 10–15 seconds. Add a tiny splash of water to the center of each slice before microwaving; the steam will help restore the creaminess without drying it out. Be sure to watch closely to avoid overheating.