It was a Wednesday night, the kind of night when the fridge feels like a treasure chest and the oven is just a stubborn old friend. I had just finished a long day at the office, and the only thing that could lift my spirits was a batch of cookies that would make my taste buds sing. I grabbed my favorite recipe book, flipped to the last page, and found a note scrawled in a friend’s handwriting: “If you’re going to bake, make it unforgettable.” That single line set the tone for the culinary experiment I was about to embark on.
The kitchen lights buzzed softly, casting a warm glow over the countertop. The scent of butter melting in the saucepan mingled with a faint whisper of vanilla, promising sweetness. My eyes darted between the measuring cups and the flour bag, feeling the gritty texture of the powder as it hovered above my fingertips. The sound of the oven timer tick-tocking echoed like a metronome, setting a rhythm for the process ahead. I could almost taste the first bite—soft, chewy, with a buttery crunch that would melt in your mouth.
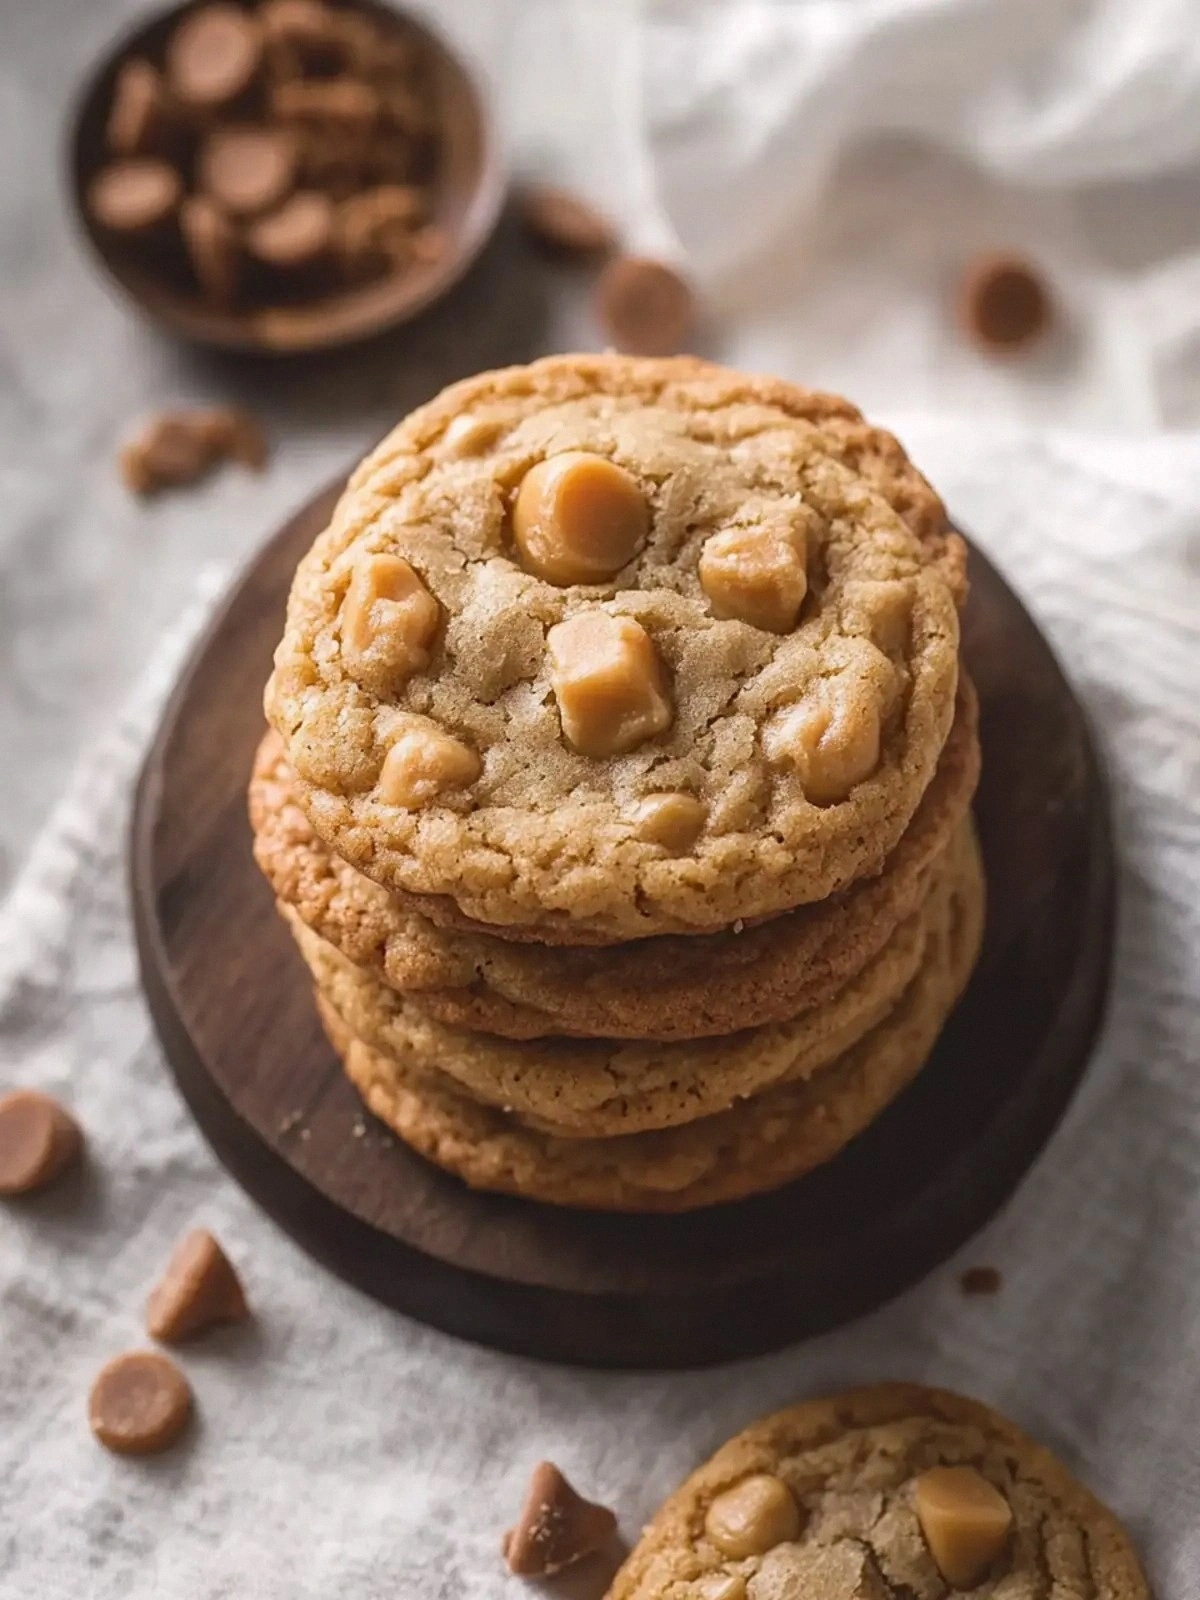
What sets this version apart from the countless cookie recipes floating around the internet is its unapologetic balance of flavors and textures. The butterscotch chips are not just sweet; they bring a deep, caramelized undertone that cuts through the richness of the butter. The addition of ground cinnamon creates a subtle warmth that elevates the entire bite. The dough itself is crafted to be tender yet slightly crisp at the edges, offering a satisfying contrast with each chew. I dare you to taste this and not go back for seconds—your palate will thank you.
The secret weapon in this recipe is a technique I discovered by accident: folding in a pinch of sea salt after the dough has rested. This simple step unlocks the full spectrum of flavors, allowing the sweetness to shine without becoming cloying. It also adds a subtle depth that makes the cookies feel luxurious instead of ordinary. I’ve tried this trick in other desserts, and the results have always been stellar. It’s a small tweak that turns a good cookie into an unforgettable experience.
Let me walk you through every single step—by the end, you’ll wonder how you ever made it any other way. This isn’t just a cookie recipe; it’s a culinary journey that will leave you with a newfound appreciation for the art of baking. You’ll learn how to combine ingredients in ways that enhance their natural flavors, how to time each step perfectly, and how to tweak the recipe to suit your own taste. Ready? Let’s get started.
What Makes This Version Stand Out
- Flavor: The blend of brown and granulated sugar creates a caramelized sweetness that feels like a hug in every bite.
- Texture: A perfectly chewy center with edges that crisp just enough to give that satisfying snap.
- Ingredient Quality: Using real butter, not margarine, brings a depth of flavor that’s impossible to replicate with cheaper substitutes.
- Ease: The recipe is straightforward—no advanced techniques, just good timing and a little patience.
- Versatility: It can be tweaked with nuts, chocolate chips, or dried fruit without losing its core identity.
- Make-Ahead Potential: The dough can be prepared in advance and frozen, making it a reliable go-to for last-minute gatherings.
Alright, let’s break down exactly what goes into this masterpiece. Each ingredient has been carefully chosen to contribute to a harmonious whole, ensuring that no single component overwhelms the others. The result is a cookie that is both comforting and exciting, perfect for any occasion where you want to impress without the stress of a complicated recipe.
Inside the Ingredient List
The Flavor Base
Packed brown sugar is the cornerstone of the caramelized sweetness that defines these cookies. Its molasses content brings depth and a hint of acidity that balances the buttery richness. Skipping it would leave the cookies feeling flat and overly sweet. If you prefer a lighter flavor, you can replace half of the brown sugar with honey, but the texture will change slightly.
The Texture Crew
Butter, softened to room temperature, is the primary fat that provides moisture and a silky mouthfeel. A generous amount of all-purpose flour anchors the dough, giving it structure without making it tough. Baking soda ensures the cookies rise just enough to stay fluffy inside while still holding their shape. Salt, though only half a teaspoon, is essential for flavor contrast; without it, the sweetness would dominate.
The Unexpected Star
Ground cinnamon is the unsung hero that adds warmth and complexity. Its aromatic profile complements the butterscotch chips and creates a multi-layered flavor experience. If you’re not a fan of cinnamon, you can use nutmeg or allspice, but the cookie’s signature warmth will shift.
The Final Flourish
Butterscotch chips are the highlight, delivering bursts of caramelized flavor that contrast beautifully with the buttery dough. They also provide a delightful texture, as they soften slightly in the center of each cookie. If you want to experiment, try adding chocolate chips or a mix of both for a richer taste.
Everything's prepped? Good. Let’s get into the real action. Each step is designed to build on the previous one, ensuring that the final product is a symphony of flavors and textures. Pay attention to the details, and you’ll see why this recipe stands out.
The Method — Step by Step
- Step 1: Preheat your oven to 350°F (175°C) and line two baking sheets with parchment paper. This ensures the cookies bake evenly and prevents sticking. As the oven warms, the air inside begins to circulate, creating an ideal environment for the dough to rise. The sound of the preheating cycle is a subtle reminder that everything is about to happen.
- Step 2: In a large bowl, cream the softened butter with both sugars until the mixture becomes light and fluffy. Use an electric mixer on medium speed; the process should take about 3 minutes. The butter should be pale and airy, indicating that the sugars are fully incorporated. This step is critical for achieving a tender crumb.
- Step 3: Add the eggs one at a time, beating well after each addition. This creates a stable emulsion that keeps the dough from separating. The mixture should look silky and hold its shape when you lift the beaters. A smooth base is the foundation for a consistent cookie.
- Step 4: Stir in the vanilla extract, ensuring it’s fully blended. The vanilla gives the cookies a fragrant aroma that permeates the kitchen. A single teaspoon is enough; too much can overpower the other flavors. This step also helps distribute the flavor evenly throughout the dough.
- Step 5: In a separate bowl, whisk together the flour, baking soda, salt, and cinnamon. The dry mixture should feel light and airy. Mixing the dry ingredients separately prevents clumping and ensures even distribution. This technique is a staple in professional baking.
- Step 6: Gradually add the dry mixture to the wet mixture, mixing on low speed until just combined. Overmixing can develop gluten and result in tough cookies. The dough should be thick yet pliable. At this point, you’ll notice a delightful aroma of baking spices.
- Step 7: Fold in the butterscotch chips, ensuring they’re evenly distributed. The chips should be scattered throughout, so every bite contains a burst of caramelized flavor. This step also adds a delightful contrast in texture. The dough will appear slightly speckled, indicating a good mix.
- Step 8: Drop rounded tablespoons of dough onto the prepared baking sheets, spacing them about 2 inches apart. The spacing allows the cookies to expand without merging. A small spoon or cookie scoop works well for consistency. The dough balls should look uniform in size.
- Step 9: Bake for 12-14 minutes, or until the edges are golden brown and the centers still look slightly undercooked. The cookies will firm up as they cool. Remove them from the oven and let them rest on the sheet for 5 minutes before transferring to a wire rack. This final resting period allows the flavors to settle and the cookies to set.
That's it — you did it. But hold on, I've got a few more tricks that'll take this to another level. The next sections will reveal insider tips, creative variations, and storage hacks that will keep your cookies fresh and delicious for days.
Insider Tricks for Flawless Results
The Temperature Rule Nobody Follows
Many bakers assume that a higher oven temperature always yields better cookies, but that’s a misconception. Baking at 350°F gives the dough a chance to rise slowly, developing a chewy center while still achieving a crisp edge. If you’re tempted to crank the heat up, you’ll end up with thin, brittle cookies that lack depth. Stick to the recommended temperature for optimal results.
Why Your Nose Knows Best
Before you even touch the dough, take a moment to sniff the batter. A faint caramel scent indicates that the sugars are caramelizing properly. If the aroma feels flat, give the dough a gentle stir; this redistributes the fats and sugars. Your nose is a reliable guide, especially when you’re aiming for a balanced flavor profile.
The 5-Minute Rest That Changes Everything
After mixing the dough, let it rest for exactly five minutes before adding the chips. This short pause allows the flour to absorb the moisture, preventing the dough from becoming too sticky. The result is a more cohesive dough that holds its shape during baking. Skipping this step can lead to uneven cookie thickness.
Chill the Dough for a Chewy Texture
Refrigerating the dough for at least 30 minutes helps the butter firm up, which in turn reduces spreading. The result is a cookie with a slightly thicker center and a crispier edge. If you’re in a hurry, you can still bake the cookies immediately, but the texture will be a bit different. This trick is a game-changer for those who love a chewy bite.
The Secret of Even Spreading
Use a silicone baking mat instead of parchment paper if you’re looking for perfect shape retention. The mat provides a consistent surface that prevents the cookies from sliding or spreading unevenly. It also makes cleanup a breeze. If you prefer parchment, just make sure to lightly grease the sheet.
The Final Crunch Factor
If you want a crunchier cookie, add a tablespoon of rolled oats to the dough. The oats absorb moisture and add a pleasant chew. They also introduce a subtle nutty flavor that complements the butterscotch. This variation is perfect for those who enjoy a bit of texture contrast.
Now that you’ve mastered the basics, you’re ready to experiment. The next section will show you how to tailor these cookies to your taste, making them the perfect treat for any occasion.
Creative Twists and Variations
This recipe is a playground. Here are some of my favorite ways to switch things up:
Chocolate Butterscotch Fusion
Replace half of the butterscotch chips with semi-sweet chocolate chips for a bittersweet contrast. The chocolate adds a deeper flavor profile that pairs beautifully with the caramel notes. This variation is ideal for chocolate lovers who still crave that sweet undertone.
Nutty Crunch
Add a cup of chopped walnuts or pecans to the dough for a satisfying crunch. The nuts provide a buttery richness that complements the caramelized sugar. This version is perfect for those who enjoy a mix of textures.
Citrus Burst
Grate a teaspoon of orange zest into the dough for a bright, citrusy twist. The zest adds a fresh aroma that balances the sweetness. This variation is especially refreshing during warmer months.
Spiced Up
Increase the ground cinnamon to 1.5 teaspoons and add a pinch of nutmeg. The spices create a warm, comforting flavor that’s reminiscent of holiday baking. This version is great for cozy evenings.
Salted Caramel
After baking, drizzle a thin layer of salted caramel sauce over the warm cookies. The salt enhances the caramel flavor, creating a delightful sweet-salty experience. This variation is a showstopper for parties.
Almond Delight
Replace the butter with almond butter for a nutty flavor profile. The almond butter also adds a subtle sweetness that pairs well with the butterscotch. This variation is ideal for those who enjoy a nutty undertone.
Gluten-Free Edition
Swap the all-purpose flour with a gluten-free blend that includes xanthan gum. The dough will have a slightly different texture, but the flavor remains the same. This version is perfect for those with dietary restrictions.
Moisture Boost
Add a tablespoon of apple sauce to the dough to increase moisture. The apple sauce also adds a subtle fruity flavor that complements the caramel. This variation is great for those who want a softer cookie.
Feel free to mix and match these ideas, or even come up with your own. The beauty of this recipe is its adaptability, allowing you to create a cookie that’s uniquely yours.
Storing and Bringing It Back to Life
Fridge Storage
Store cooled cookies in an airtight container at room temperature for up to a week. The airtight seal prevents moisture from seeping in, preserving the cookies’ texture. If you notice a slight softness, let them sit at room temperature for 10 minutes before serving. This method keeps them fresh and delicious.
Freezer Friendly
Place the cooled cookies on a baking sheet in a single layer and freeze for 2-3 hours. Once frozen, transfer them to a freezer bag or container. They’ll stay good for up to 3 months. When you’re ready to enjoy, simply take them out and let them thaw at room temperature.
Best Reheating Method
Reheat frozen cookies in a preheated oven at 300°F (150°C) for 5-7 minutes. This gentle heat restores the cookies’ warmth without overbaking them. If you prefer, a quick microwave burst of 15 seconds can also work, but the oven method yields a superior texture.
Quick Refresh
Add a splash of water to the dough before baking to keep the cookies extra moist. The water steams inside the dough, creating a tender crumb. This trick is especially useful during hot weather when cookies tend to dry out.
With these storage and reheating tips, you can keep your cookies at peak freshness for weeks. Whether you’re preparing for a holiday gathering or just want to have a sweet treat on hand, these methods ensure that every bite is as delightful as the first.