Okay, I'll be honest — I ate half the batch before anyone else got to try it. There I was, standing over the baking sheet like a raccoon guarding trash, steam curling up from these gorgeous zucchini boats, and I couldn't stop. The spicy buffalo aroma had hijacked my brain. My roommate walked in, took one look at the carnage, and said, "Did you even plate these?" Nope. Not even a little. And that, my friend, is how you know a recipe is pure gold.
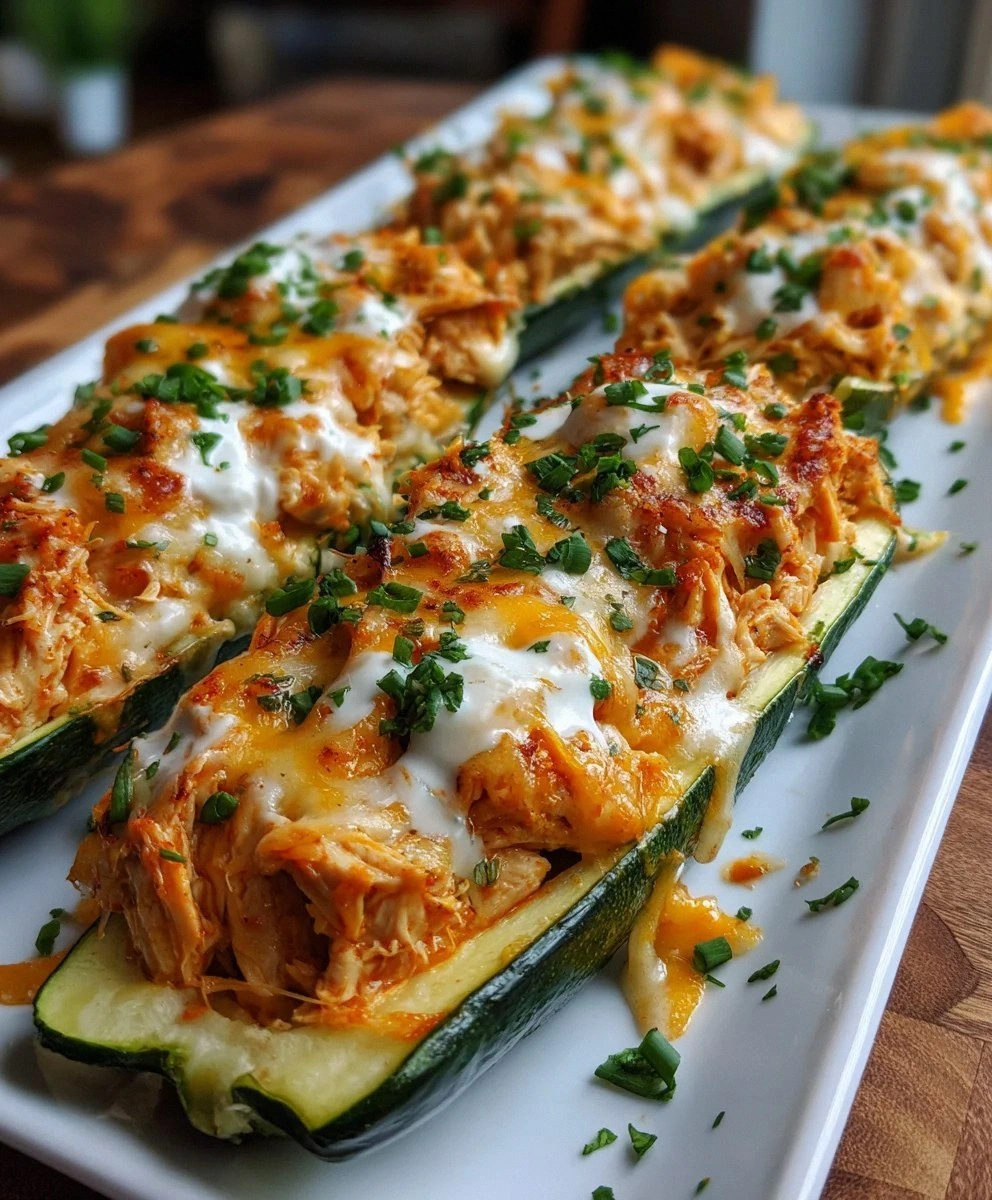
Picture yourself pulling this out of the oven, the whole kitchen smelling like a sports bar met a farmers market and decided to throw a party. The cheese bubbles like molten lava, edges browned and crackling, while the buffalo sauce mingles with ranch in ways that should probably be illegal. That first bite? It's a flavor bomb — creamy, spicy, tangy, and somehow still fresh thanks to the zucchini doing the heavy lifting. I dare you to taste this and not go back for seconds. Actually, I double-dog dare you, because resistance is futile.
This isn't just another "healthy" recipe that tastes like cardboard and disappointment. Most recipes get this completely wrong — they either drown the zucchini until it's a sad, soggy mess, or they skimp on the buffalo sauce and you're left wondering why you bothered. Here's what actually works: we roast those zucchini boats first to get them tender but still holding their shape, then we load them up with a buffalo chicken filling so good you'll want to eat it straight from the bowl. Stay with me here — this is worth it.
I stumbled onto this version after a particularly brutal week when my comfort food cravings were at war with my "maybe don't eat exclusively nachos" resolution. The local pub's buffalo chicken dip was calling my name, but so was the pile of zucchini I'd optimistically bought at the farmers market. One thing led to another, some culinary magic happened, and suddenly I had a dish that made my taste buds do a happy dance while still being something I could proudly serve at a dinner party. Let me walk you through every single step — by the end, you'll wonder how you ever made it any other way.
What Makes This Version Stand Out
- Flavor Balance: We're not just dumping hot sauce on chicken and calling it a day. The cream cheese and ranch create a cooling counterpoint that lets you actually taste the buffalo sauce instead of just burning your face off. It's like a perfectly choreographed dance between spicy and soothing.
- Texture Paradise: Forget mushy zucchini disasters. We pre-roast the boats until they're tender-crisp, then add the filling and bake again. The result? Zucchini that holds its shape like a proud little canoe, with edges that caramelize into veggie bacon-like goodness.
- Weeknight Hero: From fridge to table in 45 minutes flat, and most of that is hands-off oven time. If you've ever struggled with weeknight dinners that taste like you tried harder than you did, you're not alone — and I've got the fix.
- Crowd Psychology: Serve these at a party and watch grown adults turn into competitive vultures. They're handheld, they're messy in the best way, and they're accidentally low-carb, which means everyone from keto devotees to picky kids will demolish them.
- Ingredient Integrity: No weird processed cheese products or sad canned chicken here. We're talking real cream cheese that melts into silk, quality buffalo sauce that actually tastes like peppers, and fresh zucchini that still tastes like summer.
- Make-Ahead Magic: Prep these bad boys up to the final bake, then refrigerate or freeze. Pop them in the oven when guests arrive and pretend you're a kitchen wizard who just whips up hot, cheesy perfection on demand.
Alright, let's break down exactly what goes into this masterpiece...
Inside the Ingredient List
The Foundation Crew
Zucchini is the unsung hero here, and picking the right ones makes or breaks this dish. Look for medium-sized specimens, about 6-8 inches long — they're the Goldilocks of zucchini. Too small and you can't fit enough filling, too big and they turn watery and bitter. The skin should be glossy and firm, not dull or soft. When you pick them up, they should feel heavy for their size, like they're holding onto all their moisture for the journey ahead. Pro tip: if your zucchini has been hanging out in the fridge for a week, salt the boats and let them drain for 15 minutes before roasting — it'll draw out excess water and concentrate the flavor.
The Flavor Base
Cooked chicken is where most recipes go tragically wrong, settling for bland breast meat that tastes like gym food. Dark meat is your friend here — thighs stay juicy even if you accidentally overbake, and they bring a richness that plays beautifully with the buffalo heat. If you're using leftover chicken, remove the skin and shred it while it's still warm; cold chicken shreds into sad, dry strings. Rotisserie chicken works in a pinch, but pull off the seasoned skin and give it a quick rinse — you want a blank canvas for the buffalo sauce to paint on. And here's the thing nobody tells you: a mix of white and dark meat gives you the perfect texture balance.
The Creamy Dream Team
Cream cheese isn't just adding richness — it's the glue that holds everything together. Use the full-fat block, not the whipped tub stuff. The block has less air, which means it melts into a proper sauce instead of turning into weird foam. Let it come to room temperature before mixing; cold cream cheese forms stubborn little nuggets that refuse to cooperate. Ranch dressing isn't just for dipping — we're using it to thin the cream cheese while adding herbs and tang. Go for a quality brand, not the watery generic stuff that tastes like disappointment and regret.
The Heat and the Melt
Buffalo sauce is where personality enters the chat. Frank's is classic for a reason — it's got that perfect vinegar punch that makes buffalo wings addictive. But here's the secret: start with less than you think you need. You can always add more, but you can't un-spicy a filling that's already nuclear. The cheddar brings sharpness and color, while mozzarella gives you those Instagram-worthy cheese pulls. Mix them together and you get the best of both worlds: flavor and function.
Everything's prepped? Good. Let's get into the real action...
The Method — Step by Step
- Preheat your oven to 400°F, and don't get cute with convection here — you want steady, even heat that'll roast the zucchini without turning it to mush. While it's heating, grab your zucchini and slice them in half lengthwise like you're performing vegetable surgery. Use a small spoon to scoop out the seeds and create little canoes about 1/4-inch thick. Don't go too thin or they'll collapse under the weight of all that cheesy goodness. Lay them cut-side up on a baking sheet lined with parchment paper, brush with olive oil, and season with salt and pepper. Slide them into the oven for 12 minutes — this is where the magic begins.
- While your zucchini boats are getting their tan on, it's time to build the filling that'll make angels weep. In a medium bowl, combine your room-temperature cream cheese with the ranch dressing. Use a fork to mash them together until smooth — this should take about 30 seconds of vigorous mashing. Add your shredded chicken and start with just 2 tablespoons of buffalo sauce. Mix everything together until the chicken is evenly coated in this creamy, tangy blanket. Taste it here — this is your moment to adjust the heat level. Want it spicier? Add more buffalo sauce a teaspoon at a time until it makes your nose tingle in the best way.
- Pull those zucchini boats out of the oven — they should be tender but still holding their shape, with edges that are just starting to turn golden. Don't panic if they look a little deflated; they're about to get stuffed with pure joy. Divide your buffalo chicken mixture evenly among the boats, really packing it in there. This isn't the time to be dainty — use the back of your spoon to press the filling down and create a slight dome. The filling should mound up proudly, like it's showing off for the cheese that's coming next.
- Now for the grand finale: sprinkle your shredded cheddar and mozzarella over each boat. Be generous here — cheese is not the place to practice restraint. You want complete coverage, like a cozy blanket that'll melt into every nook and cranny. Back into the oven they go for another 10-12 minutes, until the cheese is bubbling and starting to brown in spots. Keep an eye on them after 8 minutes — cheese goes from perfect to burnt faster than a gossip spreads through a small town.
- Let them rest for 5 minutes before serving — I know, I know, the smell is driving you crazy, but this brief pause lets the cheese set up slightly so you can actually pick them up without everything sliding off. Garnish with sliced green onions or chopped celery leaves if you're feeling fancy, or just dive in like the glorious animal you are. Serve them hot, ideally with extra buffalo sauce and ranch on the side for the true believers who want to double down on the experience.
- If you're making these for a crowd, keep them warm in a 200°F oven for up to 30 minutes. Place them on a wire rack set over a baking sheet so air can circulate underneath — this prevents the bottoms from getting soggy while you finish up the rest of dinner or wait for stragglers to arrive. They'll stay perfectly melty and delicious, and you'll look like a hosting superhero who effortlessly produces hot appetizers on demand.
That's it — you did it. But hold on, I've got a few more tricks that'll take this to another level...
Insider Tricks for Flawless Results
The Temperature Rule Nobody Follows
Room temperature isn't just a suggestion — it's the difference between smooth, creamy filling and a lumpy disaster. Take your cream cheese out at least an hour before you start cooking, or better yet, plan ahead and leave it out overnight. Cold cream cheese refuses to blend smoothly with the ranch, leaving you with stubborn white flecks that no amount of mixing will fix. Same goes for your chicken; cold chicken straight from the fridge will seize up the cream cheese and make it grainy. Let everything hang out on the counter while you prep the zucchini, and you'll be rewarded with a filling so smooth it could star in a cream cheese commercial.
Why Your Nose Knows Best
That moment when the buffalo sauce hits the warm chicken and cream cheese? Stop and smell it. Seriously. Your nose is your built-in seasoning meter — if the aroma makes your mouth water and your sinuses tingle slightly, you've nailed the spice level. If you can't smell the buffalo sauce, you need more. If your eyes are watering just from the smell, you've gone too far (though some of us consider this a feature, not a bug). This sensory check happens before you add the extra heat, so you can still dial it back with more cream cheese if needed.
The 5-Minute Rest That Changes Everything
I know you're hungry. I know the cheese is calling your name in that melty, stretchy siren song. But walk away for five minutes and let these beauties rest. This isn't just about avoiding burnt tongues (though that's a nice bonus). During this brief pause, the cheese firms up just enough to create a proper crust, the filling sets so it doesn't slide out when you bite, and the zucchini finishes cooking gently in the residual heat. A friend tried skipping this step once — let's just say it didn't end well. She ended up with a lap full of molten cheese and had to change her pants before dinner. Patience, young padawan.
The Crispy Edge Secret
Want those coveted crispy cheese edges that shatter like thin ice under your fork? Here's the trick: don't cover the boats completely with cheese. Leave a 1/8-inch border around the edge where the cheese can melt down onto the baking sheet. As it bakes, this cheese will caramelize into frico-like lace that's simultaneously crispy and chewy. It's the textural contrast that takes these from good to legendary. Plus, those crispy bits are chef's snack tax — consider them your reward for all your hard work.
The Make-Ahead Miracle
These boats are party prep gold. You can assemble them completely up to 24 hours ahead, cover tightly with plastic wrap, and refrigerate until you're ready to bake. The key is to bring them to room temperature for 30 minutes before they hit the oven — cold boats straight from the fridge need longer baking time, which can turn your zucchini to mush. If you're freezing them, stop after adding the filling but before the cheese topping. Wrap each boat individually in plastic wrap, then foil, and freeze for up to 2 months. Thaw overnight in the fridge, add fresh cheese, and bake as directed.
Creative Twists and Variations
This recipe is a playground. Here are some of my favorite ways to switch things up:
Blue Cheese Thunder
Replace the ranch with blue cheese dressing and swap half the cheddar for crumbled blue cheese. It's for the bold souls who understand that blue cheese isn't just a topping — it's a lifestyle. The funkiness plays beautifully with the buffalo heat, creating a flavor profile that'll transport you straight to your favorite wing joint. Just don't tell the ranch purists; they might stage an intervention.
Loaded Baked Potato Style
Add crispy bacon bits and chopped green onions to the filling, then top with extra bacon and a dollop of sour cream before serving. It's like two comfort foods had a beautiful baby. The smoky bacon adds depth that makes the buffalo sauce taste more complex, while the green onions bring freshness that cuts through all that richness.
Vegetarian Victory
Sub in roasted cauliflower florets for the chicken — toss them with olive oil and roast at 425°F for 20 minutes until golden before mixing with the buffalo sauce. The cauliflower gets meaty and satisfying, with crispy edges that give you something to chew on. Even devoted carnivores have been known to demolish a tray of these without complaint.
Mexican Mash-Up
Replace the ranch with salsa verde, use pepper jack instead of mozzarella, and add a sprinkle of cumin to the filling. Top with fresh cilantro and a squeeze of lime before serving. It's like buffalo wings took a vacation to Mexico and came back with stories and a tan. The salsa verde adds tang and herbs that complement the buffalo sauce in unexpected ways.
Breakfast Boats
Add a scrambled egg to the filling mixture and top with everything bagel seasoning instead of cheese. Serve these for brunch and watch your guests' minds get blown. The egg makes the filling fluffy and rich, while the everything seasoning adds crunch and flavor that makes you wonder why you haven't been putting it on everything already.
Greek Goddess Style
Sub in feta for the cheddar, use tzatziki instead of ranch, and add chopped fresh dill and lemon zest to the filling. Top with kalamata olives and more feta. It's bright, tangy, and herbaceous in a way that makes you feel like you're eating healthy even though there's still a mountain of cheese involved.
Storing and Bringing It Back to Life
Fridge Storage
Cooled boats go into an airtight container with parchment paper between layers to prevent the cheese from sticking together. They'll keep for up to 4 days in the refrigerator, though the zucchini will continue to release moisture as it sits. Store them cheese-side up so the topping doesn't get squished, and don't stack more than two layers high or you'll end up with a compressed mess that looks like it lost a fight.
Freezer Friendly
These freeze beautifully for up to 2 months, making them perfect for emergency comfort food situations. Freeze them on a baking sheet first, then transfer to freezer bags once solid — this prevents them from freezing into a solid block. Label with the date and reheating instructions because future you will thank present you for being so thoughtful. They'll keep their quality for about 2 months, though honestly, they've never lasted more than a week in my freezer before someone "accidentally" eats them all.
Best Reheating Method
The microwave works in a pinch, but you'll lose that glorious cheese crust and the zucchini turns rubbery. Instead, pop them in a 350°F oven for 10-12 minutes until heated through and the cheese is bubbly again. Add a tiny splash of water to the baking sheet before reheating — it creates steam that keeps the zucchini from drying out while the cheese melts. If you're reheating from frozen, add 5 extra minutes and cover loosely with foil for the first half to prevent over-browning.