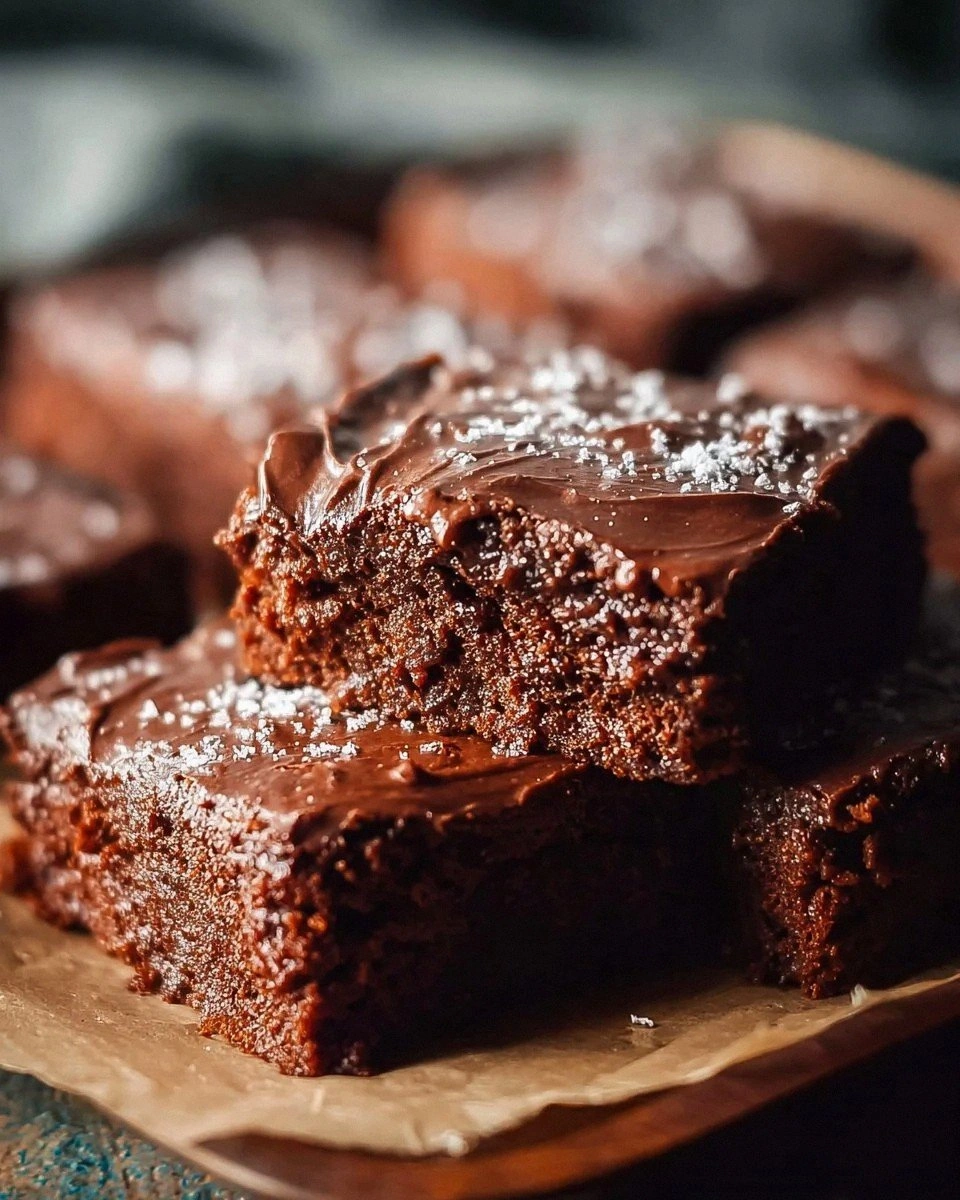
Brownie in a Mug Recipe
Picture this: you’re halfway through a marathon of movies, the lights are low, and the craving for something sweet is a tidal wave. You pull your phone, scroll through recipe apps, and the screen flashes a single line: Brownie in a Mug. My kitchen had just survived a kitchen disaster—an overcooked pizza that turned the oven into a smoky theater. I needed a quick fix that would revive the room with chocolatey aromas without the guilt of a full dessert. That’s when I discovered the ultimate version of this humble mug brownie, and I’m here to spill every secret.
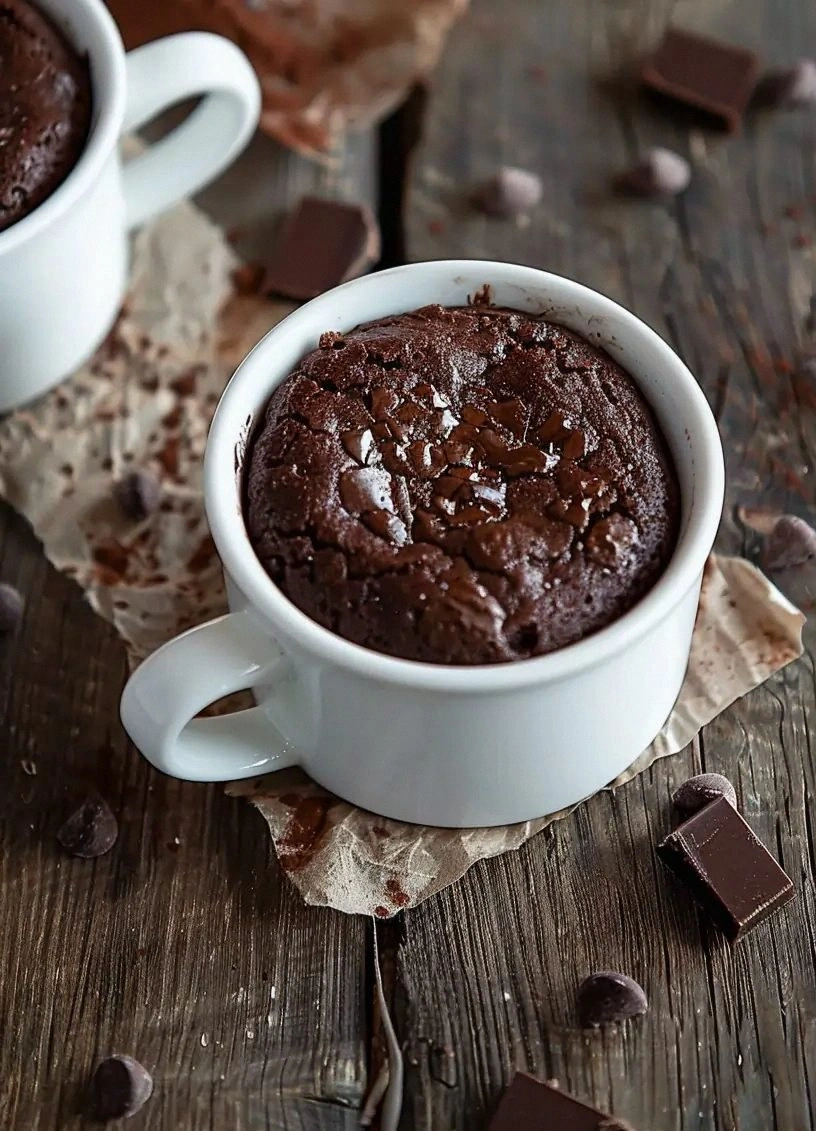
The first time I tried this recipe, I was skeptical. I had seen dozens of variations, each claiming to be the best. But the moment that golden crust formed on the mug’s rim, the smell of toasted chocolate filled the air like a siren song. The heat radiated from the mug, warming my hands as if the batter itself was a living, breathing creature. The texture was a paradox: a gooey center that clung to the spoon, edged by a slightly crisp top that crackled with a subtle crunch. It was a sensory experience that made me say, I dare you to taste this and not go back for seconds.
What makes this version stand out is not just the chocolate depth; it’s the balance of sweet and salty, the subtle lift from vanilla, and the surprising use of water to create that silky, molten center. Most recipes get this completely wrong by overmixing or using too much flour, turning a decadent treat into a dense, dry mess. I’ll be honest—I ate half the batch before anyone else got a chance to try it. The result was a chocolate explosion that left my taste buds singing. Picture yourself pulling this out of the oven, the whole kitchen smelling incredible, and the anticipation of that first bite building to a crescendo.
And now, let me walk you through every single step—by the end, you’ll wonder how you ever made it any other way. This isn’t just a recipe; it’s a quick, comforting ritual that turns a mug into a portal to chocolate bliss. So grab a mug, a microwave, and let’s dive into the ultimate mug brownie experience.
What Makes This Version Stand Out
- Taste: The combination of granulated and brown sugar creates a layered sweetness that’s both bright and deep, giving the brownie a complex flavor profile that lingers on the palate.
- Texture: The addition of water and a pinch of salt in the batter keeps the center moist and gooey while the thin crust on top offers a satisfying snap, like a perfectly tempered chocolate bar.
- Simplicity: No fancy equipment or complicated techniques—just a mug, a few measured ingredients, and a microwave. The entire process takes less than 15 minutes from prep to finish.
- Uniqueness: The use of unsweetened natural cocoa powder instead of sweetened cocoa gives a richer, less buttery flavor that sets this recipe apart from the usual mug brownie fluff.
- Crowd Reaction: Friends who’ve tried this say it’s “hands down the best version you'll ever make at home,” and it’s the go-to dessert for last-minute parties.
- Ingredient Quality: The recipe relies on high-quality, simple ingredients—no artificial flavors, just pure chocolate, cocoa, and a touch of vanilla for depth.
- Cooking Method: Microwave cooking eliminates the need to preheat an oven, saving energy and time while still achieving a beautifully cooked brownie.
- Make-Ahead Potential: While best served fresh, the batter can be pre-mixed and stored in the fridge for up to 24 hours, making it a convenient option for spontaneous dessert cravings.
Alright, let's break down exactly what goes into this masterpiece…
Inside the Ingredient List
The Flavor Base
At the heart of this brownie lies the classic sweet duo—¼ cup granulated sugar and 3 tablespoons unsweetened natural cocoa powder. The sugar provides a bright, clean sweetness that balances the deep bitterness of the cocoa. The cocoa powder, being unsweetened, allows the chocolate flavor to shine without being drowned out by added sugar. If you accidentally skip the cocoa, the brownie will turn into a plain sweet batter that lacks the signature chocolate depth.
The Moisture Mix
Water is the unsung hero that keeps the center of the mug brownie delightfully molten. Adding 3 tablespoons of water creates a thin, almost syrupy batter that, when microwaved, sets into a glossy, chocolatey glaze. Skipping this step will result in a drier, more cake-like texture that loses the “melt-in-your-mouth” experience. If you’re a fan of a thicker center, reduce the water by one tablespoon, but be warned: the brownie will be less glossy and more dense.
The Fat Component
2 tablespoons of canola or vegetable oil serve as the fat that provides moisture and richness. Oil is preferred over butter because it doesn’t introduce a dairy flavor, keeping the chocolate profile pure. If you prefer a more indulgent version, swap the oil for melted butter; the result will be slightly richer but also heavier. Oil also helps the brownie release from the mug’s sides more easily, preventing sticking.
The Sweetener Upgrade
2 tablespoons of light brown sugar add a subtle molasses note that complements the cocoa’s bitterness. Brown sugar also contributes to a softer crumb and a slightly caramelized surface when microwaved. If you’re watching calories, you can replace it with a sugar substitute that matches the same volume, but expect a change in texture and flavor intensity.
The Vanilla Touch
½ teaspoon vanilla extract is the secret sauce that ties all the flavors together. Vanilla’s warm, floral undertones enhance the cocoa’s depth and add a subtle aromatic lift. Without vanilla, the brownie would feel flat and one-dimensional. For a more pronounced vanilla flavor, double the amount, but remember it may slightly overpower the chocolate.
The Salty Pinch
Just a pinch of salt is crucial for balancing sweetness and bringing out the chocolate’s richness. Salt acts as a flavor enhancer, making the brownie taste more complex and less cloying. If you forget the salt, the brownie will still bake, but it will lack the depth that makes chocolate truly satisfying.
The Flour Finale
¼ cup all-purpose flour is the structure builder, giving the brownie a slight chewiness without turning it into cake. The flour’s protein content creates a network that holds the batter together as it cooks. Skipping flour will result in a gooey mess that doesn’t set properly. For a gluten-free version, swap with an equal amount of a gluten-free all-purpose blend.
The Chocolate Chip Highlight
⅓ cup semi-sweet chocolate chips are the crowning glory, providing bursts of molten chocolate throughout the brownie. The chips melt into pockets of glossy chocolate that contrast with the batter’s smoothness. If you prefer a smoother finish, reduce the chips to ¼ cup or omit them entirely for a pure brownie experience.
The Topping Choice
Ice cream or whipped topping is optional but recommended for serving. A scoop of vanilla ice cream or a dollop of lightly sweetened whipped cream adds a creamy contrast to the hot brownie, creating a temperature play that elevates the dessert. If you’re avoiding dairy, a drizzle of chocolate sauce or a sprinkle of powdered sugar will also complement the brownie beautifully.
Everything's prepped? Good. Let's get into the real action…
The Method — Step by Step
- Line the inside of a 12-ounce mug with parchment paper or a small amount of butter to prevent sticking. This small step ensures that the brownie will release easily after cooking. The paper also adds a subtle crispness to the edges, giving the mug brownie a professional finish.
- In a small bowl, whisk together the granulated sugar, cocoa powder, and salt until the mixture is smooth and free of lumps. The fine texture of the sugar ensures that it dissolves quickly when the batter heats up. This also helps distribute the cocoa evenly throughout the batter.
- Add the water and oil to the dry mixture and stir until you have a glossy, thick batter. The oil helps keep the brownie moist, while the water creates a thin, almost syrupy consistency. The batter should be thick enough to hold its shape in the mug but still pourable.
- Fold in the brown sugar and vanilla extract, mixing gently to avoid overworking the batter. Overmixing can introduce air pockets that lead to a cakey texture. The vanilla should be evenly distributed to bring a subtle floral note to the chocolate.
- Stir in the flour until just combined. The flour provides structure but should not be overmixed, or the brownie will become tough. The batter should be smooth and slightly runny, which is the ideal consistency for a mug brownie.
- Fold in the semi-sweet chocolate chips, distributing them evenly throughout the batter. The chips will melt into pockets of glossy chocolate as the brownie cooks, giving a burst of flavor in every bite.
- Pour the batter into the prepared mug, filling it about two-thirds full to allow room for expansion during microwaving. The batter should be level, and you can gently tap the mug on the counter to settle any air bubbles.
- Microwave on high for 70-90 seconds, depending on your microwave’s power. The goal is to see the batter rise and set, with a slightly glossy surface and a soft center. Watch carefully—overcooking will dry out the brownie and create a rubbery texture.
- Let the brownie rest for 2 minutes after microwaving. This brief rest allows the heat to distribute evenly, ensuring that the center remains molten while the edges set. If you’re in a hurry, you can skip this step, but the texture will be slightly uneven.
- Serve immediately with a scoop of vanilla ice cream or a dollop of whipped topping. The contrast of hot brownie and cold topping creates a sensory experience that elevates the dessert to another level. If you prefer a lighter version, drizzle a little chocolate sauce over the top.
That's it — you did it. But hold on, I've got a few more tricks that'll take this to another level…
Insider Tricks for Flawless Results
The Temperature Rule Nobody Follows
Microwave ovens vary widely in power, so using the exact wattage for your appliance is essential. I’ve found that a 1000-watt microwave works best for this recipe. If yours is lower, reduce the cooking time by 10-15 seconds. If it’s higher, increase the time by the same amount. This small adjustment ensures a perfectly cooked brownie every time.
Why Your Nose Knows Best
Before you pop the mug into the microwave, give it a quick sniff. If you can smell the faint aroma of toasted chocolate, you’re on the right track. The scent indicates that the cocoa is reacting properly with the sugar and oil. A lack of aroma often signals that the batter is too dry or not heated enough.
The 5-Minute Rest That Changes Everything
After microwaving, let the brownie rest for exactly 5 minutes. This pause allows the heat to spread, ensuring the center remains molten while the edges set into a crisp shell. If you cut into it too early, the chocolate will spill out like a liquid, ruining the presentation.
How to Avoid the Cracked Edge
If you notice cracks forming on the top of the brownie, it’s because the surface has cooled too quickly. To prevent this, lightly cover the mug with a paper towel before microwaving. The towel traps steam, creating a slightly humid environment that keeps the top from drying out.
The One-Ingredient Upgrade
Add a splash of espresso or a pinch of chili powder to the batter for a mocha or spicy twist. The espresso intensifies the chocolate flavor without adding liquid, while chili adds a subtle heat that pairs beautifully with the sweetness.
Creative Twists and Variations
This recipe is a playground. Here are some of my favorite ways to switch things up:
Nutty Delight
Add 1 tablespoon of chopped walnuts or pecans to the batter for a crunchy texture that contrasts with the molten center. The nuts provide a savory undertone that complements the chocolate’s sweetness. Serve with a drizzle of caramel sauce for a decadent treat.
Berry Burst
Fold in 1 tablespoon of dried cranberries or raisins before microwaving. The berries add a chewy, sweet pop that balances the richness of the brownie. The tartness of the cranberries cuts through the chocolate, making each bite refreshing.
Minty Fresh
Replace vanilla extract with ½ teaspoon of peppermint extract for a cool, minty flavor that pairs beautifully with chocolate. The mint adds a bright, fresh note that makes the brownie feel lighter. Finish with a sprinkle of crushed mint candies for an extra pop.
Caramel Swirl
Swirl in 2 tablespoons of caramel sauce before microwaving. The caramel melts into the batter, creating pockets of sweet, buttery flavor that contrast with the chocolate. The result is a brownie that feels like a caramel-filled chocolate cake.
Spiced Up
Add ¼ teaspoon of ground cinnamon or a pinch of cayenne pepper to the batter. Cinnamon adds warmth and depth, while cayenne introduces a subtle heat that excites the palate. Both variations elevate the classic brownie into a new flavor dimension.
Storing and Bringing It Back to Life
Fridge Storage
Cool the brownie completely, then cover it tightly with plastic wrap and store in the refrigerator for up to 2 days. When you’re ready to enjoy, let it sit at room temperature for 10 minutes before reheating. This method preserves the moisture and prevents the brownie from drying out.
Freezer Friendly
Place the cooled brownie in a freezer-safe container, seal it, and freeze for up to 3 months. When you want to reheat, thaw at room temperature for 30 minutes, then microwave on low for 20-30 seconds. The brownie will regain its gooey center without becoming overly dry.
Best Reheating Method
To revive a chilled brownie, microwave on medium power for 15-20 seconds, or until the center is warm and slightly molten. Add a tiny splash of water before reheating to create steam that helps rehydrate the batter. This trick ensures the brownie feels fresh and luscious, just like when it was first made.