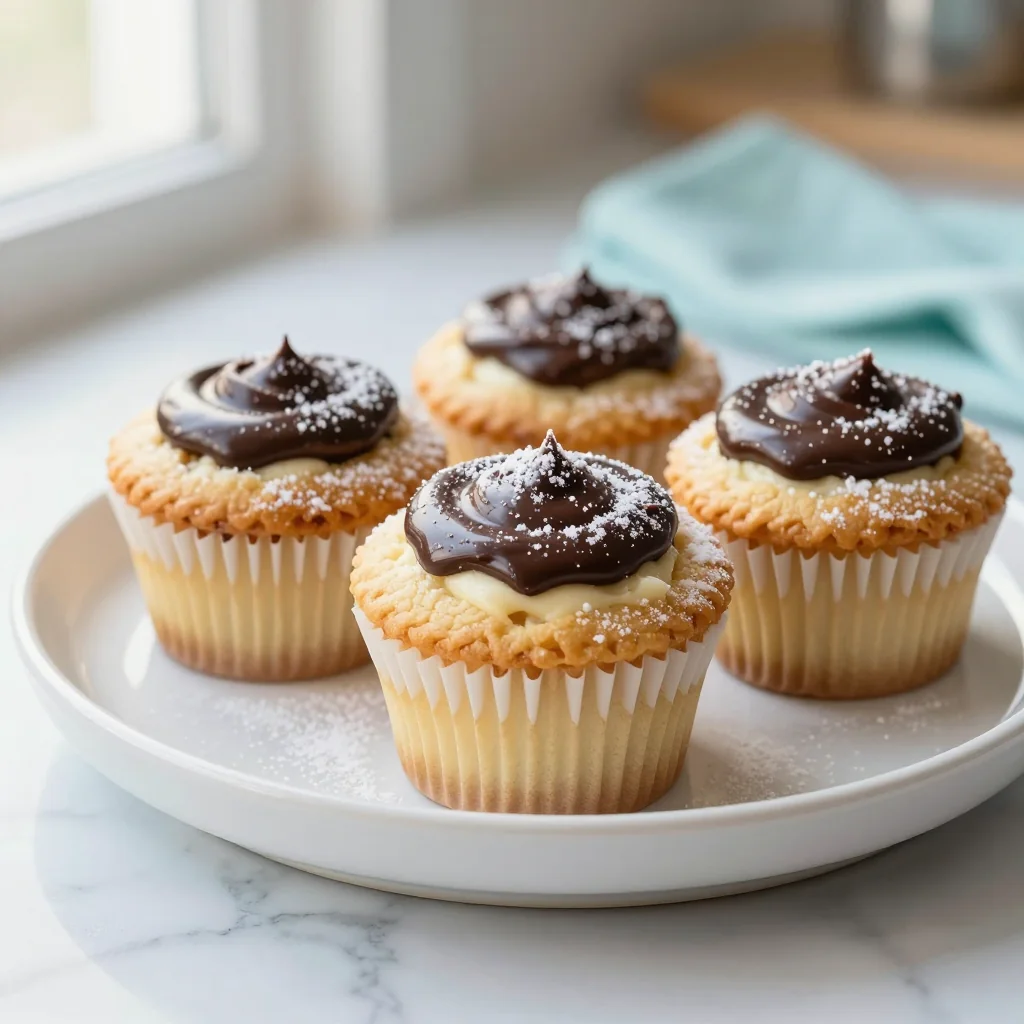
A silky custard‑filled cupcake crowned with glossy chocolate ganache that captures the classic Boston cream in a bite‑size wonder.
Personal Introduction
I still remember the first time I tasted a genuine Boston cream pie at a small bakery in Cambridge. The silky custard tucked between a tender sponge, all drenched in a glossy chocolate glaze, felt like a celebration in my mouth. That memory sparked a lifelong fascination with the balance of textures and flavors that define classic American desserts.
While the traditional pie is a delightful treat, I often found it cumbersome to serve at brunches or casual gatherings. The idea of turning that iconic dessert into portable cupcakes was born out of a desire to share the joy of Boston cream without the mess of a slice.
In this recipe, I’ll walk you through every step—from creating a light, buttery cupcake batter, to mastering a velvety vanilla custard, and finally coaxing a smooth chocolate ganache to set the perfect crown. You’ll learn why each component matters and how small tweaks can elevate the final result.
I’m thrilled to share this modern twist on a beloved classic, and I hope you’ll enjoy baking, tasting, and sharing these cupcakes as much as I do.
🌟 Why This Recipe Will Captivate You
From the first bite to the lingering aftertaste, these cupcakes blend comfort and elegance, making them perfect for any occasion.
- ✨ Perfect Balance of Sweet and Rich: The light vanilla‑infused custard complements the deep, bittersweet chocolate ganache, creating a harmonious flavor profile that pleases both sweet‑tooth and chocolate lovers.
- ✨ Foolproof Texture: The cupcake batter is designed to stay moist yet fluffy, while the custard sets just enough to avoid sogginess, ensuring a consistent bite every time.
- ✨ Visual Wow Factor: The glossy ganache glaze adds a professional sheen that makes these cupcakes look bakery‑ready, perfect for photo‑friendly moments.
- ✨ Flexible Serving Size: With the built‑in portion adjuster, you can easily scale the recipe from a small family treat to a party platter without re‑calculating each ingredient manually.
- ✨ Crowd‑Pleaser: Whether it’s a birthday, a bridal shower, or a simple weekend indulgence, these cupcakes strike the right chord for both kids and adults.
- ✨ Skill‑Building Opportunity: You’ll master custard‑making, ganache preparation, and cupcake baking in one comprehensive recipe, boosting your confidence in the kitchen.
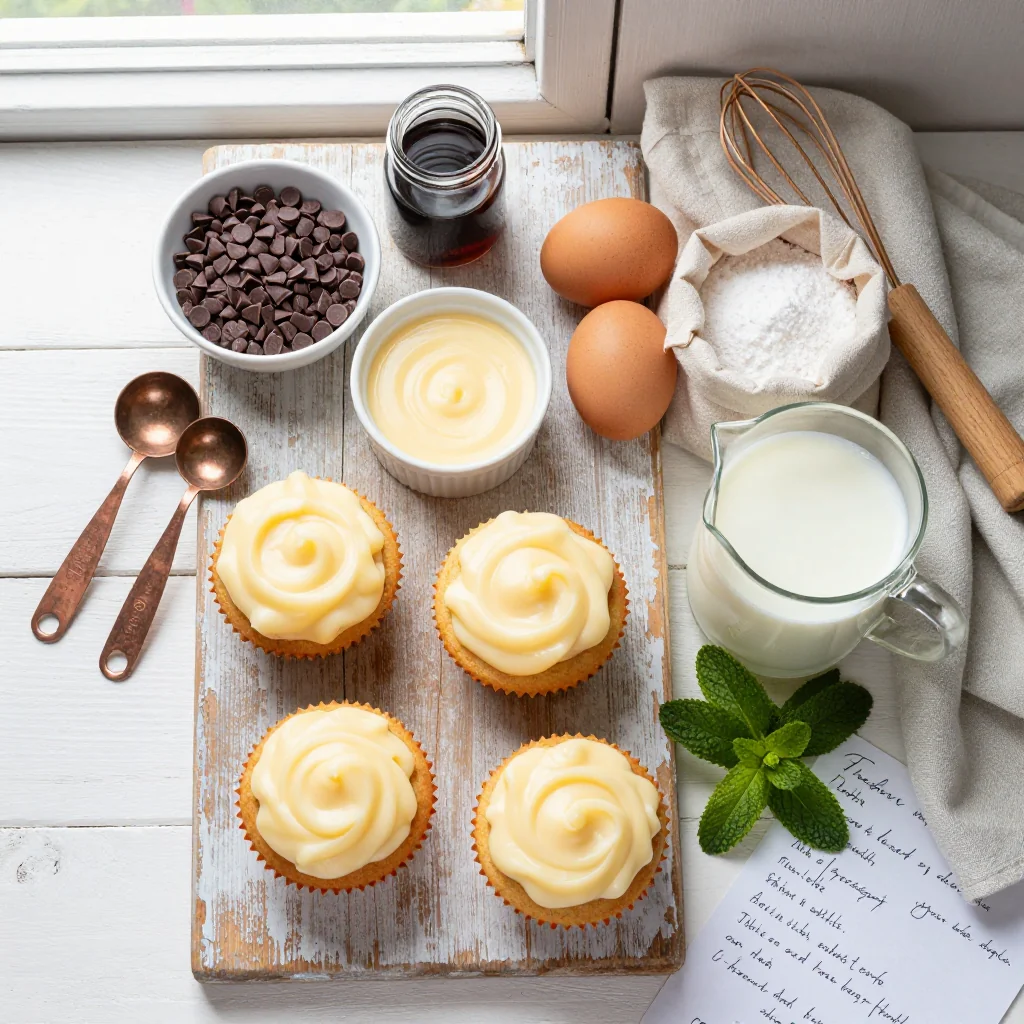
🥗 Ingredients
📝 Complete Ingredient List
For the Cupcake Batter:
- 180 g all‑purpose flour
- 200 g granulated sugar
- 115 g unsalted butter, melted
- 2 large eggs
- 120 ml whole milk
- 1 tsp vanilla extract
- 1.5 tsp baking powder
- 0.25 tsp salt
For the Vanilla Custard (Pastry Cream):
- 480 ml whole milk
- 100 g granulated sugar
- 30 g cornstarch
- 4 large egg yolks
- 30 g unsalted butter, cold
- 1 tsp vanilla extract
For the Chocolate Ganache:
- 200 g semi‑sweet chocolate, chopped
- 100 ml heavy cream
- 14 g unsalted butter
- 1 pinch salt
🔍 Focus on Key Ingredients
All‑Purpose Flour
The flour provides the structural backbone for the cupcakes. Using a well‑sifted, unbleached all‑purpose flour ensures a tender crumb without the heaviness that cake flour can sometimes impart. For a gluten‑free alternative, replace it with a 1:1 blend of rice flour, potato starch, and tapioca starch.
Egg Yolks
Egg yolks are the heart of the custard. Their emulsifying properties give the pastry cream a silky mouthfeel while thickening it without the need for excessive starch. Choose fresh, room‑temperature yolks for smoother incorporation.
Semi‑Sweet Chocolate
High‑quality semi‑sweet chocolate balances sweetness and bitterness, creating a ganache that’s glossy and not overly sweet. Look for chocolate with 60‑70% cocoa solids; lower percentages will result in a cloying glaze, while higher percentages may be too bitter.
🔄 Quick Substitutions
| If you don’t have... | Use instead... |
|---|---|
| All‑purpose flour | Gluten‑free flour blend (1:1) |
| Heavy cream | Full‑fat coconut milk (for dairy‑free) |
| Semi‑sweet chocolate | Dark chocolate 70% cocoa |
👨🍳 Step‑by‑Step Instructions
Follow these detailed steps to create flawless Boston Cream Pie Cupcakes. Each phase builds on the previous one, ensuring that the batter, custard, and ganache are each at their peak.
📋 Phase 1: Preparation & Mise en Place
Gather tools, measure ingredients, and preheat the oven.
Preheat and Prepare Pans
Set your oven to 350°F (175°C). Line a 12‑cup muffin tin with paper liners, then lightly dust each liner with a thin layer of flour, tapping out any excess. This “flouring” prevents the cupcakes from sticking and adds a subtle texture to the base.
Measure and Sift Dry Ingredients
In a medium bowl, whisk together the flour, baking powder, and salt. Sifting aerates the flour, which results in a lighter crumb. Set the bowl aside while you melt the butter for the batter.
🔥 Phase 2: Baking & Assembly
Create the batter, bake the cupcakes, and prepare the custard and ganache.
Make the Cupcake Batter
In a large mixing bowl, combine melted butter and sugar; beat with an electric mixer on medium speed until the mixture is light and fluffy, about 2 minutes. Add the eggs one at a time, beating well after each addition, then stir in vanilla extract.
Incorporate Dry Ingredients
Gradually add the sifted flour mixture to the wet ingredients, alternating with the milk. Begin and end with the flour mixture. Mix just until incorporated; a few small lumps are acceptable.
Bake the Cupcakes
Divide the batter evenly among the prepared liners—about ¾ cup per cup. Bake for 18‑20 minutes, or until a toothpick inserted into the center comes out clean. Rotate the tin halfway through for even browning.
Allow the cupcakes to cool in the pan for 5 minutes, then transfer them to a wire rack to cool completely before filling.
Prepare the Vanilla Custard
In a saucepan, whisk together milk, sugar, and cornstarch over medium heat. Bring to a gentle boil, stirring constantly until the mixture thickens and becomes glossy. Remove from heat and whisk in the egg yolks, then return to low heat for another minute.
Stir in cold butter and vanilla extract until the butter melts completely, creating a smooth, glossy custard. Transfer the custard to a bowl, cover with plastic wrap directly on the surface, and refrigerate for at least 30 minutes.
Make the Chocolate Ganache
Heat the heavy cream in a small saucepan just until it begins to simmer. Remove from heat and pour over the chopped chocolate in a heat‑proof bowl. Let sit for 2 minutes, then whisk until the mixture is smooth and glossy. Stir in butter and a pinch of salt for shine.
Allow the ganache to cool to a thick but pourable consistency (about 20‑25°C). It should coat the back of a spoon without dripping.
✨ Phase 3: Finishing & Serving
Fill, glaze, and present the cupcakes.
Fill the Cupcakes
Using a small pastry bag fitted with a ½‑inch tip, pipe a generous dollop of chilled custard into the center of each cooled cupcake. If you prefer a hidden filling, use a cupcake corer to remove a small core before piping.
Glaze with Ganache
Place the cupcakes on a wire rack set over a parchment sheet. Slowly drizzle the ganache over each cupcake, allowing it to cascade down the sides. For a smooth top, gently tilt each cupcake to spread the ganache evenly.
Let the ganache set for 10 minutes at room temperature; the surface will firm up, giving a glossy finish.
Serve and Enjoy
Arrange the cupcakes on a decorative platter. Serve at room temperature for the best texture—cooler cupcakes can cause the ganache to harden, while warmer ones may become too soft. Pair with a glass of chilled milk or a light dessert wine for an elevated experience.
💡 Expert Tips & Tricks
🛒 Choosing the Right Ingredients
Always opt for fresh, high‑quality butter; it imparts a buttery aroma that you can’t replicate with margarine. When selecting chocolate, look for a label that lists cocoa butter as the first ingredient—this ensures a smooth ganache that sets properly. For eggs, choose large, free‑range eggs; their yolks are richer, giving the custard a silkier texture.
🔪 Preparation Techniques
Before mixing, sift the flour to break up any clumps and incorporate air, which translates into a lighter crumb. When folding the batter, use a rubber spatula and turn the bowl gently; this technique prevents over‑mixing while ensuring even distribution of the melted butter.
🌡️ Mastering the Cooking Process
Use an oven thermometer to verify that your oven truly reaches 350°F; many ovens run hot, leading to over‑baked cupcakes. For the custard, keep the heat low and stir constantly—this avoids curdling and guarantees a velvety finish. The ganache should be poured while still warm; if it cools too much, it will thicken and become difficult to drizzle.
🍽️ Presentation and Service
To achieve a professional look, use a small offset spatula to smooth the ganache after drizzling, creating a mirror‑like surface. Garnish each cupcake with a single chocolate curl or a dusting of cocoa powder for visual contrast. Serve on a tiered stand for a striking table centerpiece.
🏆 Pro Tips
The difference between a good cupcake and a bakery‑level masterpiece often lies in the fine details.
- 🎯 Temperature Control for Ganache: Heat the cream to exactly 85°C (185°F) before pouring over chocolate. This temperature melts the chocolate completely without scorching, resulting in a glossy, stable ganache that sets uniformly.
- 🎯 Custard Consistency: When the custard reaches the “nappe” stage (it coats the back of a spoon), immediately remove it from heat. Overcooking causes the starch to break down, leading to a watery custard that won’t hold its shape inside the cupcakes.
- 🎯 Even Filling Distribution: Use a pastry bag with a small tip and fill each cupcake from the center outward. This technique creates a balanced flavor profile in every bite rather than a single custard pocket.
- 🎯 Portion Scaling Accuracy: The built‑in portion adjuster recalculates all numeric ingredients. Remember that non‑numeric items like “a pinch of salt” stay constant, preserving flavor balance.
- 🎯 Preventing Crumbly Tops: After baking, let cupcakes rest on the rack for at least 5 minutes before removing liners. This allows steam to escape, preventing soggy rims that can interfere with the ganache.
- 🎯 Storage Optimization: If you must store cupcakes, keep the ganache on top and the custard inside. Store them in airtight containers in the refrigerator; the ganache will stay glossy for up to 2 days.
“A great dessert is a symphony of textures and flavors, each note playing in perfect harmony.” — Thomas Keller
🔄 Variations & Adaptations
The core recipe is versatile enough to accommodate dietary preferences, flavor twists, and seasonal inspirations. Below are some creative ways to make these cupcakes uniquely yours.
🥬 Vegetarian / Vegan Version
Swap dairy and eggs for plant‑based alternatives while maintaining the same texture and flavor profile.
- Replace butter with equal parts coconut oil or a vegan butter substitute.
- Use aquafaba (the liquid from canned chickpeas) – 3 tablespoons per egg – to provide structure in the batter.
- For the custard, blend silken tofu (200 g) with almond milk, sugar, cornstarch, and vanilla; heat until thickened.
- Choose a dairy‑free chocolate ganache made with coconut cream.
🌶️ Flavor Variations
Explore different taste directions by adjusting the filling or glaze.
Spicy Version
Add a pinch of cayenne pepper to the custard and use dark chocolate with a hint of chili in the ganache. The heat pairs beautifully with the sweet vanilla core.
Mediterranean Version
Infuse the custard with orange zest and a splash of rose water. Replace the chocolate ganache with a honey‑yogurt glaze and garnish with toasted pistachios.
Asian Fusion Version
Swap vanilla for matcha powder in the custard, and use white chocolate ganache flavored with a dash of yuzu juice. Top with toasted sesame seeds for a subtle crunch.
⚠️ Dietary Adaptations
Gluten‑Free
Use a certified gluten‑free flour blend (1 cup gluten‑free flour, ¼ cup almond flour, ¼ cup tapioca starch). Add a teaspoon of xanthan gum to mimic gluten elasticity.
Lactose‑Free
Replace milk and butter with lactose‑free alternatives such as oat milk and dairy‑free butter. Choose a dairy‑free chocolate for the ganache.
Low‑Calorie
Reduce sugar by one‑third, substitute half the butter with unsweetened applesauce, and use low‑fat milk. Use dark chocolate with at least 70% cocoa to keep the chocolate flavor strong while using less chocolate overall.
👶 Family / Kids Version
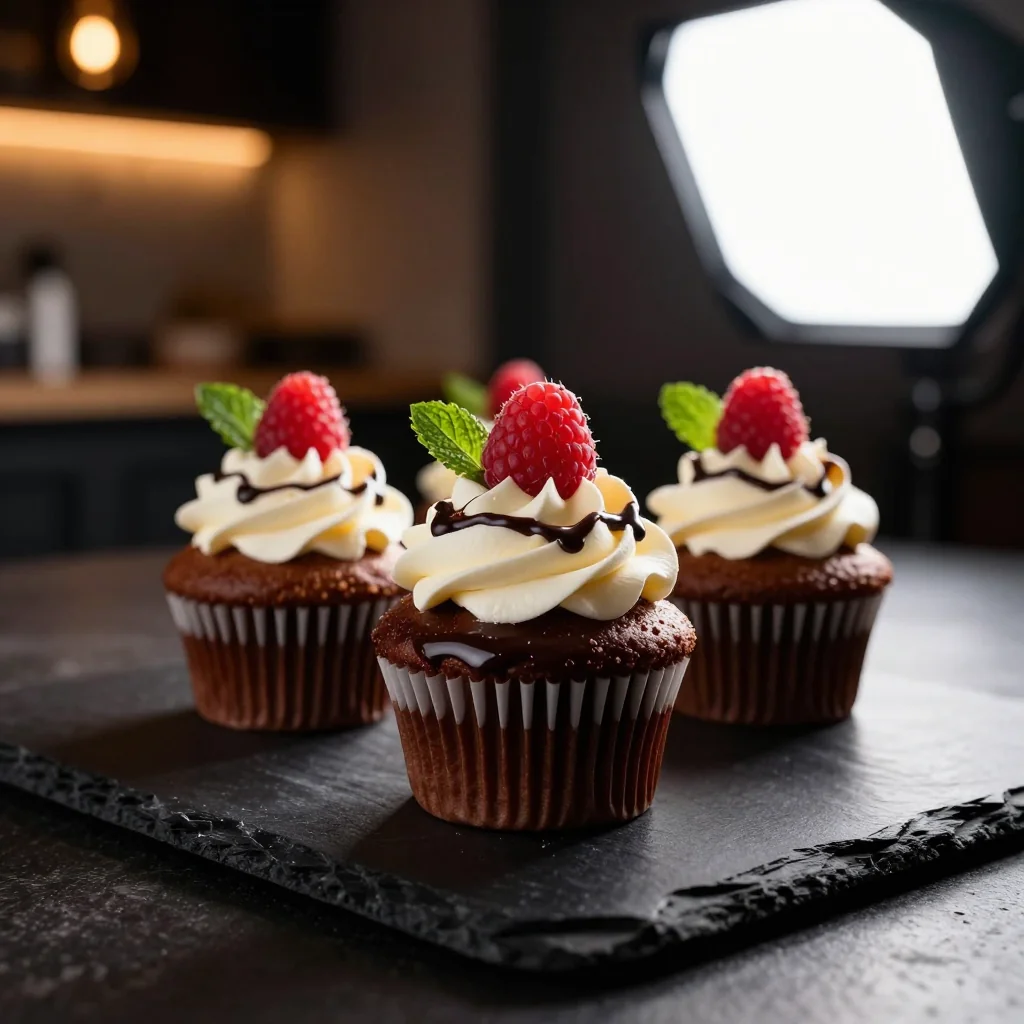
Kids love fun shapes and milder flavors. Use mini cupcake liners and add a swirl of strawberry jam inside the custard. Top with a drizzle of white chocolate and colorful sprinkles for a festive look.
📦 Conservation & Reheating
🧊 Conservation
Refrigerator
- Duration: 3 days
- Container: Airtight cake dome or sealed plastic container
- Tip: Store the cupcakes with ganache on top; this protects the custard from absorbing fridge odors.
Freezer
- Duration: 2 months
- Method: Freeze cupcakes unfilled on a tray, then transfer to a freezer bag. Freeze custard separately in a sealed container.
- Defrosting: Thaw in the refrigerator overnight, then re‑fill and glaze before serving.
💡 For optimal texture, avoid freezing the ganache; instead, re‑make a fresh glaze if you need to serve after a long storage period.
♨️ Reheating
🔥 Oven (Recommended)
- Preheat to 160°C (325°F).
- Cover cupcakes loosely with aluminum foil to prevent the ganache from over‑darkening.
- Heat for 8‑10 minutes, then remove foil and heat an additional 2‑3 minutes to refresh the ganache shine.
⚡ Microwave (Quick)
- Place a single cupcake on a microwave‑safe plate.
- Cover with a microwave‑safe lid or another plate.
- Heat on medium power for 30‑45 seconds, checking for softness.
🍳 Stovetop
If you only have a small number of cupcakes, you can gently re‑heat them in a skillet over low heat, covered, for 2‑3 minutes. This method keeps the ganache glossy without drying it out.
🍷 Perfect Pairings
🥗 Side Dishes
- Fresh Berry Salad: A light mix of strawberries, blueberries, and mint provides acidity that cuts through the richness.
- Vanilla‑Infused Whipped Cream: Adds an airy contrast without competing with the chocolate flavor.
- Light Citrus Sorbet: A palate‑cleansing scoop between bites keeps the dessert from feeling heavy.
🍷 Wine & Beverage Pairings
- Late Harvest Riesling: Its natural sweetness mirrors the custard while its acidity balances the chocolate.
- Brachetto d'Acqui (Sparkling Red): Offers fruity bubbles that lift the dense cupcake texture.
- Non‑Alcoholic Option: Sparkling vanilla‑infused water with a splash of orange juice.
🍰 Completing the Meal
Begin with a crisp garden salad dressed in a citrus vinaigrette, follow with a light seafood appetizer such as shrimp cocktail, and finish with a simple lemon shortbread. This progression ensures each course builds on the next without overwhelming the palate.
❓ Frequently Asked Questions
Q: Can I use dark chocolate instead of semi‑sweet?
A: Absolutely! Dark chocolate with 70% cocoa will give a richer, slightly more bitter ganache. You may need to increase the sugar in the custard by 1‑2 teaspoons to balance the bitterness.
Q: How do I prevent the custard from curdling?
A: Keep the heat medium‑low and whisk constantly. When adding the egg yolks, temper them by whisking a small amount of hot milk into the yolks first, then return the mixture to the pan. This gradual temperature increase protects the proteins from sudden coagulation.
Q: What if I don’t have a pastry bag?
A: You can use a sturdy zip‑top bag, cut a tiny corner, and pipe the custard that way. A spoon works in a pinch, though the filling may be less precise.
Q: My ganache hardened too quickly—what went wrong?
A: The cream may have been too cool, or the chocolate was added before the cream was hot enough. Ensure the cream reaches a gentle simmer (85°C) before pouring it over the chocolate, and work quickly while the mixture is still fluid.
Q: Can I make these cupcakes gluten‑free?
A: Yes. Use a 1‑to‑1 gluten‑free flour blend and add ½ teaspoon of xanthan gum per cup of flour to mimic gluten’s elasticity. The texture will be slightly denser but still delicious.
Q: How far in advance can I prepare the custard?
A: The custard can be made up to 24 hours ahead. Store it in an airtight container in the refrigerator, covered with plastic wrap directly on the surface to prevent a skin from forming.
🎉 Let’s Get Baking!
This Boston Cream Pie Cupcake recipe brings together the nostalgia of a classic American dessert with the convenience of a bite‑size treat. From the airy, buttery cupcake base to the silky vanilla custard and the glossy chocolate ganache, each component is crafted to deliver a harmonious taste and texture that will impress any guest.
Whether you’re planning a brunch, a holiday gathering, or simply craving a sweet indulgence, these cupcakes are versatile enough to fit any occasion. Remember to adjust the portions to suit your crowd, experiment with the suggested variations, and most importantly, enjoy the process of creating something truly special.
Have you tried this recipe?
Leave a comment and rating below! Share your photos on Instagram with #BostonCreamCupcakes for a chance to be featured.
Boston Cream Pie Cupcakes with Ganache Filling
Tender cupcakes filled with silky vanilla custard and topped with glossy chocolate ganache.
📝 Ingredients
Cupcake Batter
Vanilla Custard
Chocolate Ganache
👨🍳 Instructions
- 1 Preheat oven to 350°F (175°C) and line a 12‑cup muffin tin with paper liners.
- 2 Sift flour, baking powder, and salt together; set aside.
- 3 Beat melted butter and sugar until light; add eggs one at a time, then vanilla.
- 4 Alternate adding dry ingredients and milk to the wet mixture, mixing just until combined.
- 5 Fill liners ¾ full and bake 18‑20 min. Cool completely on a rack.
- 6 Prepare custard: heat milk, sugar, cornstarch; thicken, temper yolks, finish with butter and vanilla; chill.
- 7 Make ganache: simmer cream, pour over chocolate, whisk, add butter and salt; cool to pourable.
- 8 Pipe chilled custard into each cupcake center.
- 9 Drizzle ganache over cupcakes; let set 10 min.
- 10 Serve at room temperature and enjoy!
🥗 Nutritional Information (per serving)
*Values are approximate and may vary based on specific brands.
📚 You Might Also Like
Chocolate Mousse Cupcakes
Vanilla Pudding Cupcakes
Red Velvet Cupcakes
Lemon Cream Cupcakes
💬 Comments & Reviews
No comments yet. Be the first to share your thoughts!

Leave a Comment